Configuring lead routing in Pega Sales Automation 8.2
Use Lead routing for Sales Ops in both business-to-business and business-to-customer scenarios to manage your leads more intelligently. Bulk lead routing speeds up the management process, so that you can focus on more strategic tasks for your business.
Enabling lead routing
Enable lead routing to make it available in your settings.
- Log in to App Studio as an administrator.
- In the navigation panel of App Studio, click Settings > Application Settings.
- In the section, select the check box.
- Click .
Configuring lead routing
The lead routing option is now visible in your Pega Sales Automation™ application. Configure your lead routing by applying conditions.
- Log in to the Sales Ops portal.
- In the navigation panel of the Sales Ops portal, click Tools > Lead routing, and then specify the following conditions:
- Depending on your business needs, select either the B2B or B2C selling mode.
- Select Route to operator action.
This is the only available action. For more information, see the Known Issues section of the Pega Sales Automation 8.2 Release Notes on the Pega Sales Automation product page.
- Press the Down Arrow key, and then choose an operator routing value.
- Specify one or more When rules to adjust the routing logic to your business needs.
For example, route particular emails to a defined sales representative.
- Click . Your leads are assigned to the new operator.
Updating data and applying lead routing rules
If you have a new Pega Sales Automation 8.2 application, import your data. For more information, see Pega Sales Automation data import.
- If you upgraded your application to version 8.2, update and import the existing .csv files. For more information, see Updating.csv files to reflect lead routing changes.
- If you want to change the owner of a single lead, open the lead and modify it. For more information, see Changing the owner of a single lead.
- If you want to update existing leads, use the bulk option. For more information, see Bulk updating existing leads.
Updating .csv files to reflect lead routing changes
- Download and review sample data templates from Pega Sales Automation sample data templates.
The .csv file has two new columns: Use automatic routing and Owner. Ensure that you populate these columns with data before the import.
- Log in to the Sales Ops portal.
- In the navigation panel of the Sales Ops portal, click Tools > Data Import wizard.
- Select either Lead (Individual) or Lead (Business) upload type.
- Upload your .csv file to the application.
Follow the steps in Importing the data starting from step 2.
Changing the owner of a single lead
- Log in to the Sales Ops portal.
- In the navigation panel of the Sales Ops portal, click , and then open a lead that you want to modify.
- Click Actions > Change owner and perform one of the following actions:
- In the New owner field, press the Down Arrow key, and then select a new owner.
- Enter a change reason.
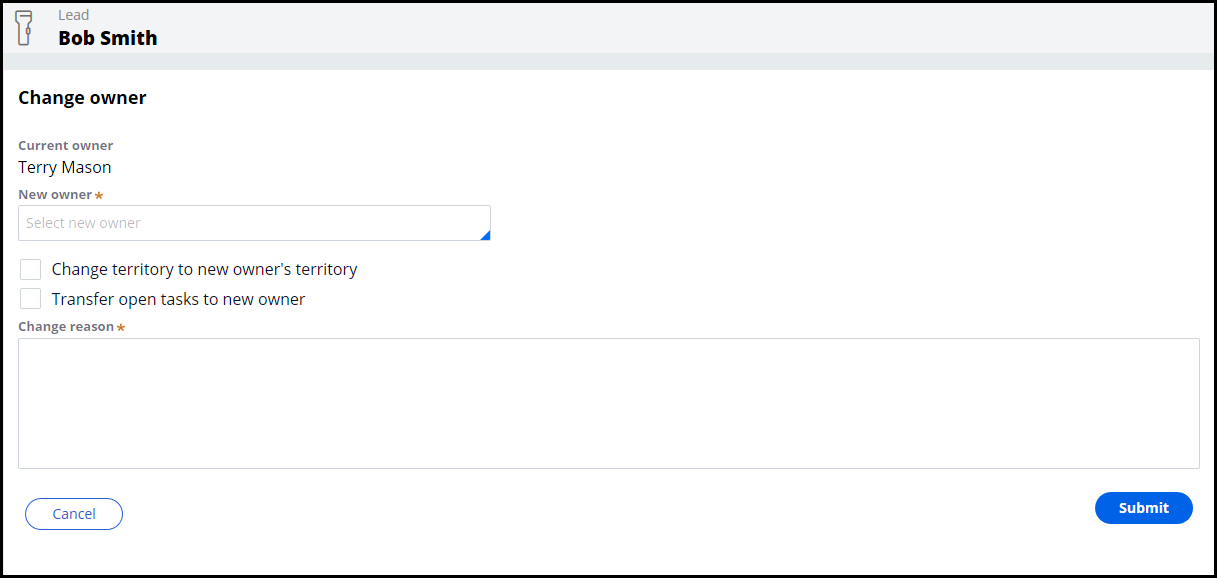
- Click .
Bulk updating existing leads
- Log in to the Sales Ops portal.
- On the Leads main page, click .
- In the Bulk processing dial box, select the leads that you want to modify.
- Click and then click Change owner.
- Select Use automatic routing and apply conditions that are defined for automatic routing.
- In the New owner field, press the Down Arrow key and select a new owner.
- Provide a change reason.
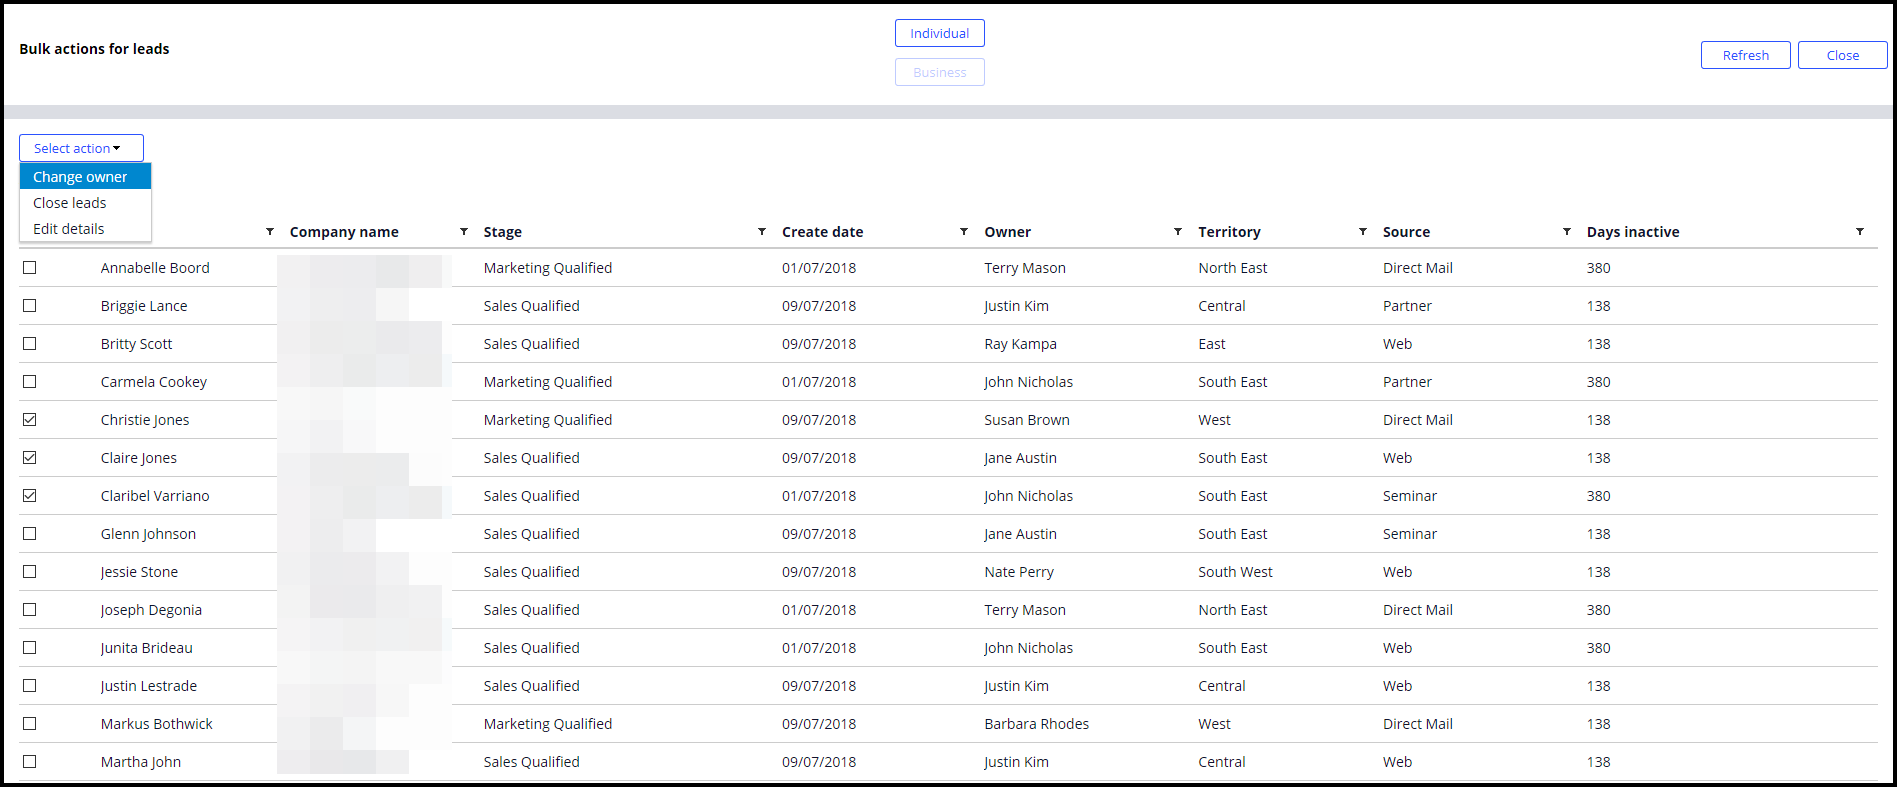
- Click , and then click .
Previous topic Configuring lead routing in Pega Sales Automation (8.3-8.4) Next topic Configuring LinkedIn integration in Pega Sales Automation (7.4-8.4)