Connecting to Twitter by using OAuth 2.0
You can connect to Twitter from the Pega® Platform to follow news trends or to collect comments about your organization or product. You can take advantage of positive comments and respond when a discussion of your product is negative.
Beginning with Pega 7.2, your Pega Platform application can act as an OAuth 2.0 client (consumer) to access private resources that are stored on external websites such as Twitter. OAuth is an open standard for authorization. Use OAuth to access private resources stored on one website and use them on another site without sharing your user name and password for the first site with the second site.
Pega Platform supports the client credentials grant type in OAuth 2.0. In this grant type, your application obtains client credentials to generate an access token, which gives you access to private resources in the external application for a defined period of time.
Refer to the following tasks to connect to Twitter and obtain a collection of tweets that match a specified query. For more information, see the Twitter Search API documentation.
Configuring the Twitter side
Create a Twitter account and register your Pega Platform application to obtain the details that are required to connect to Twitter from Pega Platform.
Creating a Twitter account
To create a Twitter account, go to https://twitter.com/signup and follow the instructions.
Registering your Pega Platform application
Register your Pega Platform application with Twitter.
- Go to https://apps.twitter.com/ and click .
- Follow the instructions for registering an application. Note that the Callback URL is where your application sends its response.
- Save the authentication, request token, authorization and access token URLs, and the consumer key and secret. You need this information to configure Pega Platform.
Configuring the Pega side
Create an OAuth 2.0 provider and authentication profile by using the details that you obtained when you registered your Twitter application and by using the information from the Twitter Search API. Use the authentication profile in a REST connector, and then create a data page that you can run to view a collection of tweets.
Creating an OAuth 2.0 provider
Create an OAuth 2.0 provider and enter the details that you obtained when you registered your Twitter application.
- From the Records Explorer, expand the Security category.
- Right-click OAuth 2.0 Provider, and click Create.
- In the Name field, enter a name for the provider.
- In the Short description field, enter a short description.
- Click Create and open.
- In the Authorization code endpoint, Access token endpoint, and Revoke token endpoint fields, enter the information that you saved when you registered your Twitter application.
- Click Save. The client can now communicate with Twitter.
Creating an authentication profile
Create an authentication profile by using the OAuth 2.0 provider.
- From the Records Explorer, expand the Security category.
- Right-click Authentication Profile, and click Create.
- In the Type field, click OAuth 2.0.
- In the Name field, enter a name for the profile.
- In the Short description field, enter a description of the profile.
- Click .
- In the OAuth provider field, select Twitter.
- In the Grant type field, select Client credentials.
- In the Identifier and Secret fields, enter the information that you saved when you registered your Twitter application.
- Click Save.
Creating a REST connector
Create a REST connector by using the authentication profile and details that you obtained when you registered your Twitter application and by using the Twitter documentation for the Search API.
- From the Records Explorer, expand the Integration-Connectors category.
- Right-click Connect REST, and click Create.
- In the Label field, enter a label for the connector.
- In the Apply to field, select the class to which this connector applies.
- Click Create and open.
- On the Service tab, in the Resource path field, enter the resource URL of the Twitter Search API, for example, https://api.twitter.com/1.1/search/tweets.json.
- In the Authentication section, select Use authentication.
- Select the authentication profile that you created for Twitter.
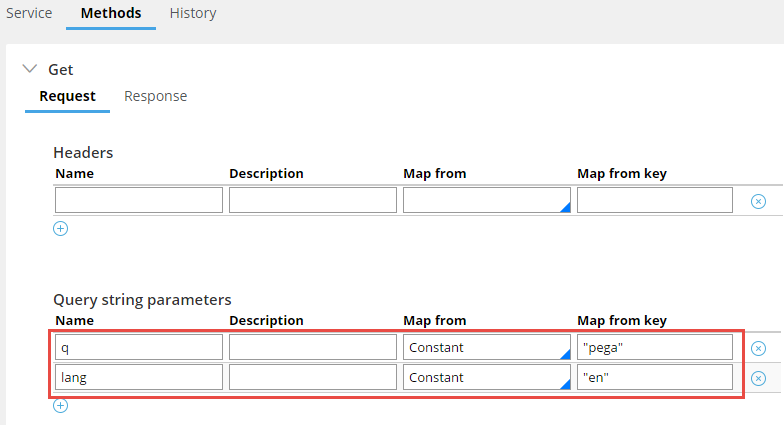
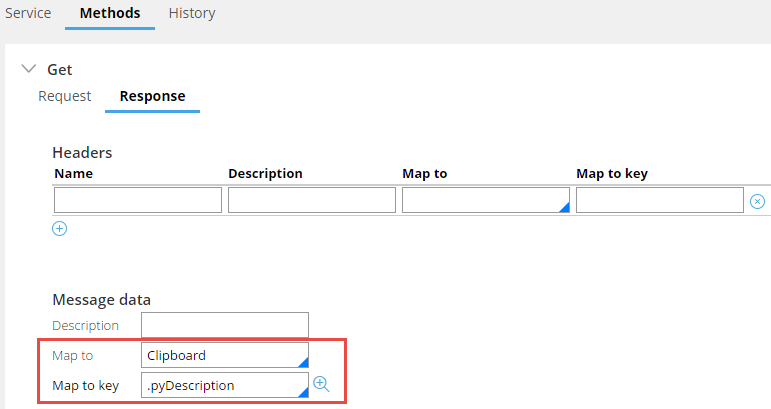
- On the Methods tab, configure the request and response for the GET method by entering values for the query string parameters "q" and "lang" that are explained in the Twitter Search API documentation, as shown in the following example. The final result is a collection of tweets that match these parameter values.
- Click Save.
Creating and running a data page
Create a data page by using the REST connector as a data source and run the data page to see a collection of tweets.
- From the Records Explorer, expand the Data Model category.
- Right-click Data Page, and click Create.
- In the Label field, enter the purpose of the data page.
- In the Apply to field, select the class to which this data page applies.
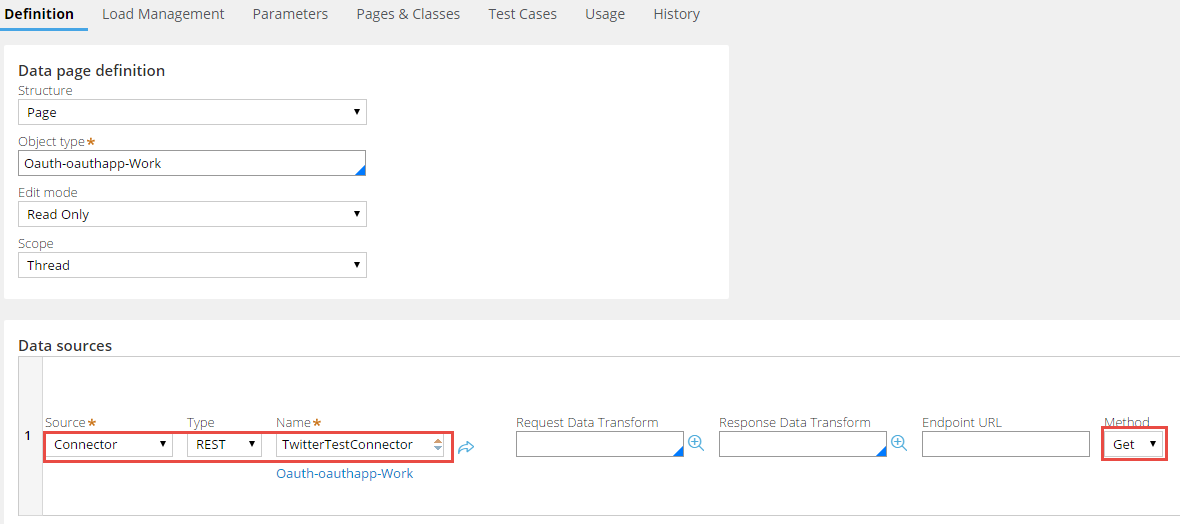
- On the Definition tab, in the Data sources section, in the Name field, select the connector created as a data source.
- In the Method field, select Get,as shown in the following example.
- Click Save.
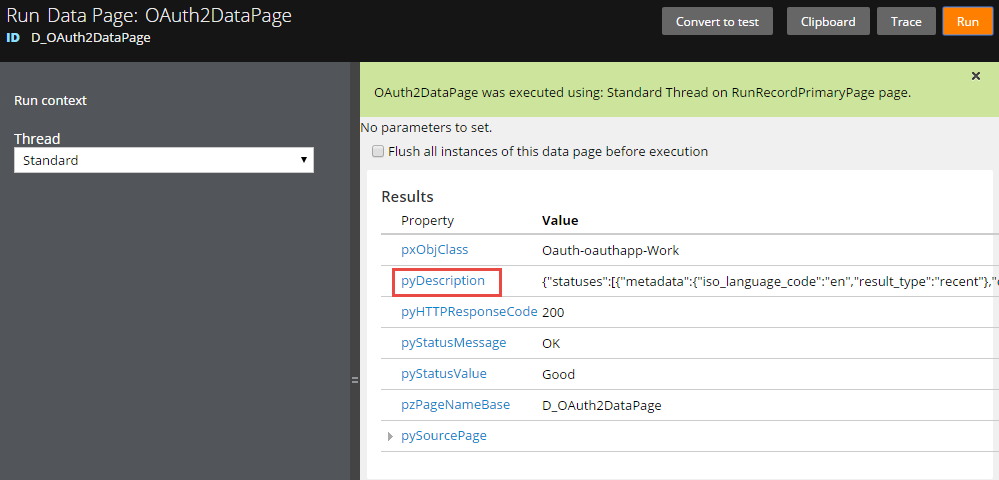
- Run the data page by clicking >. The result is a collection of tweets that match the values that you provided for query string parameters "q" and "lang" in the REST connector. The tweets are mapped to pyDescription, as shown in the following example.