Tutorial: Extracting email context with Text Analyzer rules
Configure Text Analyzer rules to identify the most important sentences in emails and combine them into short, accurate summaries that speed up the processing of large documents (for example, business emails). By using the summarization feature, you can identify the context of an email, without having to read the entire text. In addition to summarization, you can use other natural language processing capabilities of Pega Platform™ to improve your application's understanding of the incoming text.
Use case
uPlusTelco, a telecommunications company, receives a large number of emails that relate to their newest product release: the uPlusPhone10 handset. To facilitate the number of emails that uPlusTelco customer representatives process, the company wants to automate the email analysis by extracting the email summary, detecting the talking points of the email, and the overall sentiment. uPlusTelco customer representatives need to respond only to negative emails, to maximize customer retention and decrease the response time to unhappy customers.
This tutorial covers the following topics:
- Configuring a Text Analyzer rule to process incoming emails
- Configuring a File data set for storing emails
- Creating a Data Flow rule for natural language processing of emails
- Conclusions
Configuring a Text Analyzer rule to process incoming emails
Create a Text Analyzer rule and configure it to process textual data according to your business use case.
Prerequisites
Create a keyword-based topic detection model named uPlusTelco10 to classify the incoming emails into semantic categories that relate to the phone's features, performance, and specifications. For more information, see Tutorial: Configuring a topic detection model for discovering keywords.
Creating a Text Analyzer rule
Text Analyzer rules provide the way to implement sentiment, categorization, text extraction, and intent analysis of text in your application.
- In Dev Studio, click Create > Decision > Text Analyzer.
- Specify the rule label (for example Email Analyzer), identifier, and application context.
- Click Create and open.
- Configure the Text Analyzer for sentiment analysis by performing the following actions:
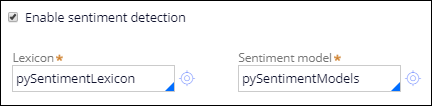
- In the Text categorization section, select Enable sentiment detection.
- In the Lexicon field, press the Down Arrow key and select the pySentimentLexicon rule. A lexicon is a manually defined set of words with the associated sentiment tagged.
- In the Sentiment model field, press the Down Arrow key and select the pySentimentModels rule.
- Configure the Text Analyzer for topic detection by performing the following actions:
- In the Text categorization section, select Enable topic detection.
- In the Taxonomy field, press the Down Arrow key and select the uPlusPhone10 keyword-based topic detection model.
- Configure the Text Analyzer for text summarization by performing the following actions:
- In the Text extraction section, select Enable summarization, as shown in the following example:
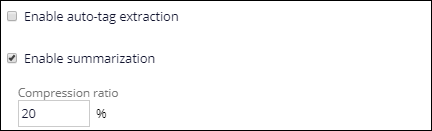
- In the Compression ratio field, enter 20 to specify how compact you want your summaries to be. The lower the value, the shorter the summary.
- In the Text extraction section, select Enable summarization, as shown in the following example:
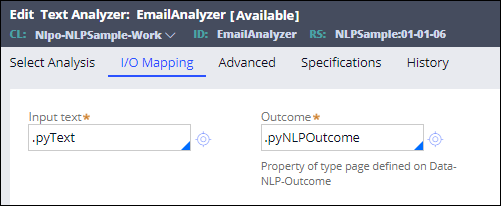
- To map the input and output properties for the Text Analyzer rule, click the I/O Mapping tab and perform the following actions:
- In the Input text field, enter .pyText. The Text Analyzer reads input from this property.
- In the Outcome field, enter .pyNLPOutcome. The Text Analyzer writes output to this property.
- Configure the topic classification granularity by performing the following actions:
- Click the Advanced tab.
- In the Topic settings section, select Document-level granularity. By selecting this setting, the Text Analyzer detects topics, based on keywords that are found throughout the document, instead of applying the taxonomy to each sentence separately. Document-level granularity is recommended when your use case involves analyzing large documents, for example, emails.
- Click Save.
Configuring a File data set for storing emails
uPlusTelco stores customer emails in a .csv file. Use Dev Studio to create a corresponding data set that will store the file. This data set will be the input for text analysis.
Creating a File data set
Create a data set rule for storing files.
- In Dev Studio, click Create > Data Model > Data Set.
- Specify the rule name (for example, Emails) and identifier.
- From the Type drop-down list, select File.
- Specify the rule context and the applicable class.
- Click Create and open.
Uploading a file with customer emails
After you create a rule, upload the .csv file that contains emails to analyze. You can download a sample CustomerEmails.xlsx file and convert that file to .csv format.
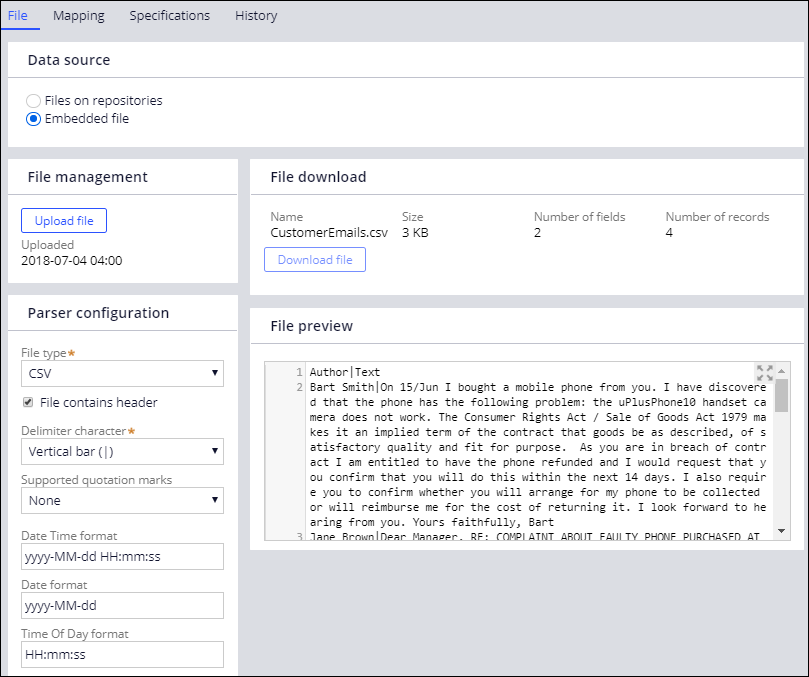
- On the File tab, in the Data source section, select Embedded file.
- In the File management section, click Upload file.
- Select the CustomerEmails.csv file from your directory and click Upload.
- In the Content section, from the File type list, select CSV.
- From the Delimiter character list, select Vertical bar (|).
Mapping properties in the File data set
Map the properties in the File data set so that the Text Analyzer rule recognizes the input for text analysis.
- Click the Mapping tab.
- Map the Author field from the CustomerEmails.csv file to the pyID property.
- Map the Text field to the .pyText property, as shown in the following example:
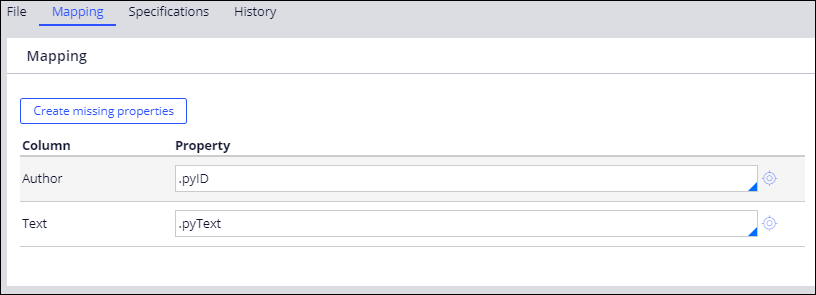
- Click Save.
Creating a Data Flow rule for natural language processing of emails
Configure a Data Flow rule that feeds the email data to the Text Analyzer rule and writes the output in NLP reports and creates a case when negative sentiment is detected.
Prerequisites
- Import NLP Sample to your application. Use NLP Sample to view various types of detailed reports about the analyzed records. For more information, see Exploring natural language processing with NLP Sample on Pega 7.4.
- Create an Email case type that has the following properties that provide an overview and context of the analyzed email:
- Author – Text (single line)
- Overall Sentiment – Text (single line)
- Topic – Text (single line)
- Summary – Text (paragraph)
Creating a Data Flow rule
Create an instance of a Data Flow rule.
- In Dev Studio, click Create > Data Model > Data Flow.
- Specify the rule label (for example, Process Emails) and identifier.
- Specify the rule context and applicable class.
- Click Create and open.
Configuring the Data Flow rule to save data for NLP reports
Specify the path for email processing, so that the processed records are saved in NLP Sample, where you can view detailed reports that pertain to the data that was processed by the Text Analyzer rule.
- Configure the Source shape by performing the following actions:
- On the Data Flow tab, double-click the Source shape.
- In the Source configurations window, from the Source drop-down list, select Data set.
- In the Data set field, press the Down Arrow key and select the Emails File data set that stores customer emails.
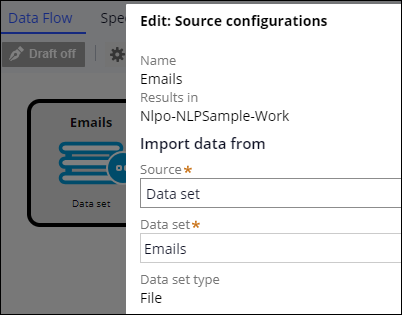
- Click Submit.
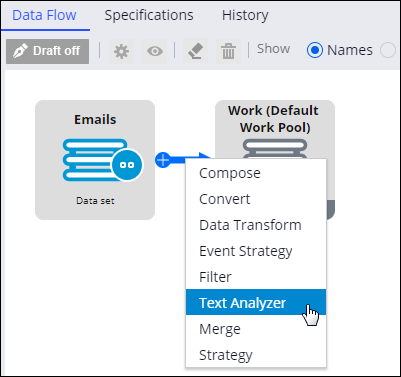
- Add a Text Analyzer shape by performing the following actions:
- Click the arrow that emanates from the Source shape.
- Select Text Analyzer.
- Double-click the Text analyzer shape that you just added.
- In the Text analyzer configurations window, in the Text analyzer field, press the Down Arrow key and select the EmailAnalyzer rule for processing emails.
- Click Submit.
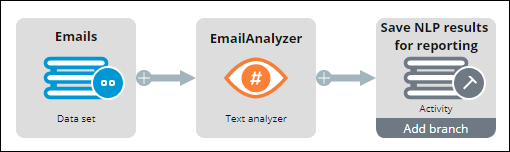
- Configure the Destination shape by performing the following actions:
- Double-click the Destination shape.
- From the Destination drop-down list, select Activity.
- In the Activity field, press the Down Arrow key and select the pxSaveNLPResultsForReporting activity. This activity saves the processed records in NLP Sample where you can view the outcome of text analysis.
- In the Parameters section, in the Source field, enter Email.

- Click Submit.
- Click Save.
Configuring the Data Flow rule to create a case when negative sentiment is detected
Configure the Data Flow to create a case every time the Text Analyzer rule detects negative sentiment the incoming record. With this configuration, customer representatives at uPlusTelco can respond only to relevant emails.
- On the Save NLP results for reporting Destination shape, click Add branch.
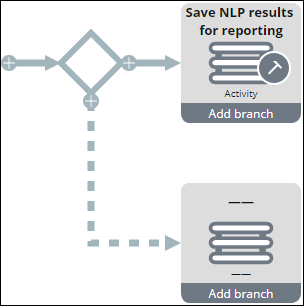
- Double-click the Destination shape that you just added.
- From the Destination drop-down list, select Case.
- From the Case drop-down list, select Email Case.
- Map the properties from the Email case to Text Analyzer properties that contain the outcome of text analysis of emails:
- Set .Author equal to .pyID
- Set .OverallSentiment equal to .pyNLPOutcome.pyOverallSentiment
- Set .TopicsDetected equal to .pyNLPOutcome.pyTopics(1).pyName
- Set .Summary equal to .pyNLPOutcome.pySummaryResult
- Click Submit.
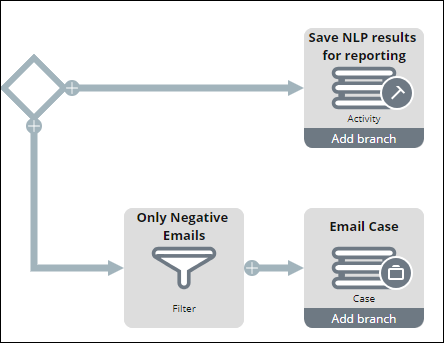
- Add a Filter shape to create a case only when negative sentiment is detected by performing the following actions:
- Click the arrow shape that points to the Email Case Destination shape and select Filter.
- Specify the name of the shape, for example, Only Negative Tweets.
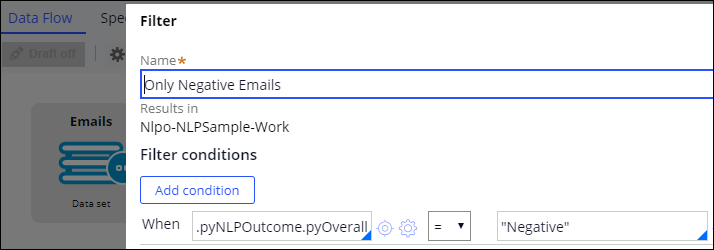
- In the Filter conditions section, click Add condition.
- Add the following condition: When .pyNLPOutcome.pyOverallSentiment = "Negative", as shown in the following example:
- Click Submit.
- Click Save.
- Click Actions > Run to start the Data Flow and process the data.
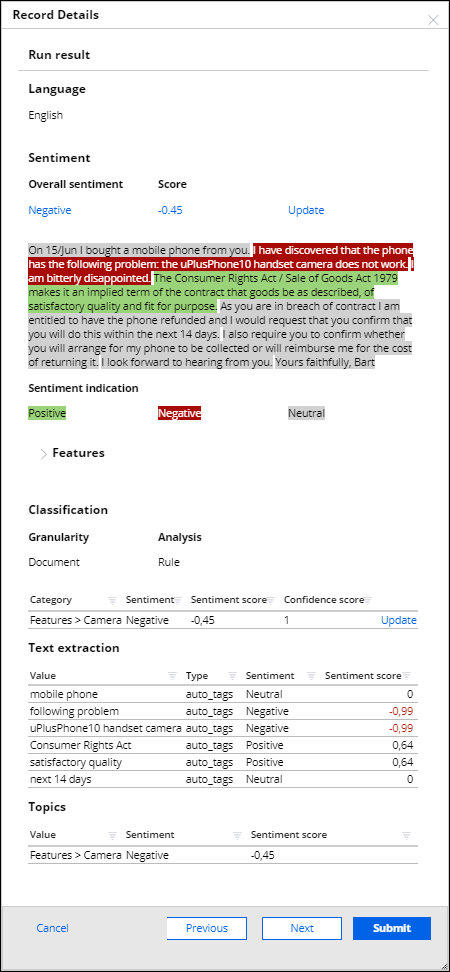
In Case Manager, the service representative can view the summary of a customer email, together with other details that define the context of the message.

In NLP Sample, you can view summary reports on all records as well as detailed reports for single records.
Conclusions
In this tutorial, you performed a number of tasks to configure text analysis of emails in your application:
- Configured a Text Analyzer rule to perform natural language processing of emails.
- Created and populated a File data set to store emails that you will use as input for natural language processing.
- Configured a Data Flow rule that feeds emails as input for the Text Analyzer rule.
Previous topic Tutorial: Creating decision strategies for a headless decisioning scenario Next topic Tutorial: How to edit, reorder, or delete values in the NBAM Proposition EditList