The data integration scenario presents how to integrate contact details with the
.FirstName property. To integrate more contact details, you must
insert these properties in a few places to make the integration run successfully. You can
run the Data integration wizard once, so to add any properties after that, you must perform
some manual steps. To have a better understanding of what can be mapped, review the
application areas that are populated with data from D_Contact_Details,
as well as what is available by default in the D_Contact_Details data
page.
Pega Customer Service
Implementation Guide
Pega Customer Service
Implementation Guide
Pega Customer Service
Implementation Guide
Pega Customer Service
Implementation Guide
Pega Customer Service
Implementation Guide
Application areas populated by the D_Contact_Details data page
The example integration scenario describes how to populate contact details with just the
.FirstName property from an external SOR. The
D_Contact_Details data page populates data into many Pega Customer Service application areas. Review the list below to see what other
properties you can map by using the D_Contact_Details data
page.
Note: Depending on the scenario, the data page returns different properties, for example, a
consumer application returns different properties than a business application.
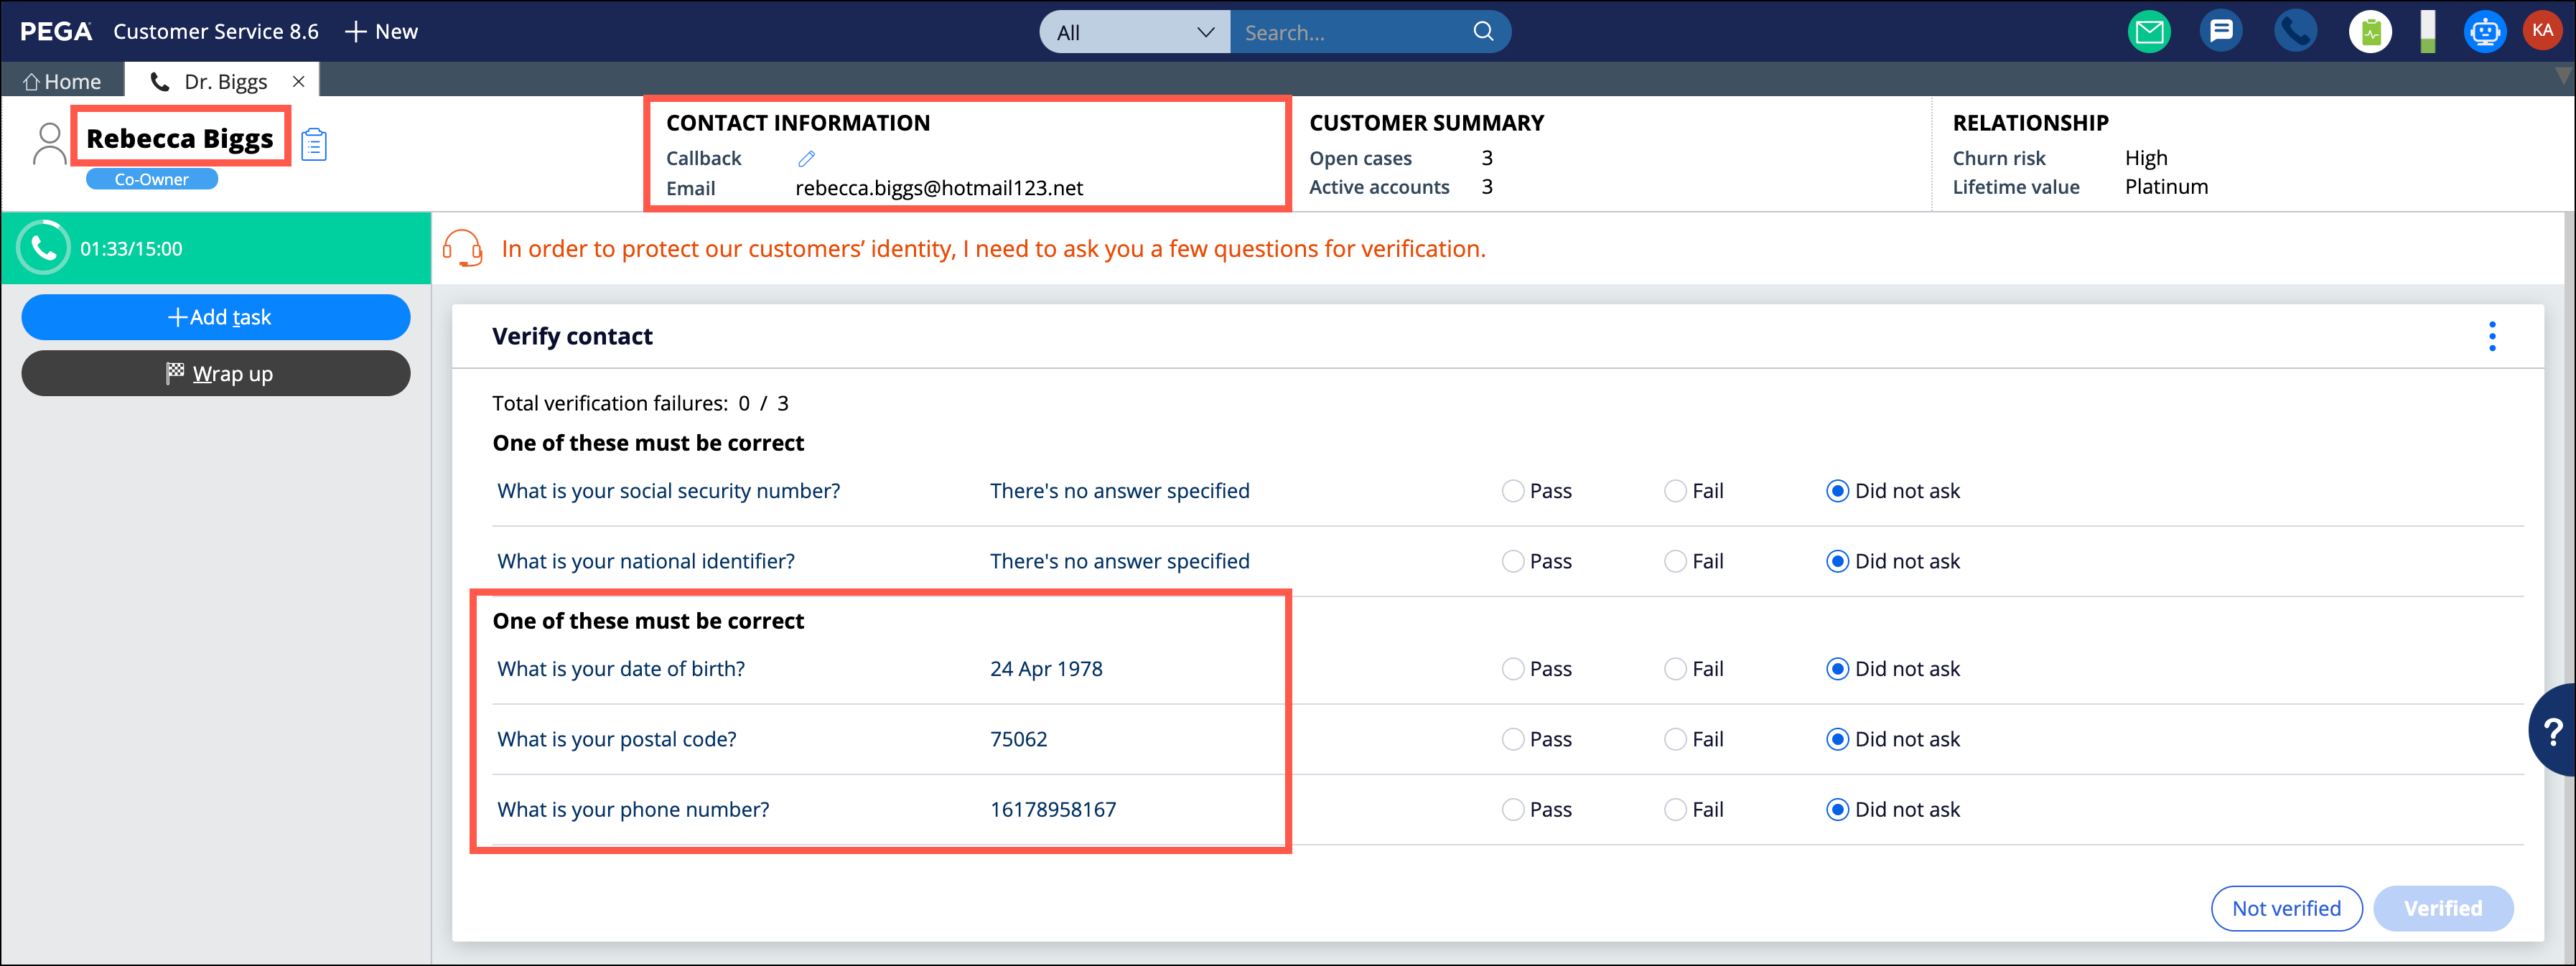
Customer verification page
Start a new phone call to see contact-related information on the Customer
Verification page.A sample customer verification page with contact-related
properties
360 composite page
After verifying the contact, see contact-related information on the 360
composite page.
Note: On this page, you can also see accounts-related
properties.
A sample 360 composite page with contact-related
properties
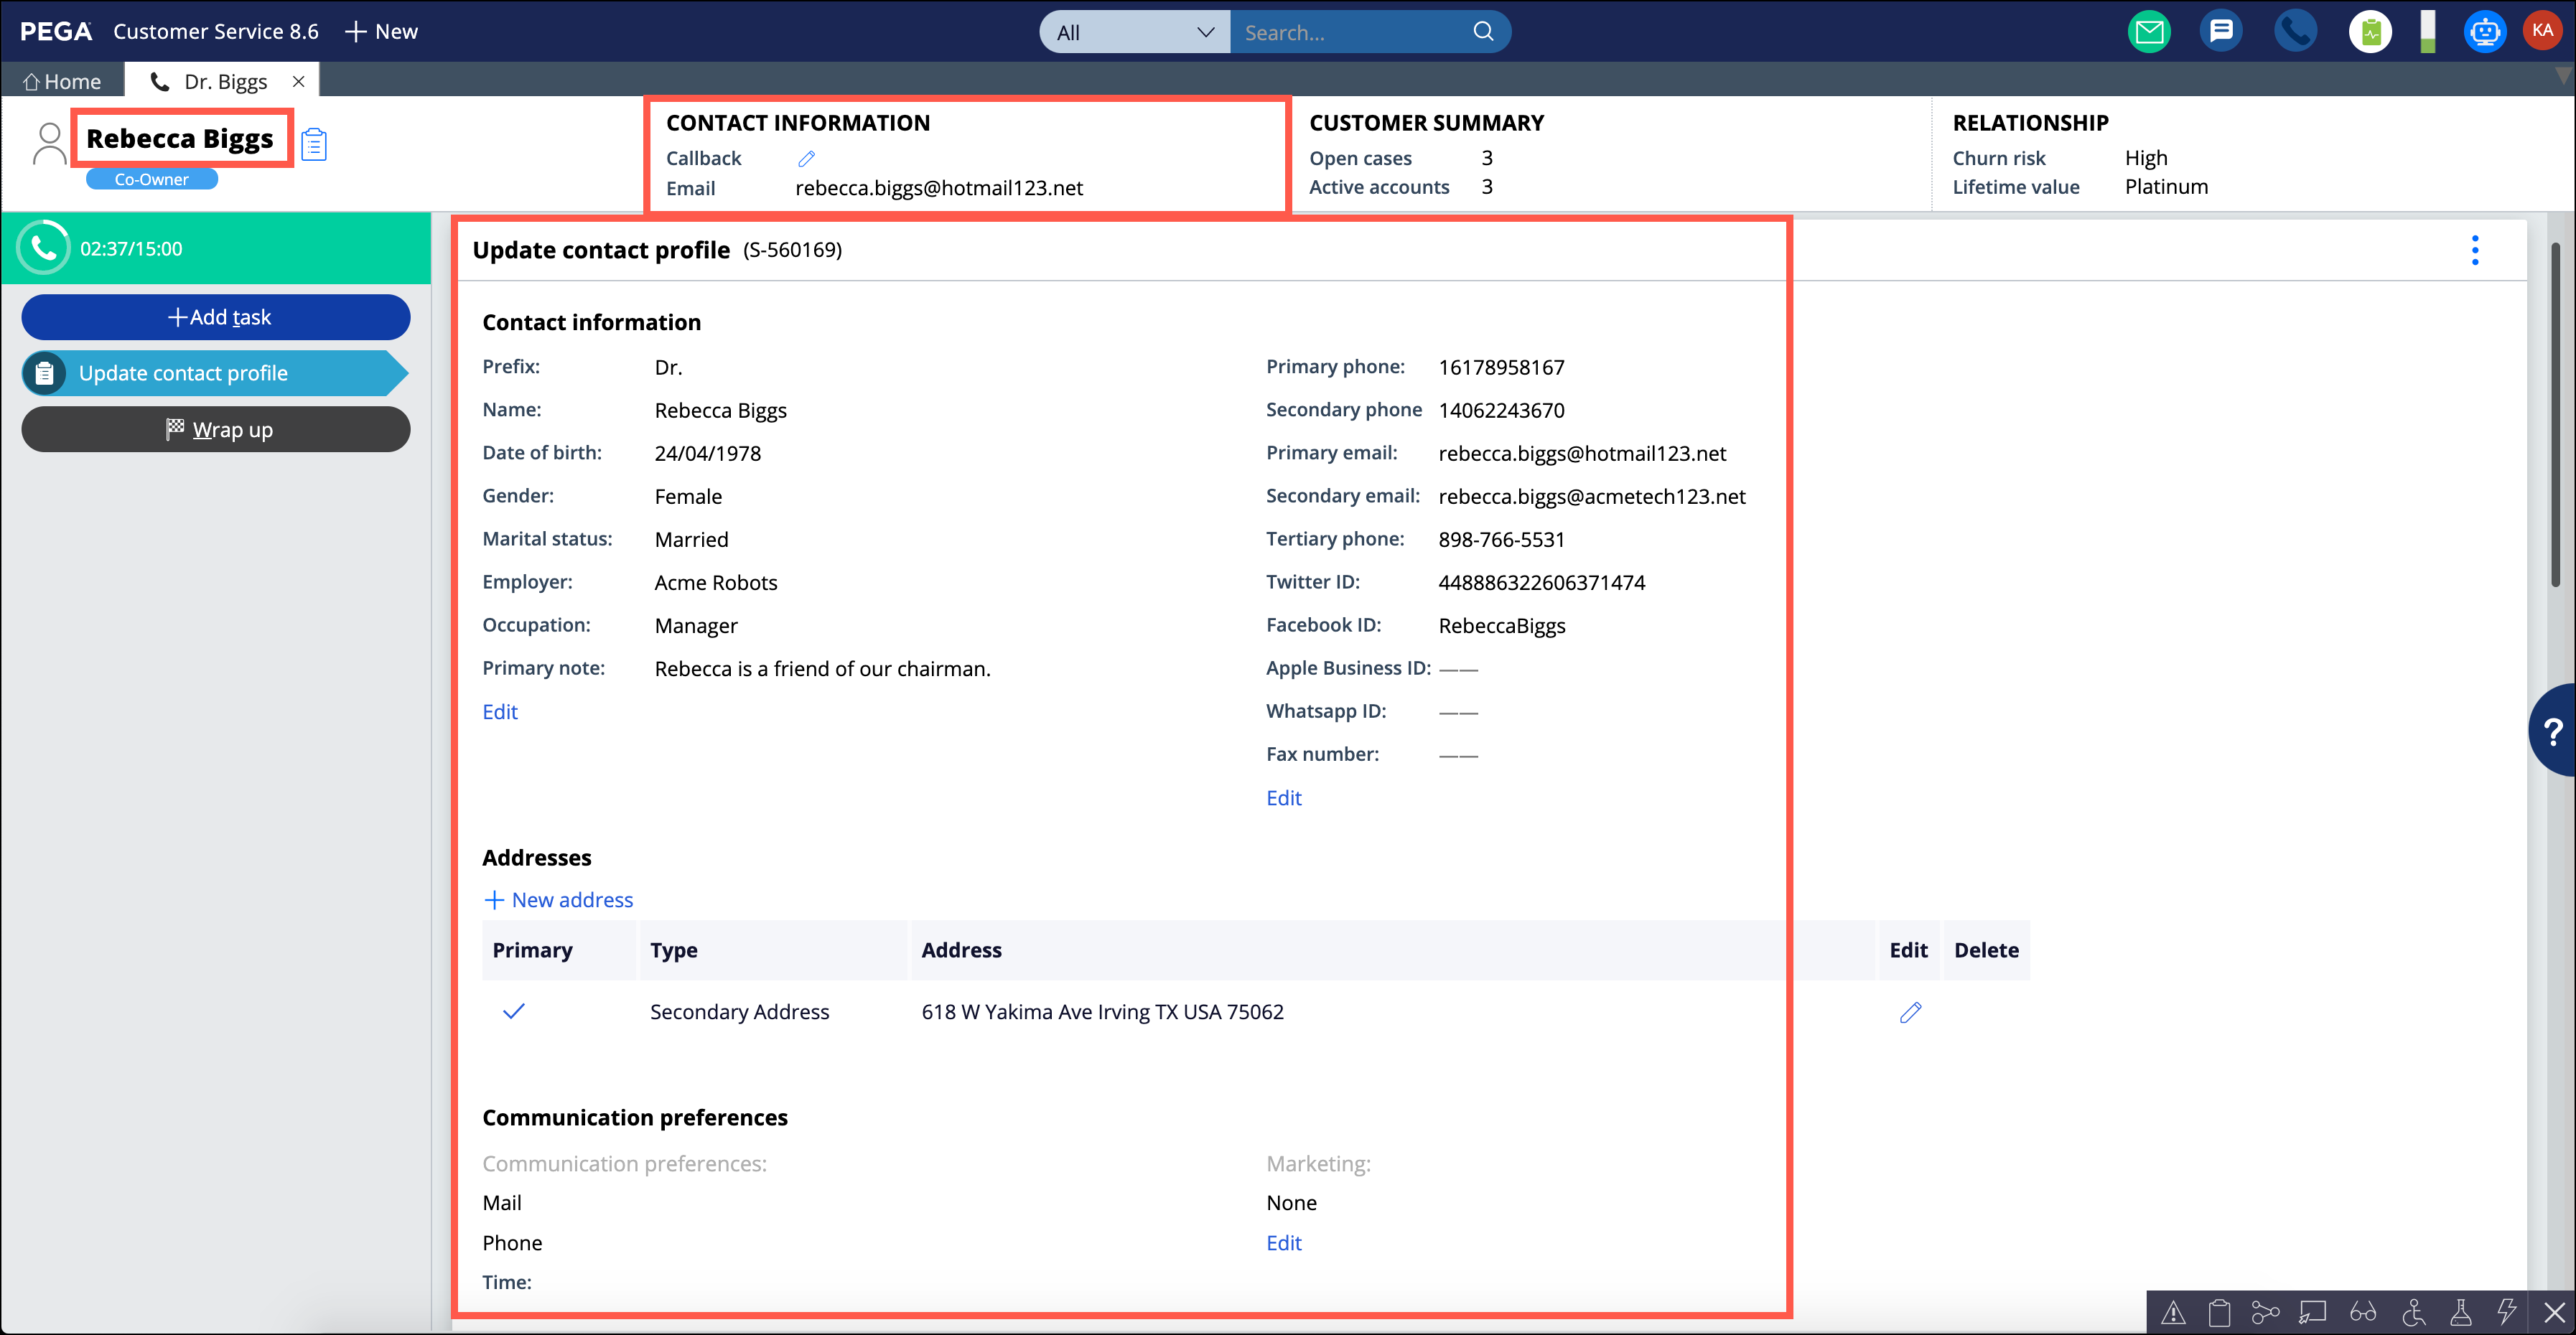
Service cases related to contacts
To see a comprehensive list of, for example, contact-related information on
the service case page, click Add task and then select
Update contact profile service case.A sample Update contact profile service case page with
contact-related properties
Reviewing the D_Contact_Details properties to decide what to map
As part of the example integration scenario, you mapped the
.FirstName property. Review the
D_Contact_Details to see what other properties you can
map.
Note: Depending on the scenario, the data page returns different properties, for example, a
consumer application returns different properties than a business application . Run the
data page, look at the properties in the sample application, and then look at the data
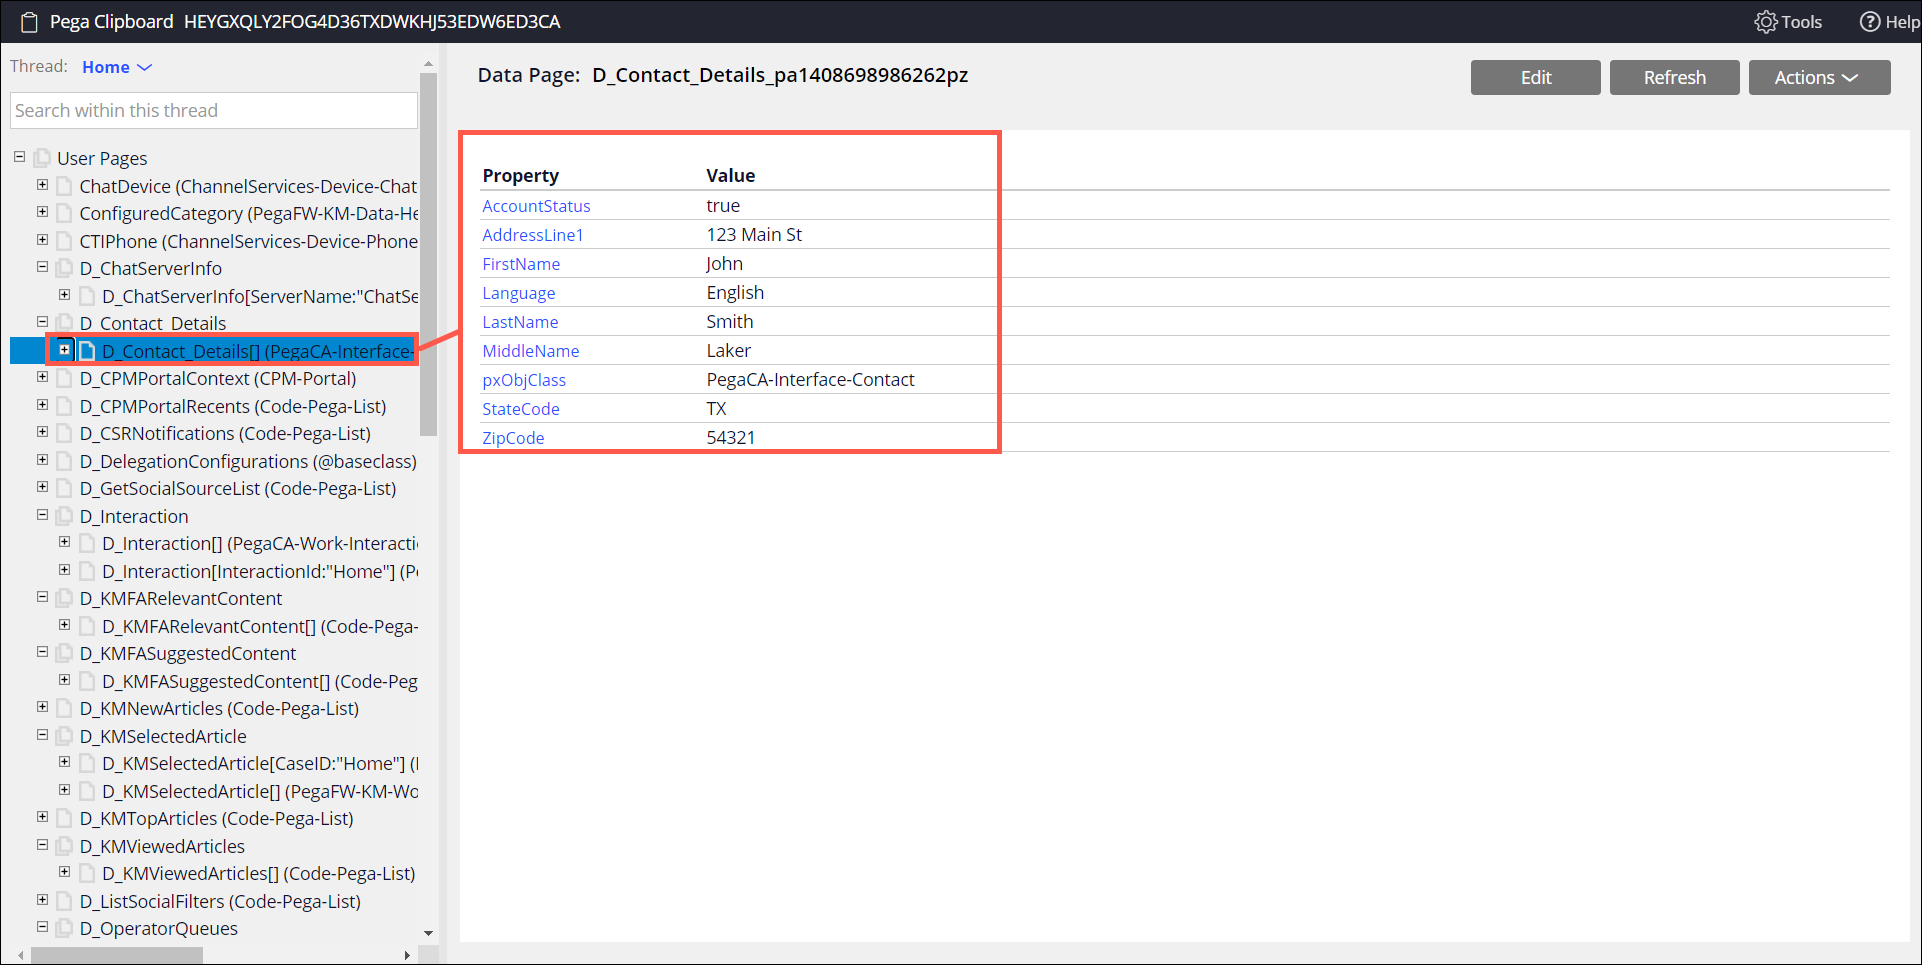
on the Clipboard to get a comprehensive view of the properties. The Clipboard view is
the preferred way to see the list of properties, but if you want to understand where
data is used, review each app area, for example, customer verification, or the360
composite page.
To see a comprehensive view of the D_Contact_Details data
page so that you can decide what to map, perform any of the following
steps:
Choices
Actions
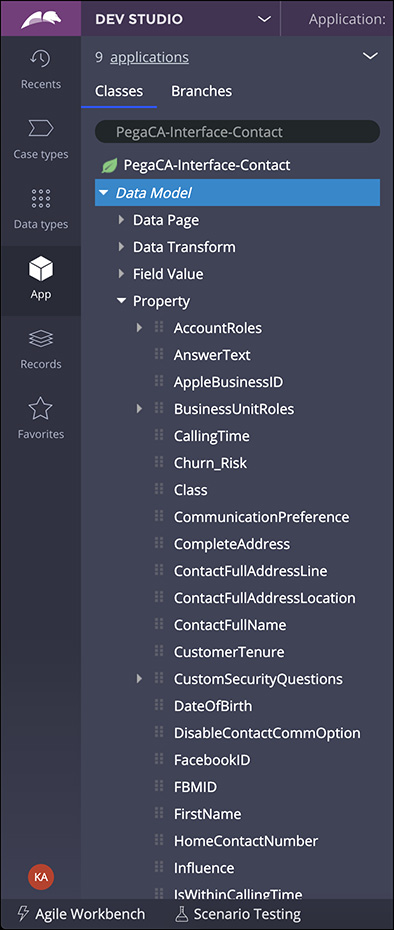
Use the class view in Dev Studio
In the navigation pane of Dev Studio, search for the
PegaCA-Interface-Contact
class.
The D_Contact_Details class uses the
PegaCA-Interface-Contact as the
object type. By reviewing this class, you can see the super
set of available properties.
Expand Data ModelProperty.
Review the list of properties.
Use the Clipboard view in the Interaction Portal of the demo
app
Switch to a demo app by clicking in the Dev Studio header, Application: Your application
nameSwitch application.
In the header of Dev Studio, click Launch portalInteraction Portal.
In the application header, run a new interaction by
clicking NewPhone call.
Search for and open a contact, for example
Rebecca Biggs.
Verify the customer, and then run the Update
contact profile service case.
In the Interaction Portal, in the upper-right corner, click Your operator
nameClipboard.
Search for and open the
D_Contact_Details data
page.
Review the list of properties.
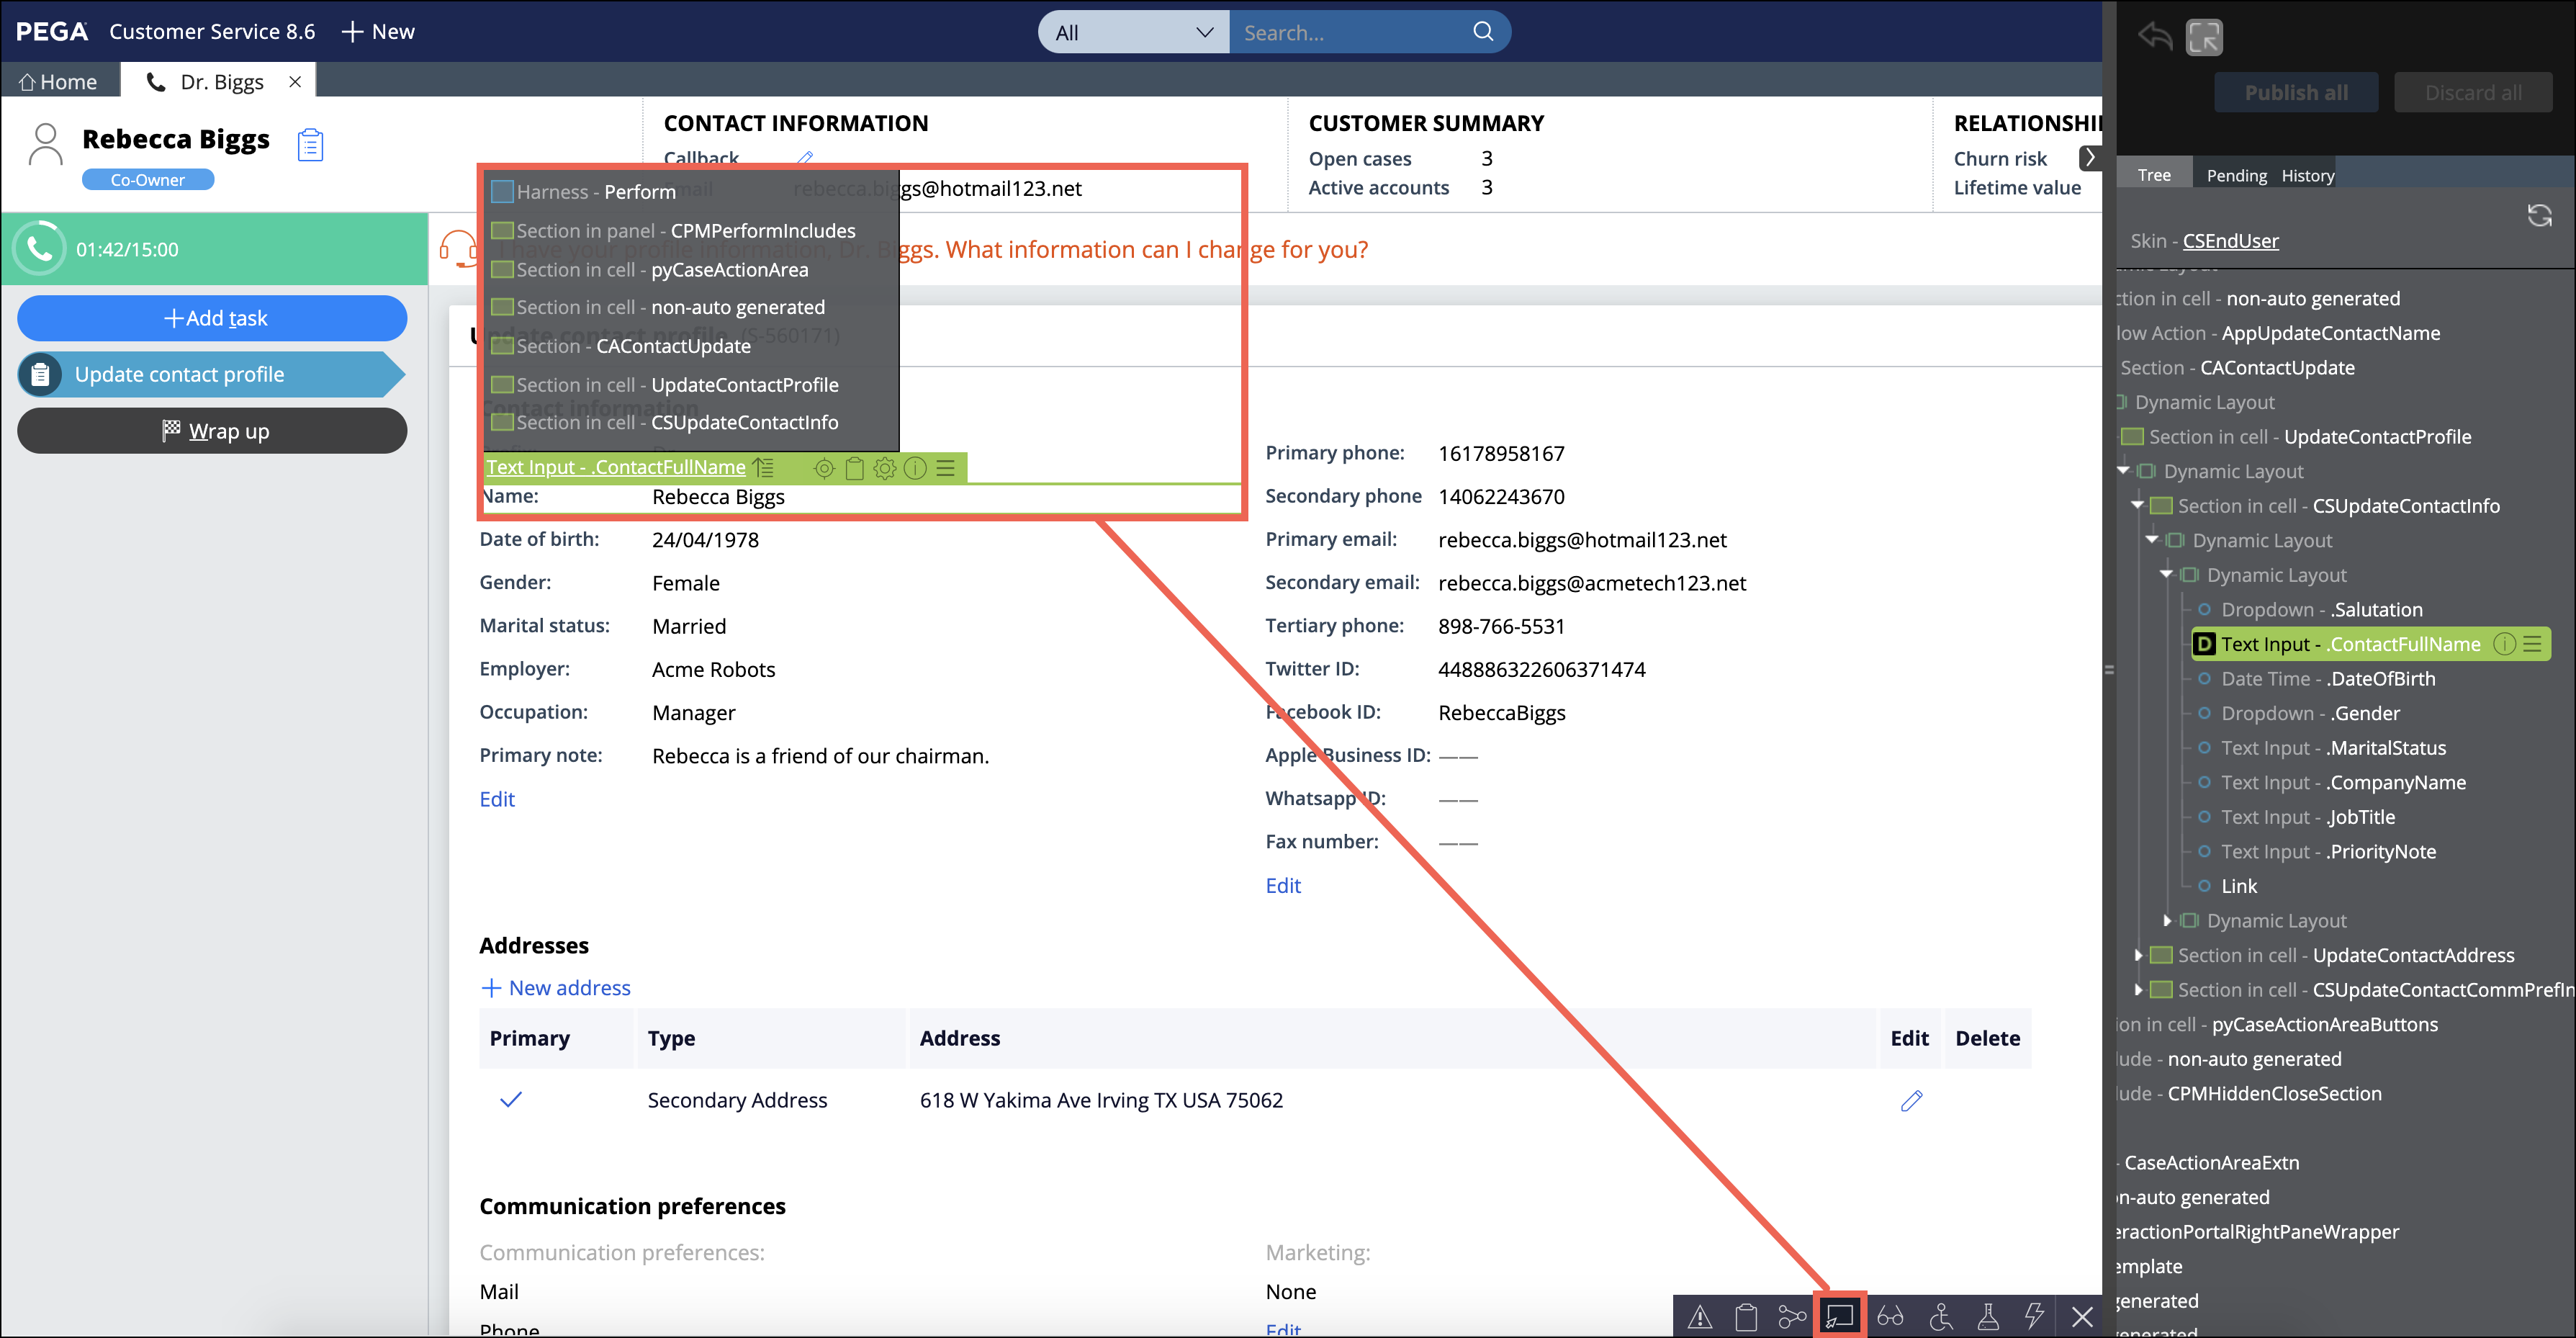
Use the Live UI in the Interaction Portal
In the header of Dev Studio, click Launch portalInteraction Portal.
Click NewPhone Call.
In the footer of the Interaction Portal, click Toggle runtime toolbarToggle Live UI.
Select any item in the UI to see where each property comes
from.
Properties in the default contacts class in Dev Studio
An example data integration result on the Clipboard screen
An example verification using Live UI
Mapping additional properties
Use the mapping structure you created for the .FirstName
property as a basis for mapping additional properties.
Open your data page and add more properties to it.
Open your data page.
On the Parameters tab, enter names and
descriptions for your new properties.
Click Save.
Optional: To test your service in the browser, add the property and its value to the URL
after the version, for example "/contacts?/ContactId=your
ContactId value, and then check whether the
response reflects the property.
Optional: To determine what you want to map from the service response, update the
connector XML parse rule.
Note: In most scenarios, this step is done for you by the Integration wizard,
but if you made updates, for example, by updating your interface, you must
also update the XML parse rule.
Open your connector.
On the Methods tab, open the
Response tab.
In the Message data section, open the
Map to key XML parse rule by clicking
Open the selected XML parse rule.
Click Allow tree editing?, and then
Add Element.
Add all new properties the same way that you added the
.FirstName property.
Click Save.
Update the GetContact_Up response data transform to
determine what you want to map back to the data page mapping rule.
Open your data page.
In the Data Sources section, open the
Response Data Transform data transform.
In your scenario, the name of the response data transform might be
different. This example scenario uses the
GetContact_Up data transform.
Add all new properties the same way that you added the
.FirstName property.
Click Save.
Verifying integration with multiple properties
After you have set all the properties, verify your integration. It is recommended to
verify that the data page returns correct values, and then verify that the application UI
uses the integrated data.
Verify that your data page returns correct values
Log into your application.
In the header of Dev Studio, search for and open your integration data page.
On the data page, click ActionsRun.
In the Value field, enter the values for your
parameters.
Click Run.
Review the results.
Result: If the data integration succeeded, the system displays all your
attributes. If there is no data displayed, switch to the Tracer tool to
investigate the issue. For more information, see Verifying a scenario-based
integration.
Verify that your application UI uses the integrated
properties
In the header of Dev Studio, click Launch portalInteraction Portal.
In the application header, run a new interaction by clicking NewPhone call.
Verify the contact and run the Update contact profile
case.
Review the application pages to see if the fields are populated with your
integrated data.
In the Interaction Portal, in the upper-right corner, click Your operator nameClipboard.
Search for and open your data page.
Verify that all the properties you integrated return set values.