Configuring the PRO-Speech Therapy benefit
The PRO-Speech Therapy benefit covers services that are related to speech issues. For example, you use this benefit for a child who has a speech impediment or a patient who has suffered a stroke.
Before you configure this benefit, read the description and perform the required tasks that are listed in Benefits.
Procedure
- In the header of Dev Studio, click .
- In the left navigation panel of your work space, click New > Benefit.
- Click .
- In the Name field, enter PRO-Speech Therapy.
- In the Effective date field, enter 1/1/2019, and in the End date field, enter 12/31/9999.
This end date means that the benefit might be in use indefinitely. By manually entering 9999 for the year, you do not have to continually update the end date. - In the Insurance line list, select Medical.
- In the Benefit category list, select Rehabilitation-Services.
- Click Add Purpose and Alias names. In the Purpose field, click Sales and in the Name field, enter a meaningful name for the benefit that the individuals in the business area understand, for example, Speech Therapy.
These fields are optional. - For this tutorial, ignore the optional Client benefit id and Description fields.
- Ensure that the Is wellness benefit check box is not selected because this benefit is not a wellness benefit.
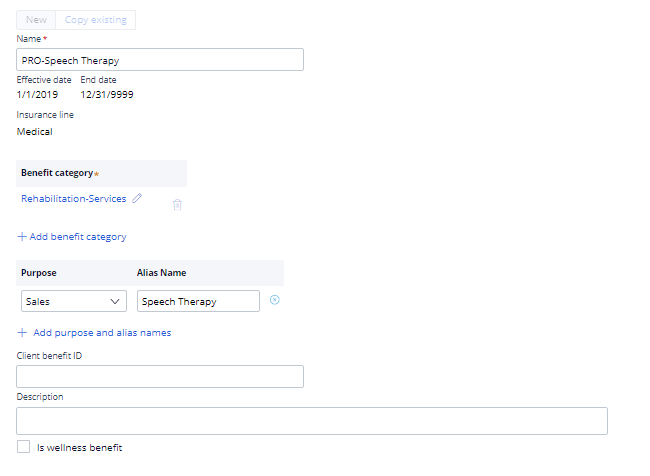
PRO-Speech Therapy benefit - Click .
- In the Define Mapping step of the wizard, define the conditions (codes) to describe the benefit which then is understood by a claims adjudication system.
- In the list, select Service Group and click .
- Click Add Service Group.
- In the Code group field, enter H2192 and select it from the list.
The Description field displays Speech therapy.
Service group for the PRO-Speech Therapy benefit You can click the Show Detail icon next to the Description field to view the details of the code group.
- For this tutorial, ignore the optional Override section because it does not apply.
If you are integrated with a downstream processing claim system that requires an indicator to advise when one benefit precedes or overrides another, you select this check box. The systems use this benefit on all claim lines so that the member pays only for the cost shares associated with this benefit. - Click to list the benefit description based on the codes that you selected.
- Click .
- In the Enter notes step of the wizard, click the SBC Benefits Description tab, and enter PRO-Speech Therapy benefit is required. Then click .
- In the Review benefit step, review the benefit and then click .
- Because you have manager credentials, approve the benefit entity by following these steps:
- Click Actions > Approve and hold at the top right.
By selecting Approve and hold instead of Approve, the entity remains in the current stage, but is available for use in other tasks. To advance the entity to the next stage, click Approve. - In the Approve section, click .
- Click Actions > Approve and hold at the top right.
What to do next
Configure the PRO-Urgent Care benefit. See Configuring the PRO-Urgent Care benefit.
Previous topic Configuring the PRO-Occupational Therapy benefit Next topic Configuring the PRO Urgent Care benefit