Creating robotic work groups and assignment types
Organize robots into work groups that are customized for achieving a specific business objective. For each work group, create work queues that hold work to be assigned to robots.
For example, you can create a work group of robots tasked with placing product orders based on the demand. That work group can contain work queues that correspond to various product types that are available for ordering.
- In the application header, click Robots.
- On the Work groups tab, click .
- Enter the work group name.
- Enter at least one assignment type that this work group will be processing,
based on robot activities included in the automation package assigned to the
work group.Assignment types in Pega Robot Manager correspond to work queues in Pega Platform.
- Optional: Depending on your current application settings, you can enable or disable
Auto-balancing in this work group:
- If Auto-balancing is disabled, you can enable it by activating the Auto-balancing switch.
- If Auto-balancing is enabled, you can disable it by deactivating the Auto-balancing switch.
Automatic workload balancing increases efficiency and minimizes robot idle time by moving robots between work groups to complete pending assignments on time. For more information, see Auto-balancing robot workload across work groups.
By disabling automatic workload balancing, you ensure that the number of assigned robots across work groups is always the same, at the cost of efficiency. This means that Pega Robot Manager cannot automatically add robots to a work group to respond to a spike in open assignments or reassign idle robots to work in other work groups.
For example: You can configure a robotic work group for placing orders. That work group contains a work queue (assignment type) for each product type. Creating a work group 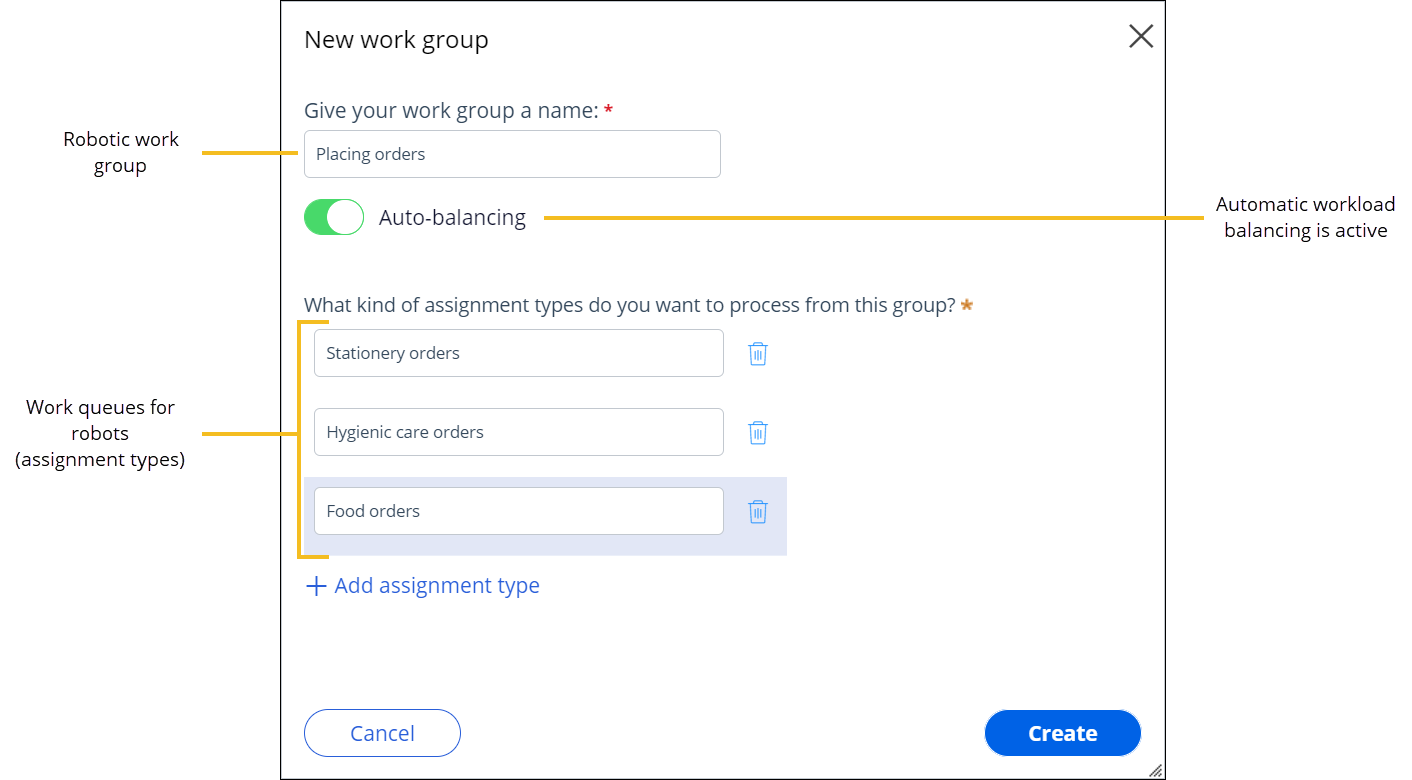
- Click Create.
Previous topic Managing work groups and assignment types Next topic Monitoring work groups