Tutorial: Configuring a remote repository as a source for a File data set
To use data stored in cloud-based storage systems such as JFrog Artifactory, Amazon S3, or Microsoft Azure in your Pega Platform™ applications, configure a remote repository as a data source for a File data set. You can apply this functionality to set an automated data transfer to Pega Platform in the cloud by enabling parallel loads from CSV and JSON files that are stored remotely, instead of creating and maintaining relational databases to transfer remote files.
You can then convert and use the transferred data in various scenarios, such as in a marketing strategy or for customized correspondence.
After you create a File data set with a remote repository, you add a reference to the File data set in a data flow. See Referencing remote repository data in a data flow.
Use case
The marketing team of the Xauto company wants to use their client data, which is stored in Amazon S3, in their decision strategy on Pega Platform in the cloud.
Creating a File data set with a remote repository
To use data that is stored in a remote repository, such as Amazon S3, create a File data set that references that directory.
- In Dev Studio, click .
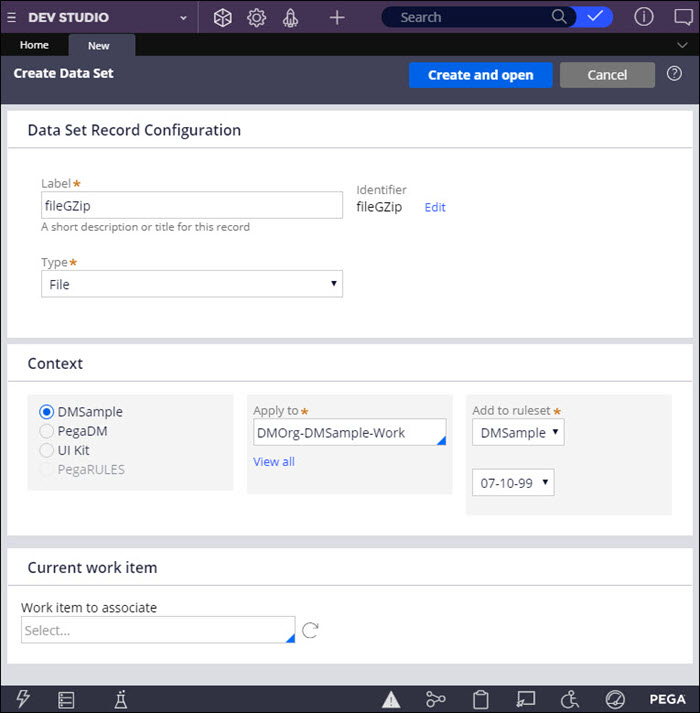
- In the Data Set Record Configuration section, enter the data set parameters:
- In the Label field, enter a name for the new record, for example:
fileGZip
- In the Type field, select File.
- In the Context section, select the Apply to class and ruleset version.
- Confirm the settings by clicking .
- In the Label field, enter a name for the new record, for example:
- In the New tab, in the Data source section, click .
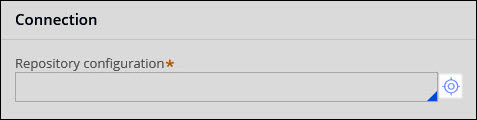
- In the Connection section, click the icon to the right of the Repository configuration field and configure the remote repository:
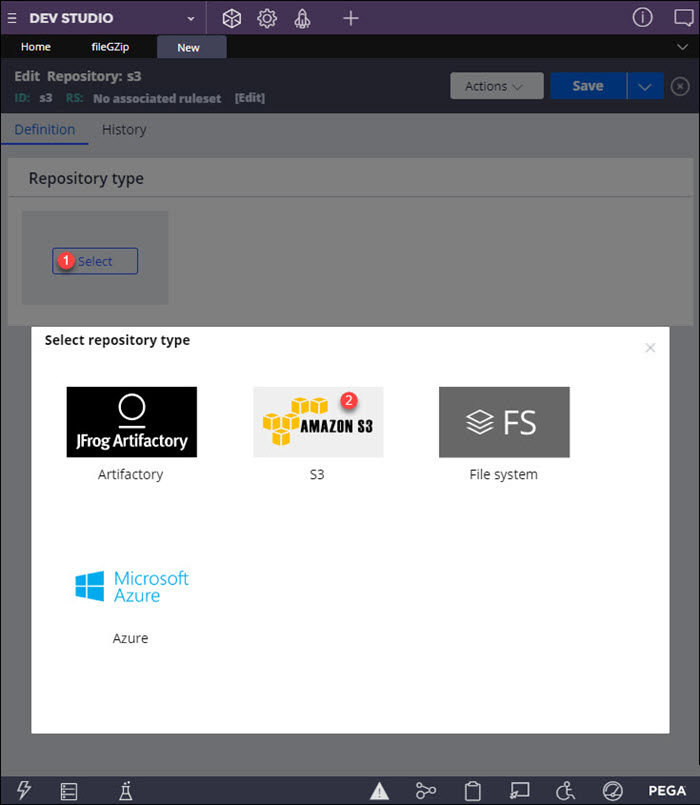
- In the Create Repository tab, enter a description in the Short description field, for example:
Xauto customer data directory (Amazon S3)
- Enter the Repository name, for example:
s3
- In the Edit Repository tab, click and select S3 as your repository type.
- In the Create Repository tab, enter a description in the Short description field, for example:
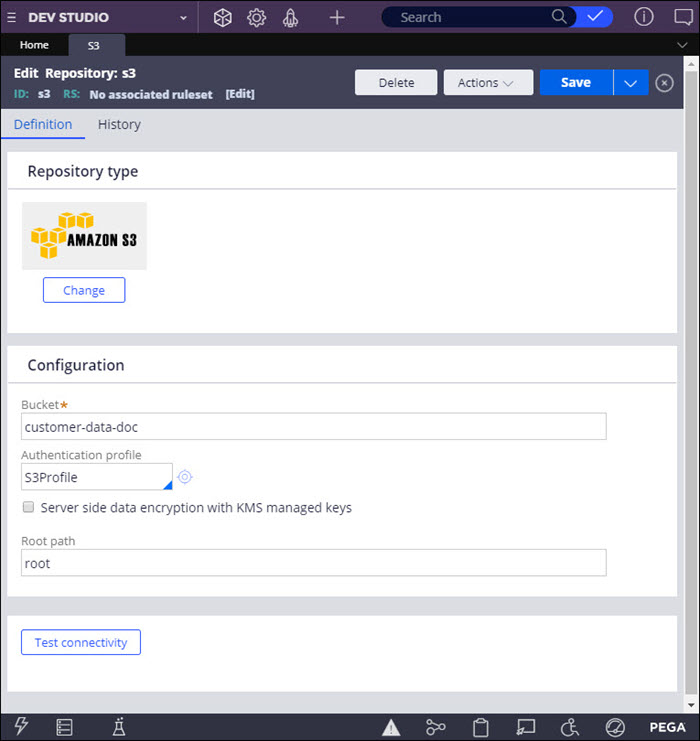
- In the Configuration section, enter the parameters for your Amazon S3 repository:
- In the Bucket field, enter the S3 bucket location where artifacts are stored, for example:
customer-data-doc
- In the Authentication profile field, select or create an authentication profile to connect to the repository.
For more information, see Creating an authentication profile.
- To use an Amazon Key Management Service (KMS)keystore for storing keys and certificates, select the Server side data encryption with KMS managed keys check box and enter the KMS key ID.
For more information, see Keystores.
- In the Root path field, enter the location of the root folder in S3, for example:
root
- In the Bucket field, enter the S3 bucket location where artifacts are stored, for example:
- Verify the credentials by clicking .

- Click .
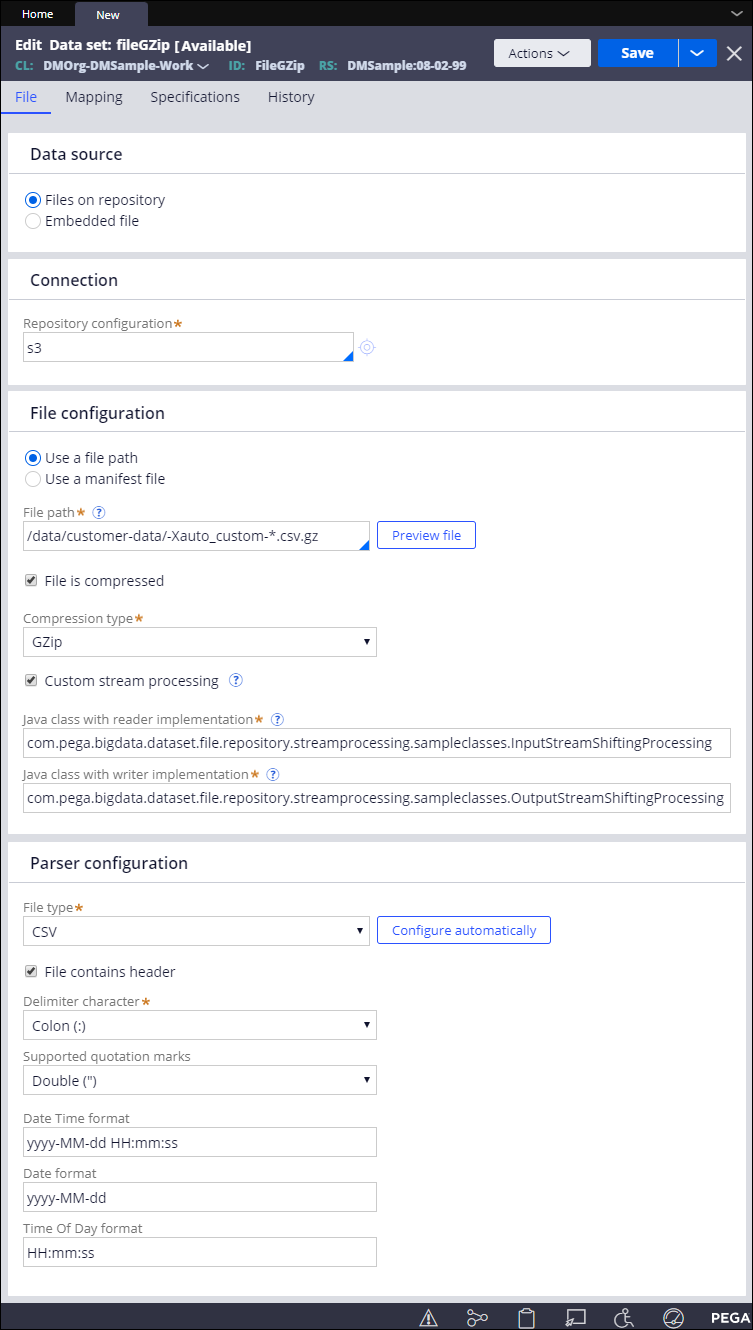
- In the File configuration section, select the check box and enter the source file directory, for example:
/data/customer-data/-Xauto_customers.csv.gz
To match multiple files in a folder, use an asterisk (*), for example:
/data/customer-data/-Xauto_custom-*.csv.gz
- If the file is compressed, select the check box and choose the , for example: GZip
- Optional: To provide additional file processing for read and write operations, such as encoding and decoding, define and implement a dedicated interface:
- Select .
- In the field, enter the fully qualified name of a java class with the logic that you want to apply before parsing, for example:
com.pega.bigdata.dataset.file.repository.streamprocessing.sampleclasses.InputStreamShiftingProcessing
- In the field, enter the fully qualified name of a java class with the logic that you want to apply after serializing the file, before writing it to the system, for example:
com.pega.bigdata.dataset.file.repository.streamprocessing.sampleclasses.OutputStreamShiftingProcessing
For more information about the custom stream processing interface, see Requirements for custom stream processing.
- Optional: To preview the file based on the settings from the File Configuration section, click .
- Optional: In the Parser configuration section, update the settings for the selected file by clicking or by configuring the parameters manually, as in the following example:
- For CSV files, in the Mapping tab, modify the number of mapped columns:
- To add a new column, click Add mapping.
- To remove a column and the associated property mapping, click the Delete mapping icon for the applicable row.
- For CSV files, in the Mapping tab, check the mapping between the fields in the CSV file and the corresponding properties in Pega Platform:
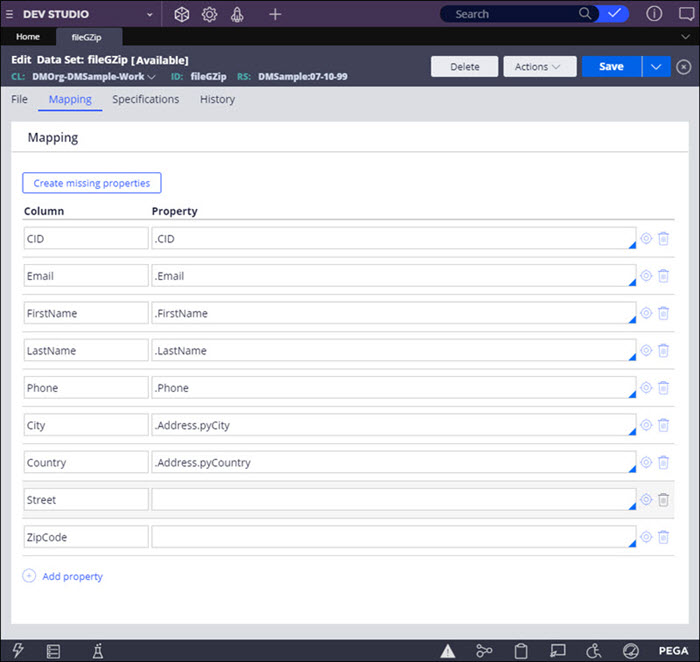
- To map an existing property to a CSV file column, in the Property column, press the Down Arrow key and select the applicable item from the list.
- For CSV files with a header row, to automatically create properties that are not in Pega Platform and to map them to CSV file columns, click Create missing properties. Confirm the additional mapping by clicking Create.
- To manually create properties that are not in Pega Platform and to map them to CSV file columns, in the Propertycolumn, enter a property name that matches the Column entry, click the Open icon and configure the new property. For more information, see Creating a property.
For CSV files with a header, the Column entry in a new mapping instance must match the column name in the file.
- Confirm the data set settings by clicking Save.
Next steps
Add a reference to your File data set in the Source shape of a data flow. See Referencing remote repository data in a data flow.
Previous topic Tutorial: Building a headless decisioning scenario with data flows in Pega 7.2.1 Next topic Tutorial: Configuring a topic detection model for discovering keywords