How to configure a local action in a button on a harness
Summary
You can configure a local action as a button directly on a Harness rule form.
This provides an optional alternate runtime presentation of the flow action that provides users with quick and consistent access to the local action.
This technique can be used to present optional input fields on a work object form. The After this Action... Run activity (identified on the Action tab of the form) can copy user inputs to the work object.
Suggested Approach
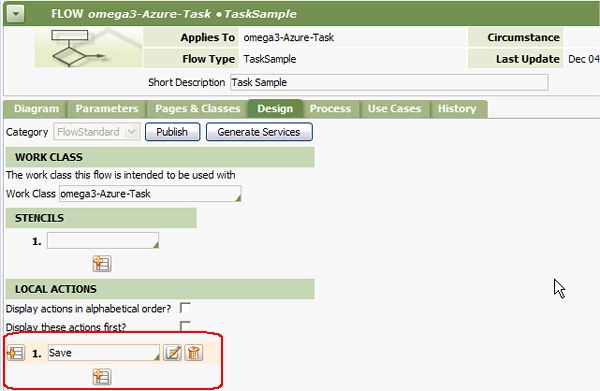
1. Plan. Determine under what situations and on which harness forms the local action is to be available. Update the flow rule using Visio to add the local action to the assignments where it is to be available.
In this example, the standard local action Work-.Save is to be available at every assignment in the flow rule. In this case, rather than edit the flow in Visio, you can specify the local actions directly in the Local Actions area of the Design tab of the Flow form.
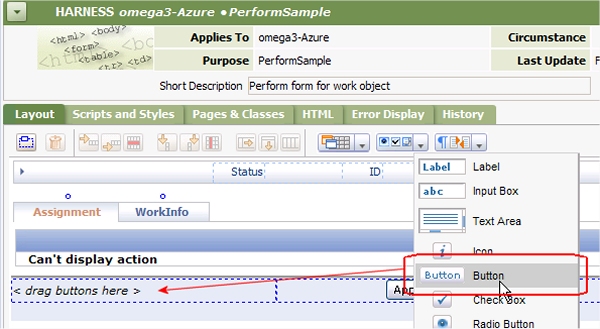
2. Drag Open the Harness rule. From the middle control group on the Layout tab, select and drag the Button control to the button area of the Harness rule.
3. Configure. Drop the button control. Click the magnifying glass button to open the Cell Properties panel. Complete the Button tab:
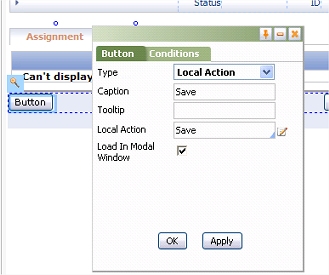
- Set the Type to
Local Action. - Enter a text label for the button, in the Caption field.
- Identify the local action, in the Local Action field.
- If the action requires inputs, select the Load in Modal window check box.
- Optionally, complete the Tooltip field; enter text that appears when the mouse pointer hovers over the button.
- Optionally, complete the Conditions tab to control when the button is visible and available.
- Click Apply. Click OK.
- Save the Harness form.
4. Test. Run the flow rule. Confirm that the work object forms based on the Harness rule show the local action as planned in step 1. If the button is to be available only in certain situations, confirm this through testing.
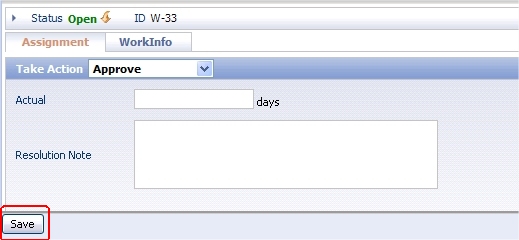
5. Test. When the user clicks the local action button, the associated flow action form appears as a modal window, with a Submit button and Cancel button.
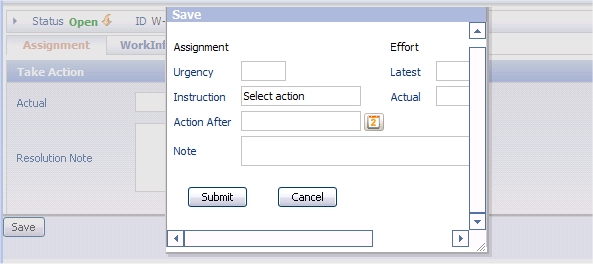
Note: This approach may not work with all existing local actions; some may be designed to work only in the Action area of a form.
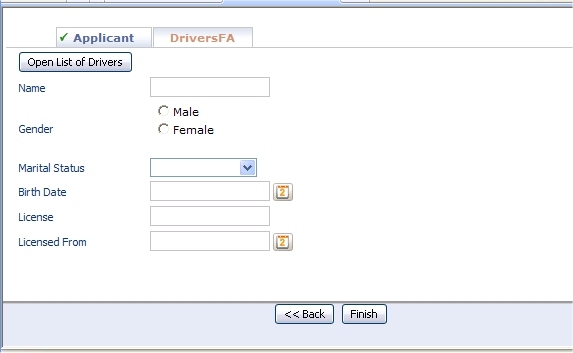
Example 2
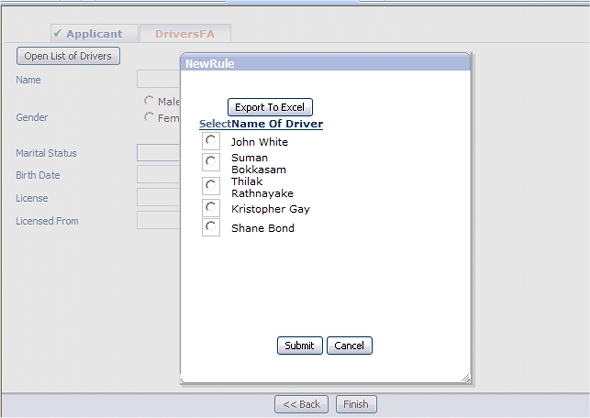
In this example, the Open List of Drivers button provides access to a modal pop-up form.
The pop-up form presents a list view report with radio buttons (defined on the Select tab of the List View form) to allow user selection..
* * * * *