How to use the Application Skin wizard
Summary
Introduced with 5.4, the Application Skin wizard provides a guided approach to creating a branded portal for application users.
The wizard creates a skin rule (Rule-PortalSkin), associated text file rules for CSS styles, and two portal rules, overriding the standard portal rules WorkManager and WorkUser. The Developer portal is not altered.
You can rapidly prototype a collection of styles for the two user portals, affecting the appearance of the portal itself, work object forms, and report displays. Because the wizard can be re-run at any time (either updating the same rules, or updating a copy), gradual refinement and experimentation are easy to accomplish.
Update: This article describes 5.4 features. For 5.5, see How to use the Application Skin wizard to create a new skin. For 6.1, see How to use the Branding wizard to create a new application skin. For 6.3, see How to use the Skin rule to style your application user interface.
Suggested Approach
The W3C cascading style sheet (CSS) standard defines a sophisticated, detailed way to specify styles. Because the appearance of Process Commander user portals is the combined result of dozens of individual style elements, it can be challenging to compose the CSS files to match the colors or fonts that match an organization's branding standards.
The Application Skin wizard simplifies and structures this task with a sequence of 13 forms, organized into four groups:
- Overall styles
- Styles for the elements of the WorkUser and WorkManager portals, such as the title bar and navigation panel.
- Styles for work object forms, applied to the runtime rendering of harness, section, and flow action rules
- Styles for list view and summary view reports.
Five additional features of the wizard simplify the development task:
- Design elements you select on the first few forms can appear as defaults on later forms
- V5.4 includes 5 built-in read-only "template" skins that you can use as a starting point.
- At any step, you can preview the effect of your inputs so far.
- At any step of the wizard, you can advance to the final step, using defaulted values for all remaining decisions.
- No rules are altered or created until the final step.
Example
This WorkManager portal reflects the combined effect of portal styles and report styles (as the worklist display is from a list view rule). This skin is derived from a standard template skin, Tan.

Colors and fonts for work object forms are harmonious with the portal and report styles:

 Development
With little or no preparation, you can experiment with the wizard to understand its operation and the effect of individual design choices. However, developing an attractive, unified skin design requires preparation. Test your design with application users to ensure that the buttons, icons, and other controls they need to use are quick and easy to spot..
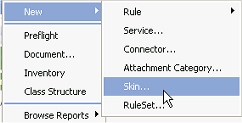
To start the wizard, select Application > New > Skin from the Developer portal menus. The wizard provides step-by-step guidance. Click the help icon (![]() ) to access context sensitive help from any form.
) to access context sensitive help from any form.
Specify colors, fonts, and other design elements on each wizard step. For example, in the HappyFace skin, the overall font color is #835A1C in HTML's RGB hexadecimal notation.

 Click the color box to access a standard color picker in a pop-up window. Click OK to apply a color choice.
Notes: If your company specifies brand colors using the CMYK or the Pantone Matching System®, you can convert each color to an RGB equivalent.
Remember that colors vary on different monitors.
The final wizard form identifies the two portal rules, six text file rules, and single skin rule that you created. Click the pencil button to review these rules.

The Auto-generated option on the Style tab of the Skin form indicates that the Desktop, Work, and Report CSS styles were produced by the wizard and are designed to work together. Ordinarily, leave this option selected. Do not update these text file rules directly (from the Text File form), because your changes will be overwritten if you or another developer later re-runs the wizard in update mode.

To see the overall wizard results:
- Select Edit > My Profile Access Group. Enter WorkManager on the list of secondary portal layouts on the Settings tab of your own access group.
- Select View > My Profile. Confirm that the RuleSet Version containing your newly constructed WorkManager portal and other wizard outputs is included on your own RuleSet list. (This RuleSet version must appear above any other RuleSet version that contains a portal rule named WorkManager.)
- Select File > Open > Portal > WorkManager.