Configuring a benefit set
A benefit set is similar to a container. It holds multiple benefits and benefit groupers that are managed as a single unit. It maps to potential claims that are submitted to the health plan for payment. When you attach a benefit set to a product template, the product and plan inherits the benefit set. However, you can change the benefit set at the product or plan level.
Before you begin
Ensure that you have configured the benefits and benefit groupers that you want to include in the benefit set.
Procedure
- In the header of Dev Studio, click .
- In the left navigation panel of your work area, click New > Benefit set.
- Click New and in the Name field, enter PPO Benefit Set.
- In the Insurance line list, select Medical.
- In the Line of business list, select Commercial.
- In the Effective date field, enter 1/1/2019, and in the End date field, enter 12/31/9999.
This end date means that the benefit set might be in use indefinitely. By manually entering 9999 for the year, you do not have to continually update the end date. - In the Description field, enter Benefit set for services related to rehabilitation.
- Click .
- In the Add benefits section:
- In the Category list, select Medical.
- In the Benefit field, enter PRO Urgent Care and select it from the list.
- Select the Required check box and click .
- Repeat step 9 to include the FAC-IP Hospital and FAC-Urgent Care benefits.
- In the Add groupers section:
- In the Category list, select Medical.
- In the Benefit field, enter Rehabilitation-Services and select it from the list.
- Click .
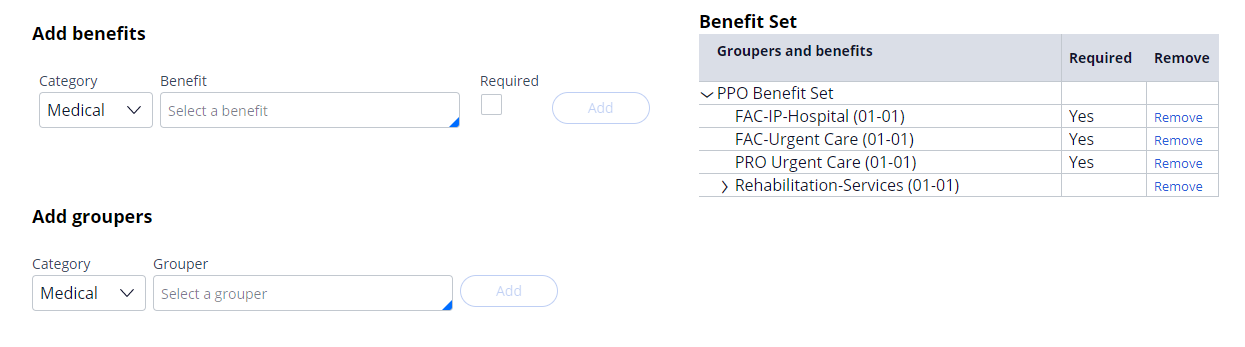
Benefits and grouper in the benefit set
- Click .
- In the Review and submit step, if needed, follow these steps:
- For the specified benefit, click the Open this item for review icon to review the benefit, and then close the window.
- For the specified benefit, click the up link or down link to reorder the benefits.
- Click .
- Because you have manager credentials, approve the benefit set entity by following these steps:
- Click Actions > Approve and hold at the top right.
By selecting Approve and hold instead of Approve, the entity remains in the current stage, but is available for use in other tasks. To advance the entity to the next stage, click Approve. - In the Approve section, click .
- Click Actions > Approve and hold at the top right.
What to do next
Configure your networks. See Configuring networks.
Previous topic Configuring a benefit grouper Next topic Configuring networks