|
|
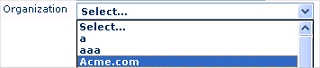
You can associate a Dynamic Select control with a field on a work object form or flow action form. You can create cascading Dynamic Select controls, so that the choices that users see at runtime for a second field are determined by their earlier selection in a previous field.
In most cases, you do not need to code XML or HTML. For advanced cases and to aid in testing Dynamic Select controls, see Dynamic Select — Internal operations and advanced features.
 A Dynamic Select control
is an optional feature you can add to work object forms
(through HTML rules, harness rules, or section rules) and
other HTML forms to speed user input. The user chooses from
one list, computed on demand, to determine a (possibly
distinct) value to assign to the property. For example, a
user may choose a school course name "Introduction to
Computers" from a list that shows only courses with
unfilled enrollment. Reflecting the user's choice, the
Dynamic Select control may assign a corresponding value such
as COMP101 to the property.
A Dynamic Select control
is an optional feature you can add to work object forms
(through HTML rules, harness rules, or section rules) and
other HTML forms to speed user input. The user chooses from
one list, computed on demand, to determine a (possibly
distinct) value to assign to the property. For example, a
user may choose a school course name "Introduction to
Computers" from a list that shows only courses with
unfilled enrollment. Reflecting the user's choice, the
Dynamic Select control may assign a corresponding value such
as COMP101 to the property.
![]() Don't use a Dynamic
Select control if the contents of the drop-down list is
stable and short; consider listing the values on the Table Edit area of the General tab of the Property
form. Don't use a Dynamic Select control if an ordinary
HTML Select box meets the need. See Harness, Section, and Flow Action
forms — Adding A Select control.
Don't use a Dynamic
Select control if the contents of the drop-down list is
stable and short; consider listing the values on the Table Edit area of the General tab of the Property
form. Don't use a Dynamic Select control if an ordinary
HTML Select box meets the need. See Harness, Section, and Flow Action
forms — Adding A Select control.
![]() 1. Preparations: Using a list view
rule
1. Preparations: Using a list view
rule
Use this procedure when both the values that users select and the values for the property are present as two columns in a list view rule.
Find or create a list view rule. Enter ALL as
the Owner key part.
1. In the Show These Fields area of the Display Fields tab, identify two properties. Identify a property for the report column that is to contain the possible values of the property. Identify a second property is the source of text values to appear in the drop-down list. (If the displayed values are the same as the internal property values, include the property only once.)
![]() The Dynamic Select feature provides best performance
when these two properties that are exposed as columns in the
PegaRULES database table that supports the class. If they are
not now exposed, update the database schema to expose them if
feasible. This is important if the Dynamic Select control is
to be used with high frequency.
The Dynamic Select feature provides best performance
when these two properties that are exposed as columns in the
PegaRULES database table that supports the class. If they are
not now exposed, update the database schema to expose them if
feasible. This is important if the Dynamic Select control is
to be used with high frequency.
2. Complete the selection criteria, sorting, and other fields on the List View form. Don't enable report paging, as the Dynamic Select drop-down list then shows only items on the first page.
3. Save and test the new list view rule.
![]() Often, values for the
Dynamic Select control are instances of a class that users
maintain with the Data Table editor. If so, you can use
either of two standard list view rules:
Often, values for the
Dynamic Select control are instances of a class that users
maintain with the Data Table editor. If so, you can use
either of two standard list view rules:
InsNameStartsWith
parameter to the desired prefix text. ![]() 2. Preparations: Using an
activity
2. Preparations: Using an
activity
![]() 3. Drag and drop the Dynamic Select
control
3. Drag and drop the Dynamic Select
control
Click the down-arrow (![]() ) at the right end of the
Advanced control group (
) at the right end of the
Advanced control group (![]() ) and select
the Dynamic Select control (
) and select
the Dynamic Select control (![]() ). Drag the
control to the cell or header that is to contain the property
value. When the pointer changes shape to indicate that a
single cell is selected, release the mouse button to drop the
control.
). Drag the
control to the cell or header that is to contain the property
value. When the pointer changes shape to indicate that a
single cell is selected, release the mouse button to drop the
control.
If the cell is not empty, the dropped control replaces the
current contents of the cell. Click the magnifying glass
(![]() )to
display the Cell Properties panel.
)to
display the Cell Properties panel.
![]() 4. Complete the Cell Properties panel
— Top fields
4. Complete the Cell Properties panel
— Top fields
Complete top fields of the Cell Properties panel.
Your updates to this panel can update the rule form immediately or upon clicking Apply, depending on the Property Panel settings in your Edit preferences. See Setting preferences. If the panel is pinned(![]() ), the
wireframe on the rule form changes immediately to reflect
your inputs. If the panel is not pinned(
), the
wireframe on the rule form changes immediately to reflect
your inputs. If the panel is not pinned(![]() ), click Apply to apply your inputs.
), click Apply to apply your inputs.
Field |
Description |
||||||||||||||||||||||||||||||||||||||||
| Property |
Click the pencil icon ( You can reference properties on any page identified on the Pages & Classes tab, using the normal notation pagename.propertyname for pages other than the page corresponding to the Applies To class of the rule. |
||||||||||||||||||||||||||||||||||||||||
| Display As |
|
||||||||||||||||||||||||||||||||||||||||
| Behavior |
Optional. Leave blank if no dynamic form actions to other parts of the form are to occur based on user updates or values for this field. To establish a dynamic form action, click the
magnifying glass icon ( Click the help icon ( Event support is available for harness, section, or
flow action rules that have Generate
for set to |
![]() 5. Complete the Cell properties panel
— General tab
5. Complete the Cell properties panel
— General tab
![]() 6. Complete the Cell Properties panel — Advanced tab
6. Complete the Cell Properties panel — Advanced tab
![]() Use the
advanced approach described in this section when you require
additional control over the function and appearance of a
Dynamic Select control and are familiar with URL
encoding.
Use the
advanced approach described in this section when you require
additional control over the function and appearance of a
Dynamic Select control and are familiar with URL
encoding.
1. Find or create an activity that produces a XML document, structured to match the XML document that corresponds to a clipboard page of class Code-Pega-List.
2. Select the Advanced radio button. Complete these fields.
Field |
Description |
| SelectID |
Optional. Enter an alphabetic-only value for the ID=" " element in the <SELECT> control. An ID is needed when another Dynamic Select controls is a parent to this control and supplies a filter value. |
| Source |
Enter the query string form of the activity to call,
including values for parameters. Click the magnifying
class button ( pyActivity=myClass.myActivity¶m=value.... You can reference another HTML element (such as a parent Dynamic Select control) for a parameter value. Enclose the ID of the other element between square brackets. For example, to reference an element with ID=textbox17:
pyActivity=ActivityClass.ActivityName |
| Set Primary Page |
Select |
| Caption |
Enter a semicolon-delimited string of property names that form the visible text of Option elements, in the format: propertyName1;propertyName2;... For example. to display the name and the label of a class as the text of the Dynamic Select options elements, use the following: pyClassName;pyLabel |
| Value |
Enter a semicolon-delimited string of property names that form the values of the HTML Option elements in the format: propertyName1;propertyName2;... For example, the following string sets the values of a Dynamic Select to the class names in a list: pyClassName |
| Default |
Optional. Enter a text value that becomes the runtime default value of the Dynamic Select control. |
| DefaultCaption |
Optional. Enter a text value for the caption value in the control. For example, "Choose a state". |
| ParentID |
Optional. Enter the ID of another <SELECT > element that, when changed, triggers a refresh of this control. |
| TargetID |
Optional. Complete this field when the results of another Dynamic Select control on the same harness, section, or HTML form depends on the results selected by users for this Dynamic Select control. This technique is known as cascading. Enter one or more semicolon-delimited text value to identify the ID(s) of the other Dynamic Select controls whose values depend on the value selected in this Dynamic Select control. When a user selects a value in this Dynamic Select control, the system appends the value to the Source of the target Dynamic Select control. The activity of the latter control is then executed to populate it. The Source of the target control must end with the following syntax: parameterName=. The value of the selected option in the first Dynamic Select then becomes the value of the parameter in the activity of the target Dynamic Select. |
| NoDataCaption |
Optional. Enter text that appears when the activity returns an empty page. If this field is blank, the default text "No results were found." appears. |
| Delimiter |
Optional. Enter one or a few characters to override the default delimiter used to concatenate multiple captions or values. If this field is blank, the delimiter is a single space character. |
| LoadMode |
Select:
|
| OnDemandCaption |
Optional. Enter an optional string to appear as the
caption of the default value when this Dynamic Select
control is set to
To call an activity, use the following syntax, using URL percent encoding for special characters: pyActivity=myClass.myActivity¶m=value.... |
| WaitTime |
Optional. Enter a value between 1 and 60 to set a maximum period in seconds after which processing times out (fail) if no results were received from the activity. If omitted, the default timeout value is 3 seconds. The system does not notify users of this timeout. |
| EnableCache |
When set to true, the Dynamic Select control instructs Internet Explorer to cache the data that it receives for a specific URL. The next time the same user accesses this control, cached information in the Internet Explorer cache appears again; the system does not call the activity. The default is true, which is recommended for best performance. This feature is especially useful when a single HTML form includes more than one Dynamic Select controls that have a common value for the Source. For example, a user may need to select one or more General Ledger codes for debits, and later one or more General Ledger codes for credits. |
| Width |
Optional. Enter a width in pixels of the drop-down area |
| ReadOnlySmartInfo |
Optional. Select a section that presents at runtime a SmartInfo pop-up display when this field appears in read-only mode. |
| ReadWriteSmartInfo |
Optional. Select a section that presents at runtime a SmartInfo pop-up display when this field appears in read-write mode. |
| SmartInfoHeader |
Optional. Enter a text string to appear at runtime as the contents of the SmartInfo header. |
| Size |
Optional. Enter a count of the number of drop-down rows presented. |
![]() About Flow Action rules
About Flow Action rules
![]() About Harness rules
About Harness rules
![]() About Section rules
About Section rules
 Optional. Enter the name of an input
parameter to the activity identified in the Activity Name field, or a parameter
affecting the list view rule identified in the View Purpose field.
Optional. Enter the name of an input
parameter to the activity identified in the Activity Name field, or a parameter
affecting the list view rule identified in the View Purpose field.