|

|
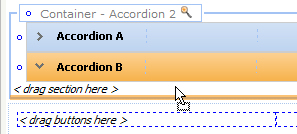
Using the Accordion control, you can add containers that comprise multiple sections; each section is configured with an accordion header. At runtime, when the user clicks one header within an accordion group, that section becomes visible and the other open section closes.
 1. Creating and adding accordions
To add an accordion container to a harness, do the following:
- Click the down-arrow (
 ) at the right end of the Layout control group (
 ) and select the Accordion control (
 ).
). - Drag and drop the control onto the form. As you move the pointer over existing frames, a yellow line indicates where the accordion will be dropped.
The accordion container appears in a wireframe on the form.
Alternatively, you can add an accordion container by selecting an existing one and clicking the Insert Row Above ( ) or Insert Row Below (
 ) icon.
To add accordions to a container, do the following:
- Select the Accordion control and drag it onto a top or bottom accordion border.

- Release the pointer. A new accordion appears on the below (or above) the existing accordion.

- Add a section to an accordion by dragging and dropping a section from the Application Explorer, or using the Section control (
 ) . See Harness, Section and Flow Action forms — Adding a section.
 Make the desired accordion within a container front-most when you save the harness, as your choice determines which accordion is front-most in the initial runtime presentation. You can change the order by dragging and dropping individual accordions.
To delete an accordion, select it and click the Delete Row icon (![]() ). Do not use the Delete Cell icon (
). Do not use the Delete Cell icon (![]() ). If this is the only accordion in a group, the container is deleted.
). If this is the only accordion in a group, the container is deleted.
 2. Complete the accordion container properties panel
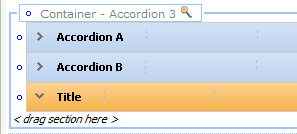
Each accordion within a container has its own properties panel. To access it, select the accordion header to make it active, and click the magnifying glass icon (![]() ) at the top-level header of the wireframe. Each accordion is numbered — the value appears in the header and in the panel. When you select an accordion header, the number changes to match the accordion. For a description of the properties, see Harness form — Adding a container.
) at the top-level header of the wireframe. Each accordion is numbered — the value appears in the header and in the panel. When you select an accordion header, the number changes to match the accordion. For a description of the properties, see Harness form — Adding a container.
Note the following:
- Do not change the Header Type (
Accordion). - You can select the New Layout? option on the General tab to remove an accordion from a group, and add it as a new accordion group directly below the original group. Deselecting this option causes the separated accordion to merge back into the original group.
- You can specify Edit Options for this container:
Auto— uses the edit mode of the harness. For example, a New harness is editable, while a Review harness is read only.Editable— makes the container editable, regardless of the edit mode of the harness.Read Only— specifies the container as read only. You can override this setting for cells within a section or section include by setting the Edit Options on the cell Properties panel toEditable.

 Harness forms