|

 Case Manager portal — Using the My Cases tab
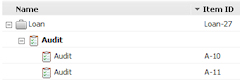
The ![]() Case tab of the Case Manager portal initially displays, in the top-level nodes of a tree grid, all cases where the following are true:
Case tab of the Case Manager portal initially displays, in the top-level nodes of a tree grid, all cases where the following are true:
- The case is in one of the operator's work pools, is not resolved, and is not covered by another case.
- The current operator is a party to that case. The node does not appear if the current operator is a party to only a subcase but not to the top-level case.
Expanding a node shows the subcases.
![]() Cases in this tab refer to work instances belonging to case types defined on the
Cases in this tab refer to work instances belonging to case types defined on the ![]() > Process & Rules > Case Management > Case Designer tab, and use the same case-type icons. You can customize the icons using the Define > Appearance right-click menu option in the tab.
> Process & Rules > Case Management > Case Designer tab, and use the same case-type icons. You can customize the icons using the Define > Appearance right-click menu option in the tab.
![]() To ensure that an operator's cases appear in this tab, name the operator in a work party rule referenced in the Work Parties Rule field on the top-level case type rule's Processes tab. Use the Define > Parties right-click menu option in the Case Designer to edit this work party rule. See Case Management page.
To ensure that an operator's cases appear in this tab, name the operator in a work party rule referenced in the Work Parties Rule field on the top-level case type rule's Processes tab. Use the Define > Parties right-click menu option in the Case Designer to edit this work party rule. See Case Management page.
The case information, collected in the new case work harness, is displayed under the following fields:
Heading |
Description |
| Name |
Name of the case type as it appears in the Case Designer. If available, appends the customer name (.pyCustomerName) to the case name. If the item is ad hoc work, the name is New ad hoc work for: <case type name>. Two or more subcases of the same type with the same parent are nested beneath the subcase name.
|
| Item ID | The unique identifier assigned by the application to this case. A prefix or suffix portion of this identifier can help users remember the application or work type. By default, ad hoc instances use the prefix "C-". See Understanding work item IDs. |
| Owner | The work item owner. See Ownership. |
| Creation Date | The date and time the case was created by the user or by the system. |
| Urgency | Indicates the case's urgency value. By default, a value of 10 is considered of normal priority. A red urgency clock |
| Deadline | For this case, the time remaining from the current time to the overall deadline time, or the time elapsed from the deadline to the current time. The deadline time is specified this case type's service level rule (.pyCaseTypeDefault), used by the .OverallSLA flow.
You can set goals and deadlines in the service level rule, or from the Case Designer landing page tab using the right-click menu item Define > Goals and Deadlines. The time appears in yellow if the case has exceeded its goal but not its deadline; in red if the deadline is exceeded. A blank value in this field indicates that the Goals and Deadlines option has not been initialized, or that the service level rule is not present in this case type class. |
| Status | This item's work status (property Work-.pyStatusWork). |
The case-level and expanded subcase lists use the Work-pyMyCasesReport and the Work-.pyLoadMyCasesNested report definitions, respectively. By default, the lists show a maximum of 500 items. You can modify this value by copying the rules and updating the Maximum Number of Rows To Retrieve field in the Data Access tab.
The user can do the following in the grid:
- Double-click an item to open its review user form in a separate tab on the portal.
- Select an item to display the user form's work summary section in an embedded pane beneath the grid.
- Click a breadcrumb link in summary section's subcase header to open a parent case.
The user can perform the following tasks by right-clicking an item and opening a context menu.
| Selection | Description |
| Open | Open review user form in a portal tab. |
| Complete Item |
Resolve this case. Status becomes Resolved-Completed. The user cannot manually add a subcase to a completed case. If this case has subcases, the field appears. The user selects the Yes radio button (default) to resolve them (includes direct and nested subcases). To resolve only the selected case, the user selects No.
|
| Withdraw Item |
Reject and withdraw this case. Status becomes Resolved-Withdrawn. The user cannot manually add a subcase to a withdrawn case. The user can resolve all subcases as described in the Complete Item above. |
| Save as Template | This option is used with ad-hoc work only (see Create Ad Hoc Work below) and appears if the operator's Access Group contains the role pyPega-ProcessEngine:CaseDesigner, which contains the privilege .pyCaseInstitutionalize.
Save as Template is useful in applications where the user frequently relies on the Create Ad Hoc Work option to create process exceptions. If these exceptions become routine, the user may decide to copy the ad hoc work structure to the application's case type structure without the assistance of an application developer. When the user selects this option, the Save as Template dialog appears. The user can either add the case as a top-level case type, or as a subcase type under the current parent — the new case type appears as a Coverable Work Type in the parent's Case Type rule form. If there are subordinate ad hoc work items, the user can choose to add them to the application structure as new subcase types. When the user clicks OK, the new case type appears in the Case Designer landing page tab and in the Application Explorer. The default case type, starter flow, work parties, and activity rules are added to the new case type.
|
| Actions | Lists the connector ( |
| Create Ad Hoc Work | Create a subcase and start a work process under the parent case or another ad hoc case. Known as ad hoc work, it is not defined as a case type in the application structure. The case cannot be automatically instantiated when a parent case is created.
When the user selects this option, a modal dialog opens and presents a new work form. The Goals and Deadlines fields are used to define the subcase's overall SLA values. The Process to Start drop-down lets the user select either of two standard ad hoc flows: The user creates the ad hoc case when he or she clicks OK. The case appears in the tree indicated by an ad hoc work icon (
|
After performing an action on this tab, the user can click Refresh to refresh the current page.
 Portals in applications
