Enabling users to respond to Pulse email notifications
Users can receive Pulse emails on cases that they are following and for which they choose to receive notifications. Users also receive emails when other users reference them in posts. You can allow users to more quickly post attachments or text as replies to emails instead of having to log in to the application to reply.
For example, in a sales automation scenario, a Pulse discussion about converting a prospect to a customer is occurring on a case. A sales executive can quickly add comments to a post and attach a related document by replying to an email without logging in to the application.
Requirements
Before you begin, make sure that you have configured an email account from which to send notifications. See Configuring an email account for Pulse notifications.
Creating a service package in the application ruleset
- Click .
- Enter a short description and name for the service package.
- Click .
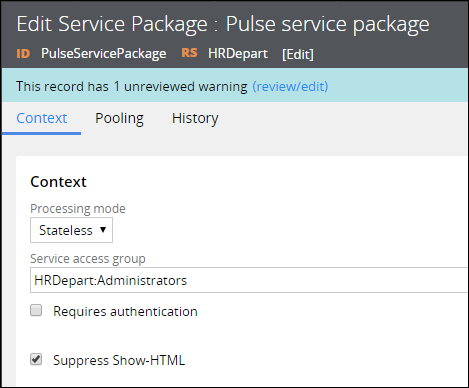
- In the Service access group field, enter the access group of your application. This access group must have access to service methods.
- Clear the Requires authentication check box to bypass authentication for all incoming emails and allow the Pega Platform™ to invoke service methods.
- Select the Suppress Show-HTML check box.
- Click .
Creating a service email rule
- Open the pzCreatePulseReply service email:
- Click .
- Expand Service Email in package PulseEmailService class PegaSocial-Message.
- Click pzCreatePulseReply.
- Click .
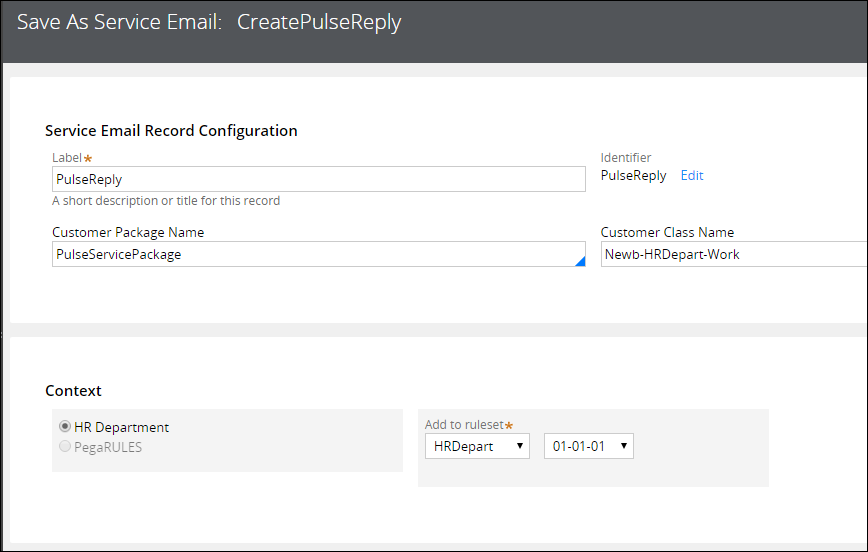
- In the Labelfield, enter a name for the rule.
- In the Customer Package Name field, enter the name of the service package that you created in the Creating a service package in the application ruleset section.
- Provide the service class in the Customer Class Name field.
- Select your application ruleset from the Add to ruleset list.
- Click .
- In the Primary page section of the Service tab, ensure that PegaSocial-Message is displayed in the Primary page class field.
- In the Service activity section, ensure that
pzPostReplyFromMailis displayed in the Activity name field.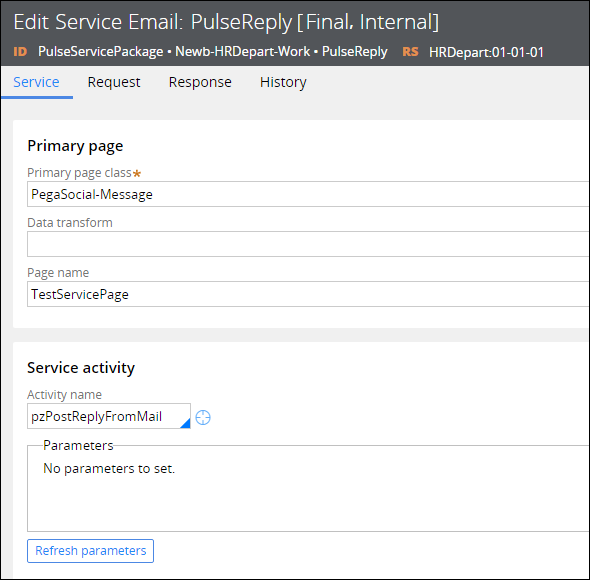
- Click the Request tab and ensure that the data that is populated in the Message header section has field names similar to those in the pzCreatePulseReply service email.
- Click the Responsetab and ensure that
Noneis displayed in the Message type list to avoid receiving blank emails when users reply to Pulse emails.You can trace the service email rule to trace replies to Pulse emails. - Click .
Creating an email listener rule
- Select .
- Provide a short description and listener name.
- Click .
- On the Properties tab, from the Startup option list, select the appropriate option for running the listener, depending on your requirements. If you select Node based startup, you can find the Node ID on the clipboard by clicking .
- In the Email Account field, enter the email account for the listener. You can use the same account that you used for sending emails.
- In the Service information section, in the Service package field, enter the service package that you created in the Creating a service package in the application ruleset section.
- In the Service class field, enter the name of the service class name that you provided in the Customer Class Name field in the Creating a service email rule section.
- In the Service method field, enter the name of the service email that you created in the Creating a service email rule section.

- Enter a value, in seconds, in the Latency period field to set the listener rest period, if required.
- Click the Processes tab and ensure that the No Attachments check box is cleared so that attachments can be sent to email replies.
- Click .
Start the email listener
- Select .
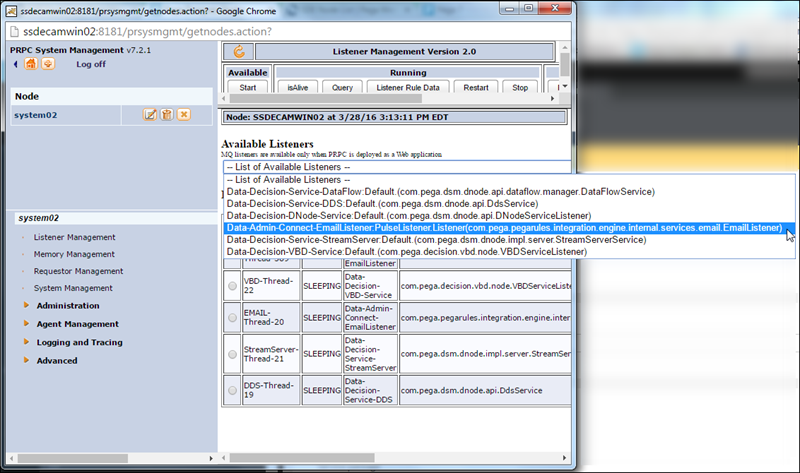
- Select the appropriate node.
- Click Listener Management.
- From the Available Listeners list, select the Pulse email listener that you created.
- Click .
For more information, see: