
When developing applications, using branches to contain changes can have many benefits. When multiple team members are making changes at once, issues are bound to arise when you least expect them. Keeping your application in a state that is ready to ship allows you to switch priorities without your inflight development impacting other changes. In this post, I'll explain how to do it.
Branch development requires that all the rulesets in the application stack are locked. If your application contains open rulesets, these will need to be locked before enabling branch development preferences.
Where did Pega App Studio place my changes?
This is a common question voiced by Pega professionals that are starting to adopt Pega App Studio. Unlike Pega Dev Studio, which requires a user to know where a change needs to reside, Pega App Studio makes these choices for the user. Branch development preferences allow the author to decide where to place a rule.
Let’s look at how branch development works in Pega App Studio.
How do I enable branch development preferences?
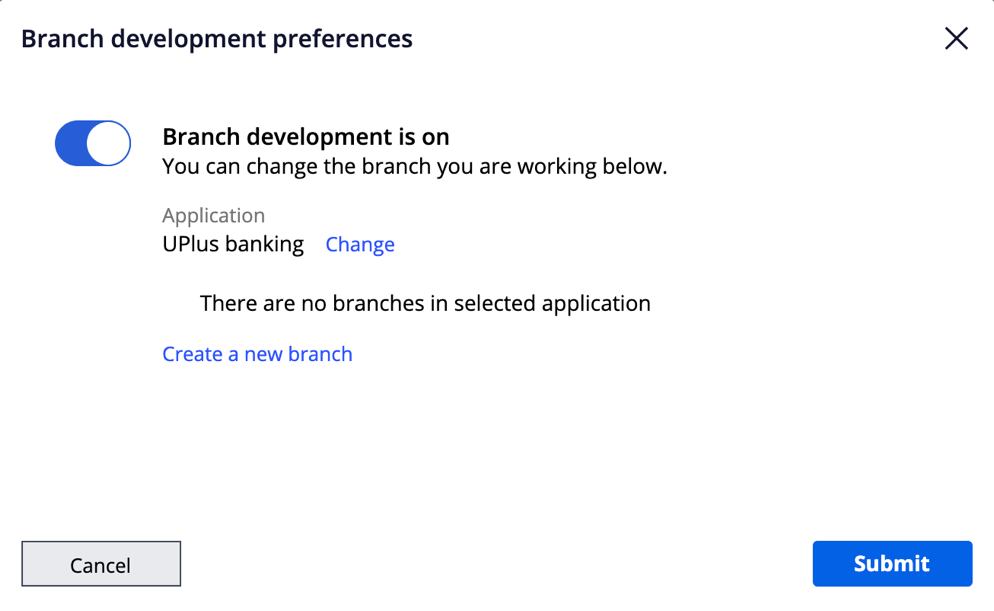
On the composer bar there is a button to launch a modal to enable and configure branch preferences. Each operator can define their own branch development preferences to contain any changes they make in a branch of their choosing.

Within the modal dialog there is a toggle to turn on branch development for your user. If the application stack contains any unlocked rulesets, you will not be able to turn on the branch development. Once you turn on the feature you can provide Pega App Studio with information that will help determine where it will make changes.
What does the “application” tell Pega App Studio?
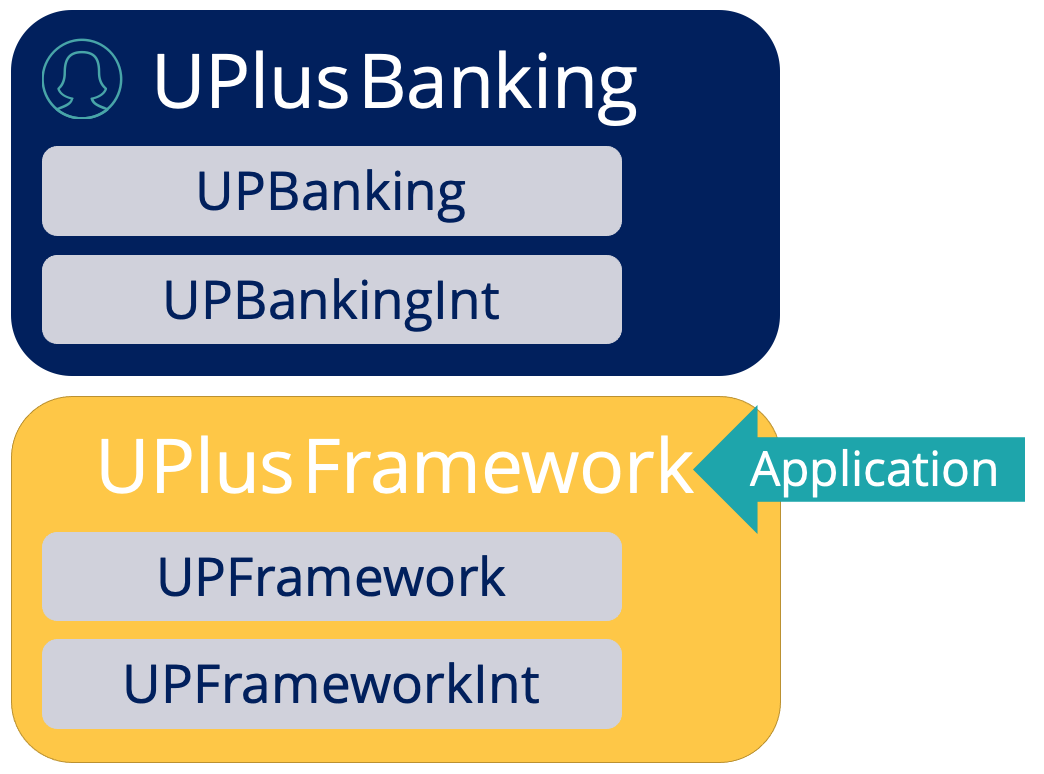
When you are working on an application that is built on another application, you can use the application setting to tell Pega App Studio the applications and rulesets that it should consider when choosing where to place a rule. (If your application is built only on an application that ships with the Pega Platform, the dropdown will only include your current application.)
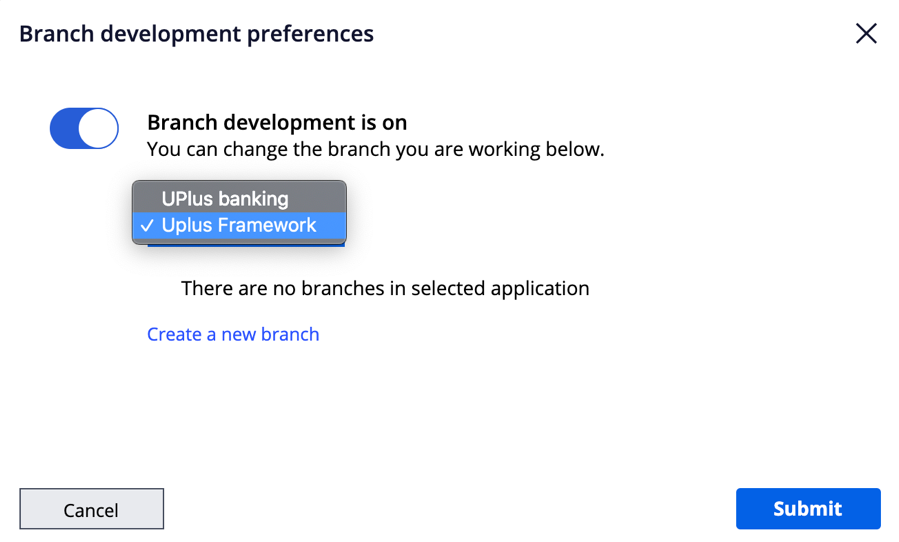
By selecting a built-on application layer, shown as “Uplus Framework” in the image above, you tell Pega App Studio to consider the rulesets in all the application layers in that layer and above.
When should I create a new branch?
It’s Ideal for branches to contain all the changes needed for an individual product update. If you are following an agile practice like Scrum, a branch will contain all the changes needed to implement a story. It can also be helpful to create a branch to contain the changes needed to address a product bug. Keeping branches focused on individual improvements removes dependencies, so you can work on multiple fixes simultaneously. This allows Pega App Studio to integrate all your changes and helps you deliver value quickly.
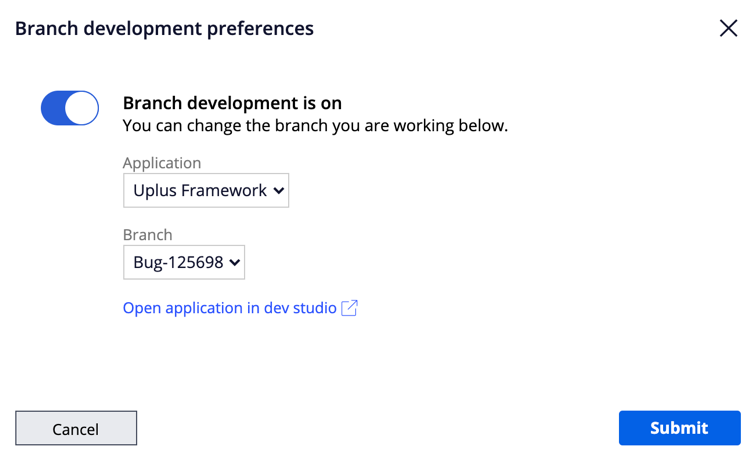
If you are working on an improvement with someone who has already created a branch for the changes, you can select the existing branch from the branch development preferences modal.
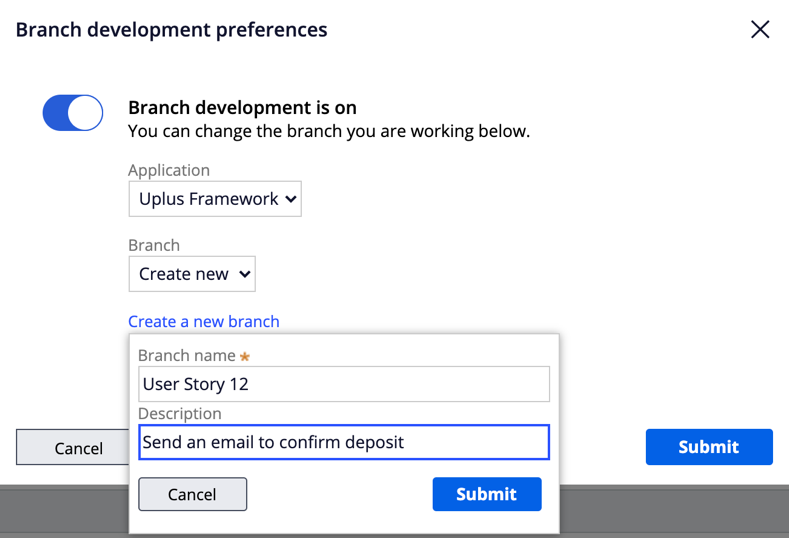
If you want to create a new branch, select the “Create new” option and fill in a branch name and description. The platform then adds the new branch to the application that the operator is logged into, not the application selected in the dropdown.
How does Pega App Studio determine which branch ruleset to use?
The defined application sets the scope of rulesets that Pega App Studio can choose from. When creating or editing something in Pega App Studio, those changes are made in a certain context, which we refer to as the “class.” When you are making changes to a case type in case designer, you are making the changes in the class that defines the case type. The class is defined in a ruleset, and Pega App Studio will try to keep any changes a user makes close to the class ruleset.
The below example application stack shows how Pega App Studio would behave in different scenarios. In this image the larger boxes denote applications (UPlus Banking and UPlus Framework), and the smaller boxes within the larger boxes define the rulesets that are within those applications. The order of the larger boxes symbolizes that UPlus Banking is built on the UPlus Framework application.
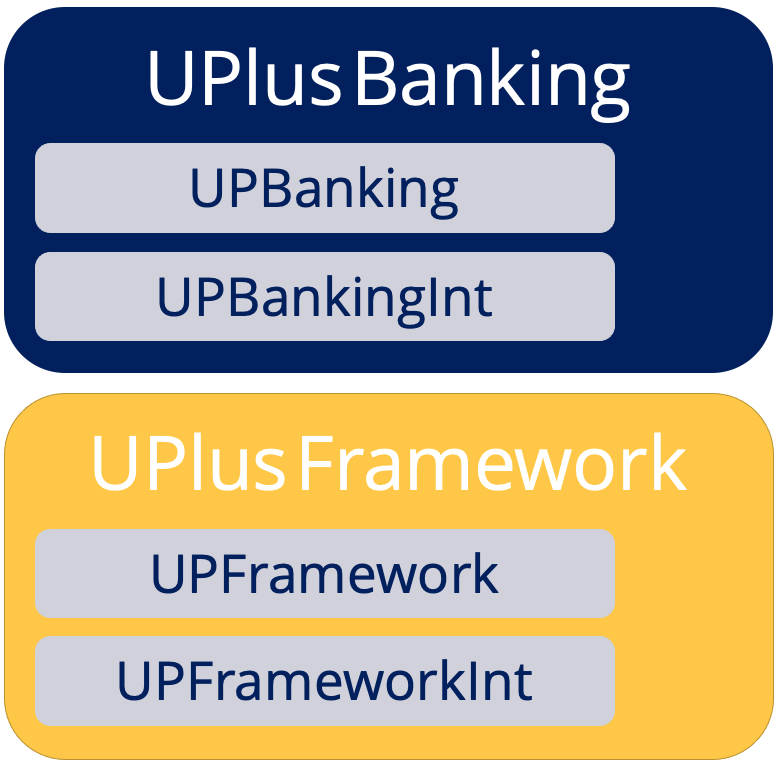
In these scenarios, the user is logged into the UPlus Banking application.
How do I make changes to the built-on application?
In our example, within the UPlus Framework application there is a data type called “Office,” which is used to define information about the different UPlus offices around the globe.
While working on the UPlus Banking application you discover that you need another field in the “Office” data type. The new data field must be available to applications that build on UPlus Framework.
To make this possible, we need the changes to be made in the UPlus Framework. Setting the branch development preference to the UPlus Framework application will make this happen. Let's take a look at how.
When the user creates the field, the system will assemble a list of possible rulesets in which it could make the change. Setting the branch development preference to the UPlus Framework application incorporates all its rulesets into the candidate list, in addition to the implementation layers’ rulesets.
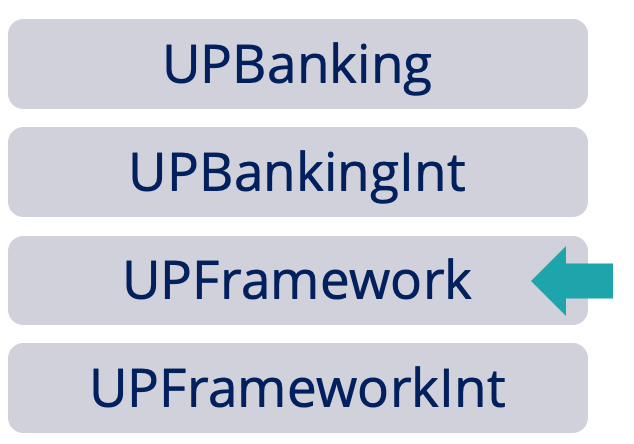
In the image above, the arrow denotes the ruleset where the “Office” data type class is defined. The system will look to see if the ruleset where the class is defined is in the list of candidates and if it can be branched.
In this scenario, The UPFramework is in the list of candidates and can be branched, so the platform saves any changes you make into a branch ruleset for UPFramework, enabling a user working in one application to add in a built-on application layer.
Specializing built-on application features
When making changes, you should remember to make them in the context of the application that needs the change. This is because not all changes apply to all applications.
For example, imagine that while your team is implementing the UPlus Banking application you hear that you will need to build a different interface to display the “Office” details.
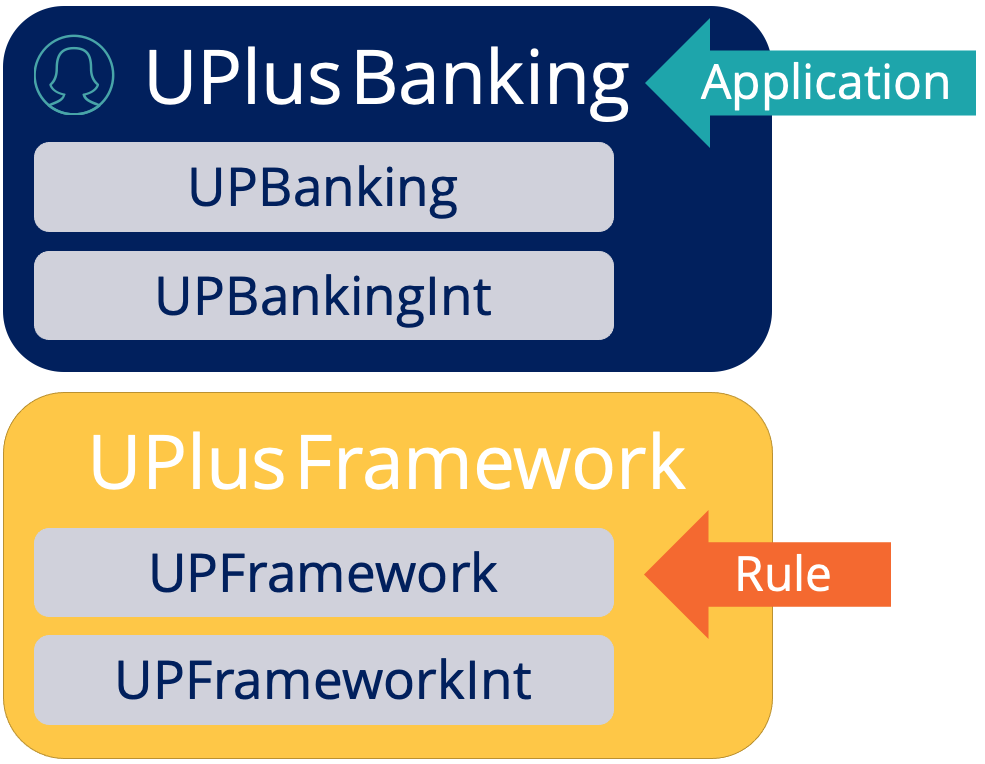
Setting the branch development preference to the UPlus Banking application includes only the UPlus Banking rulesets in the candidate list.
Let's look at what happens when a user edits a view for the “Office” data type, which is defined in the UPFramework.
The platform assembles the candidate ruleset list based on the application preference. In this example, the preference is defined as UPlus Banking, and so the candidate ruleset list includes the rulesets that are valid for that specific application layer.
First, the system will check to see if the source ruleset is available. The UPlus Framework ruleset is not in the list, so the system will look to see if the ruleset where the class is defined is in the list of candidate rulesets and if it can be branched.
The “Office” data type class is defined in the UPFramework ruleset as well and cannot be selected. The process will then examine the preferred application layer, which is set to UPlus Banking. The platform evaluates the UPBanking Ruleset first and determines that it is a valid location for the change. The platform then saves the rule in the UPBanking ruleset, which makes the changes available to the UPlus Banking application, but not to other applications built on the UPlus Framework.
Did you know that branch preferences will populate the Pega Dev Studio rule forms?
When building an application it may be necessary to switch into Pega Dev Studio to create a configuration that cannot be done in Pega App Studio. When enabled, the platform applies the branch development preference logic discussed here to any new rules you might create in Pega Dev Studio.
The platform then uses the logic to automatically add the established development branch, application layer, and ruleset to the new rule form.
Enabling branch preferences will override the default Pega Dev Studio behavior, leading to more consistent rule placement.
Recommended resources:
Visit Pega Community for step-by-step instruction on how to lock and roll ruleset variations.
Don’t forget
JOIN THE CONVERSATION on Collaboration Center
FOLLOW @PegaDeveloper on Twitter
SUBSCRIBE to the Pega Developer Podcast on Spotify or via RSS