Welcome to another entry in our How do I? series on Pega Process Mining.
In this month’s post we will be looking at how you can use your mined process data to supplement a blueprint so that it has stages and steps relevant to your existing process. Pega GenAI Blueprint™ now supports the import of BPMN files, which inform how it chooses stage and step names to create decision points. This makes it even easier to share your Pega GenAI Blueprint with stakeholders because it much more closely reflects how work is currently done in your organization and uses the same language that your stakeholders are used to seeing.
‘But where can I get a BPMN map of my processes?’ Fortunately for you as a process miner – Pega Process Mining can convert your mined processes into BPMN maps, which can then be exported at the click of a button.
Fortunately for you as a process miner – Pega Process Mining can convert your mined processes into BPMN maps, which can then be exported at the click of a button.
Cleaning up your process data
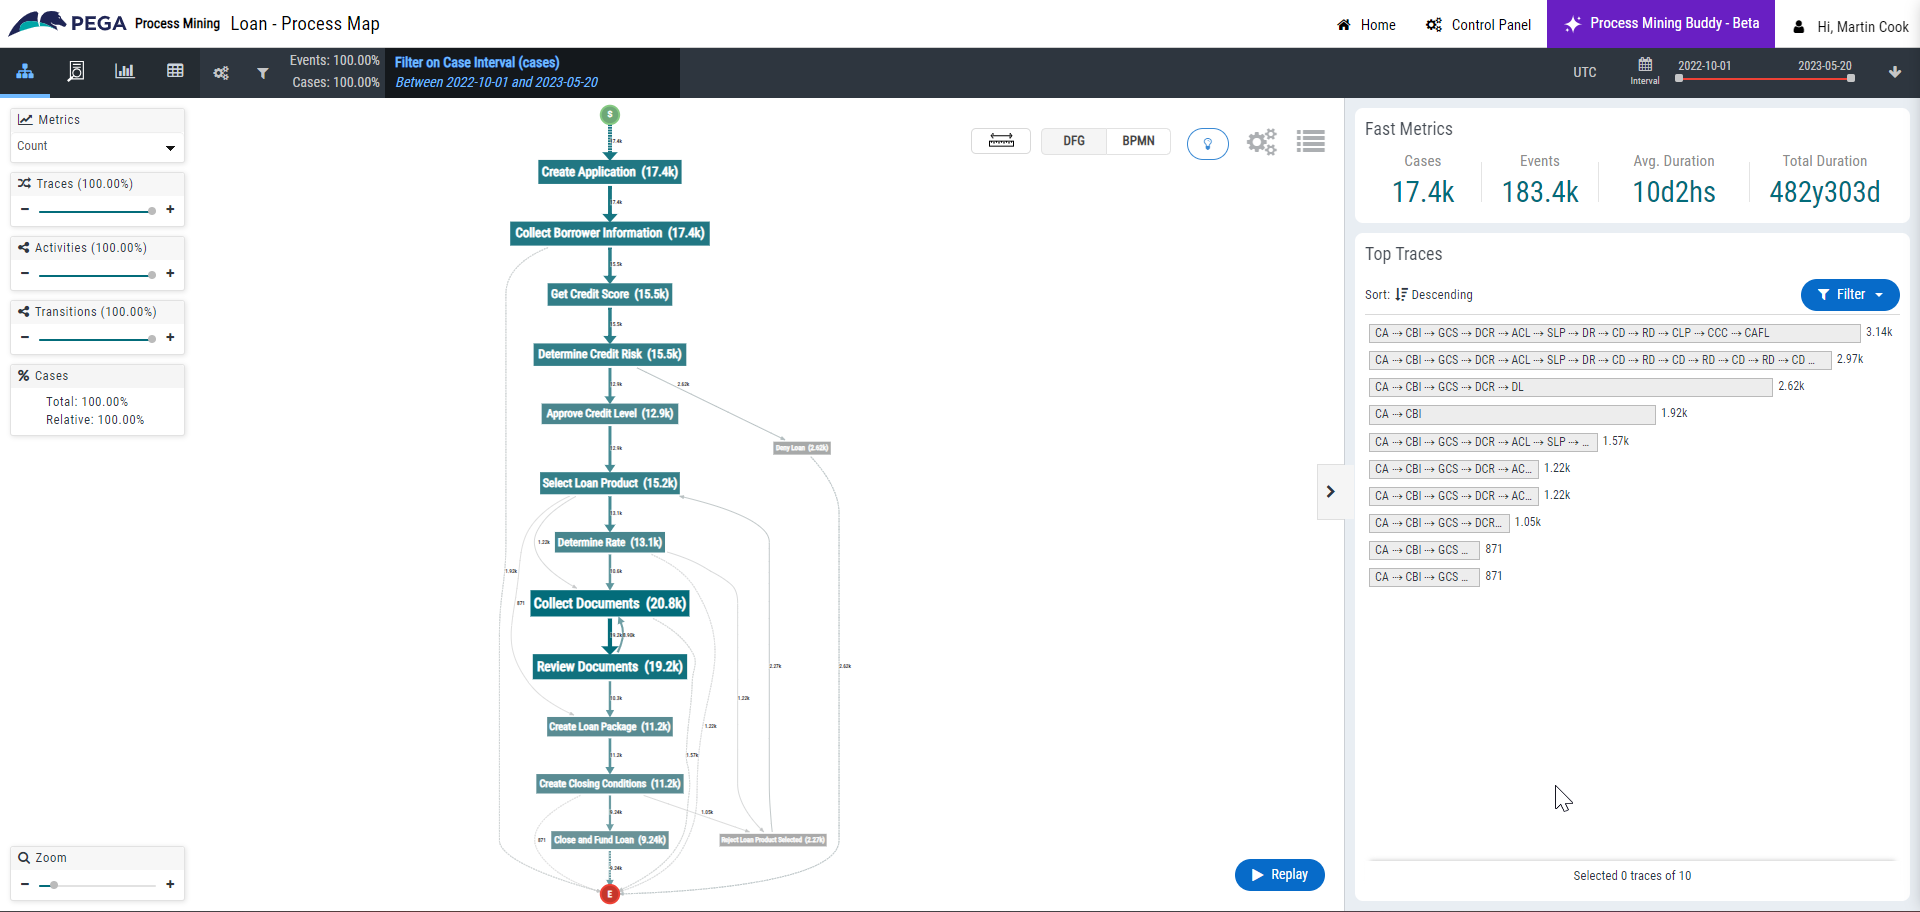
First, we need a process. Here I have a view based on loan data:
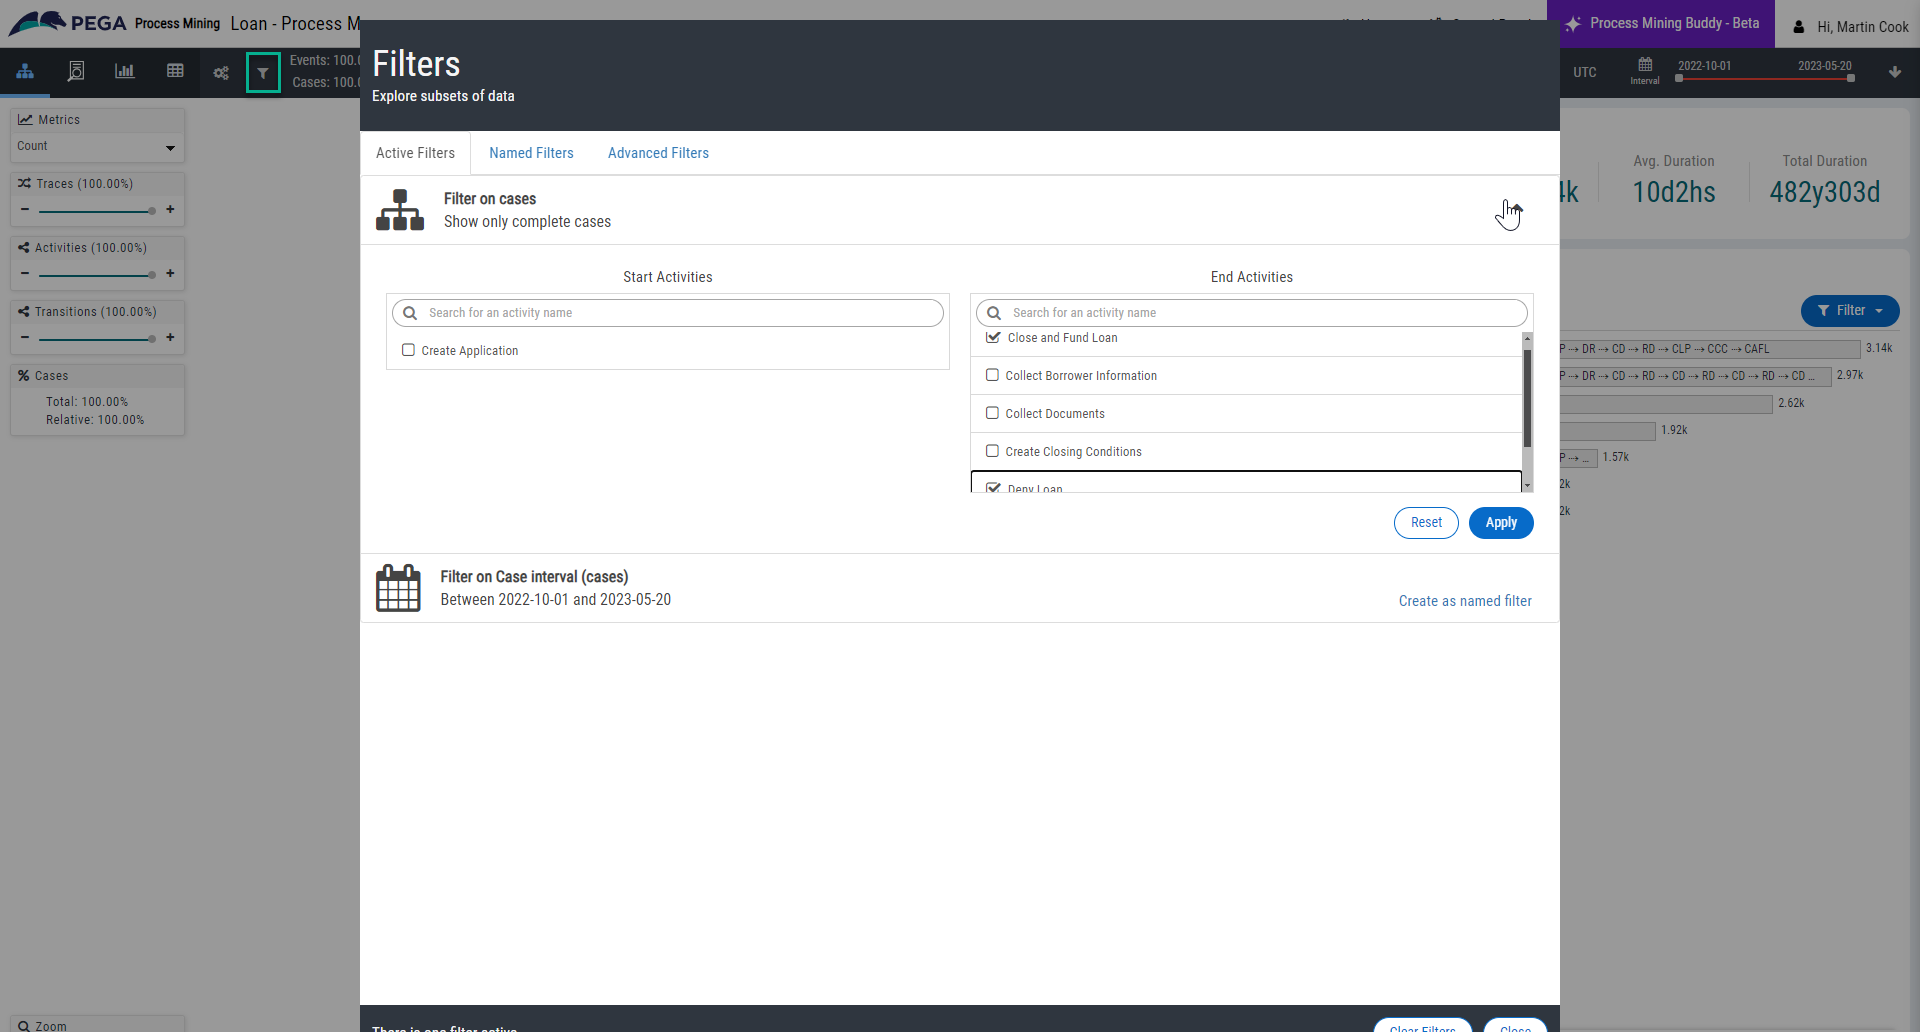
We need to make sure that we do not create a new process based on incomplete data, so in the Filters section, I expand Filter on cases – Show only complete cases and select the relevant end activities. In my case these are Close and Fund Loan and Deny Loan.
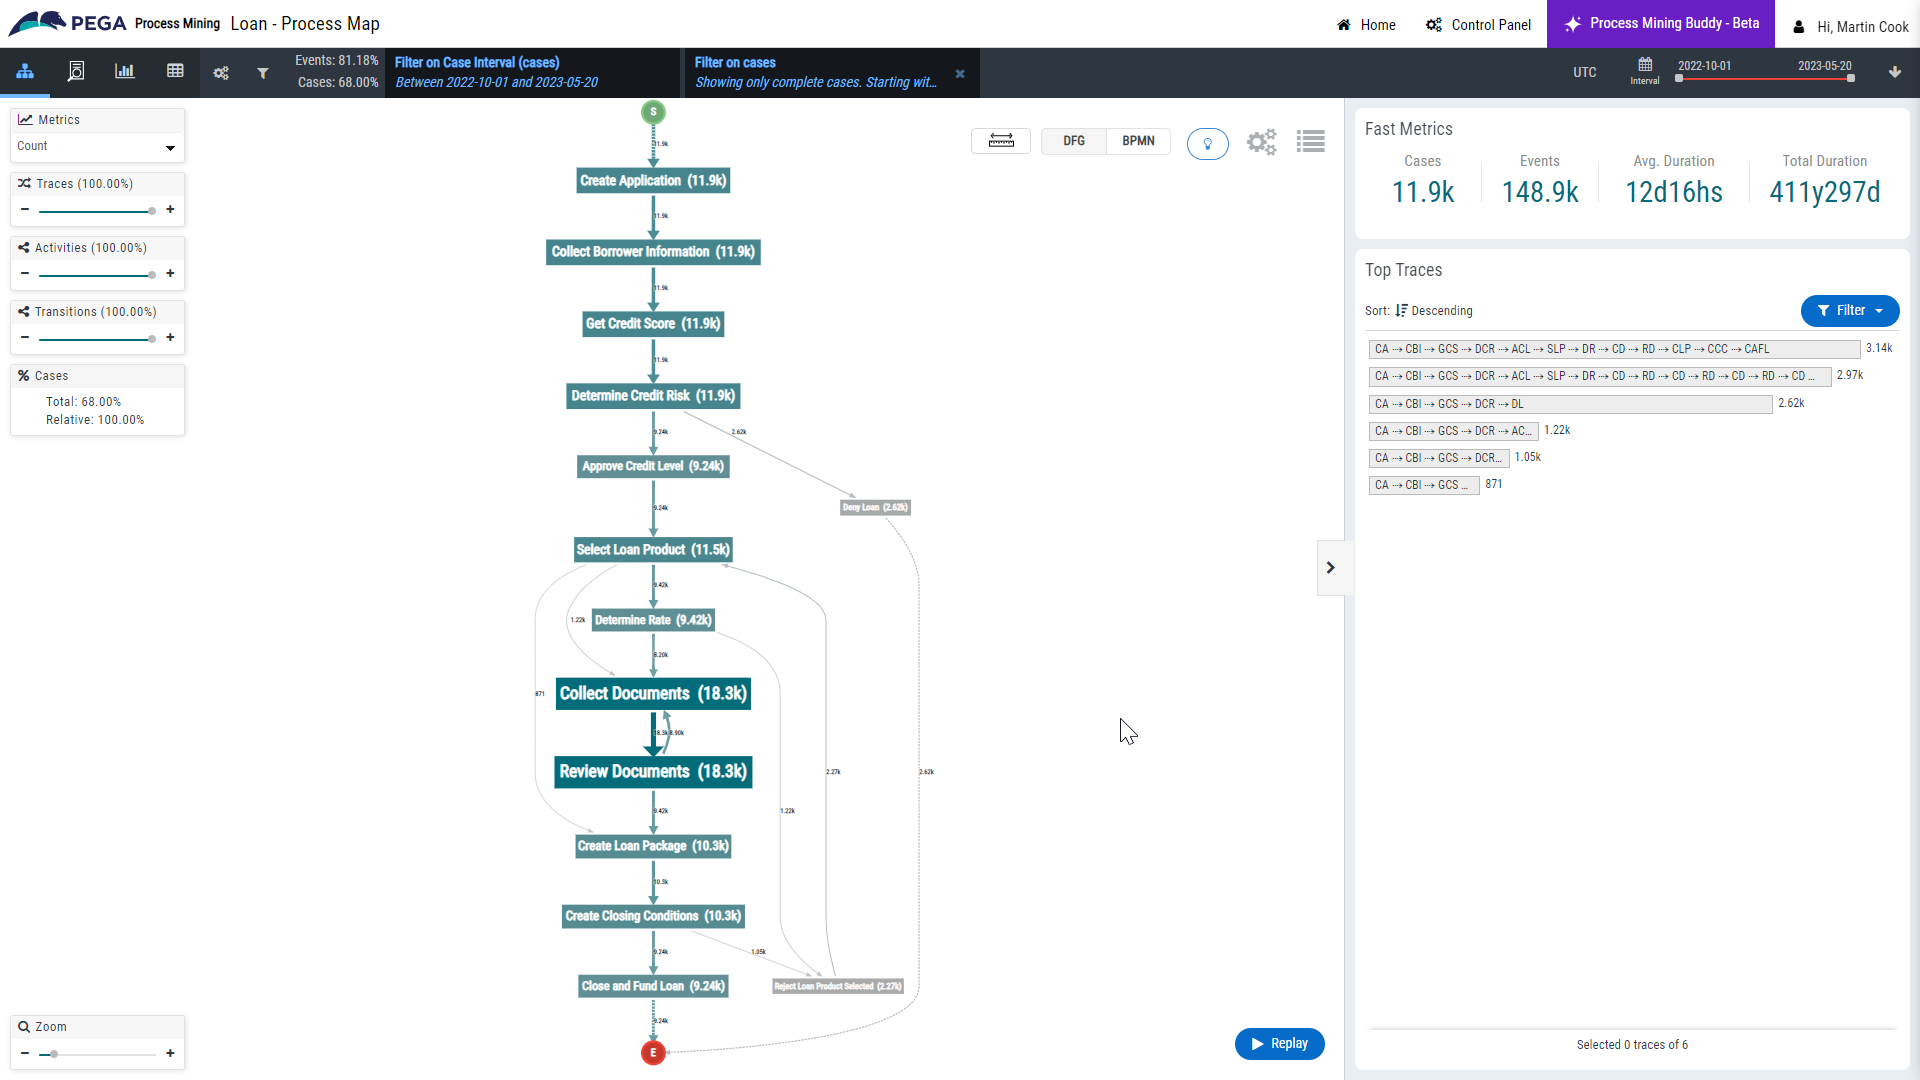
Clicking Apply and then closing the window gives us a slightly cleaner view:
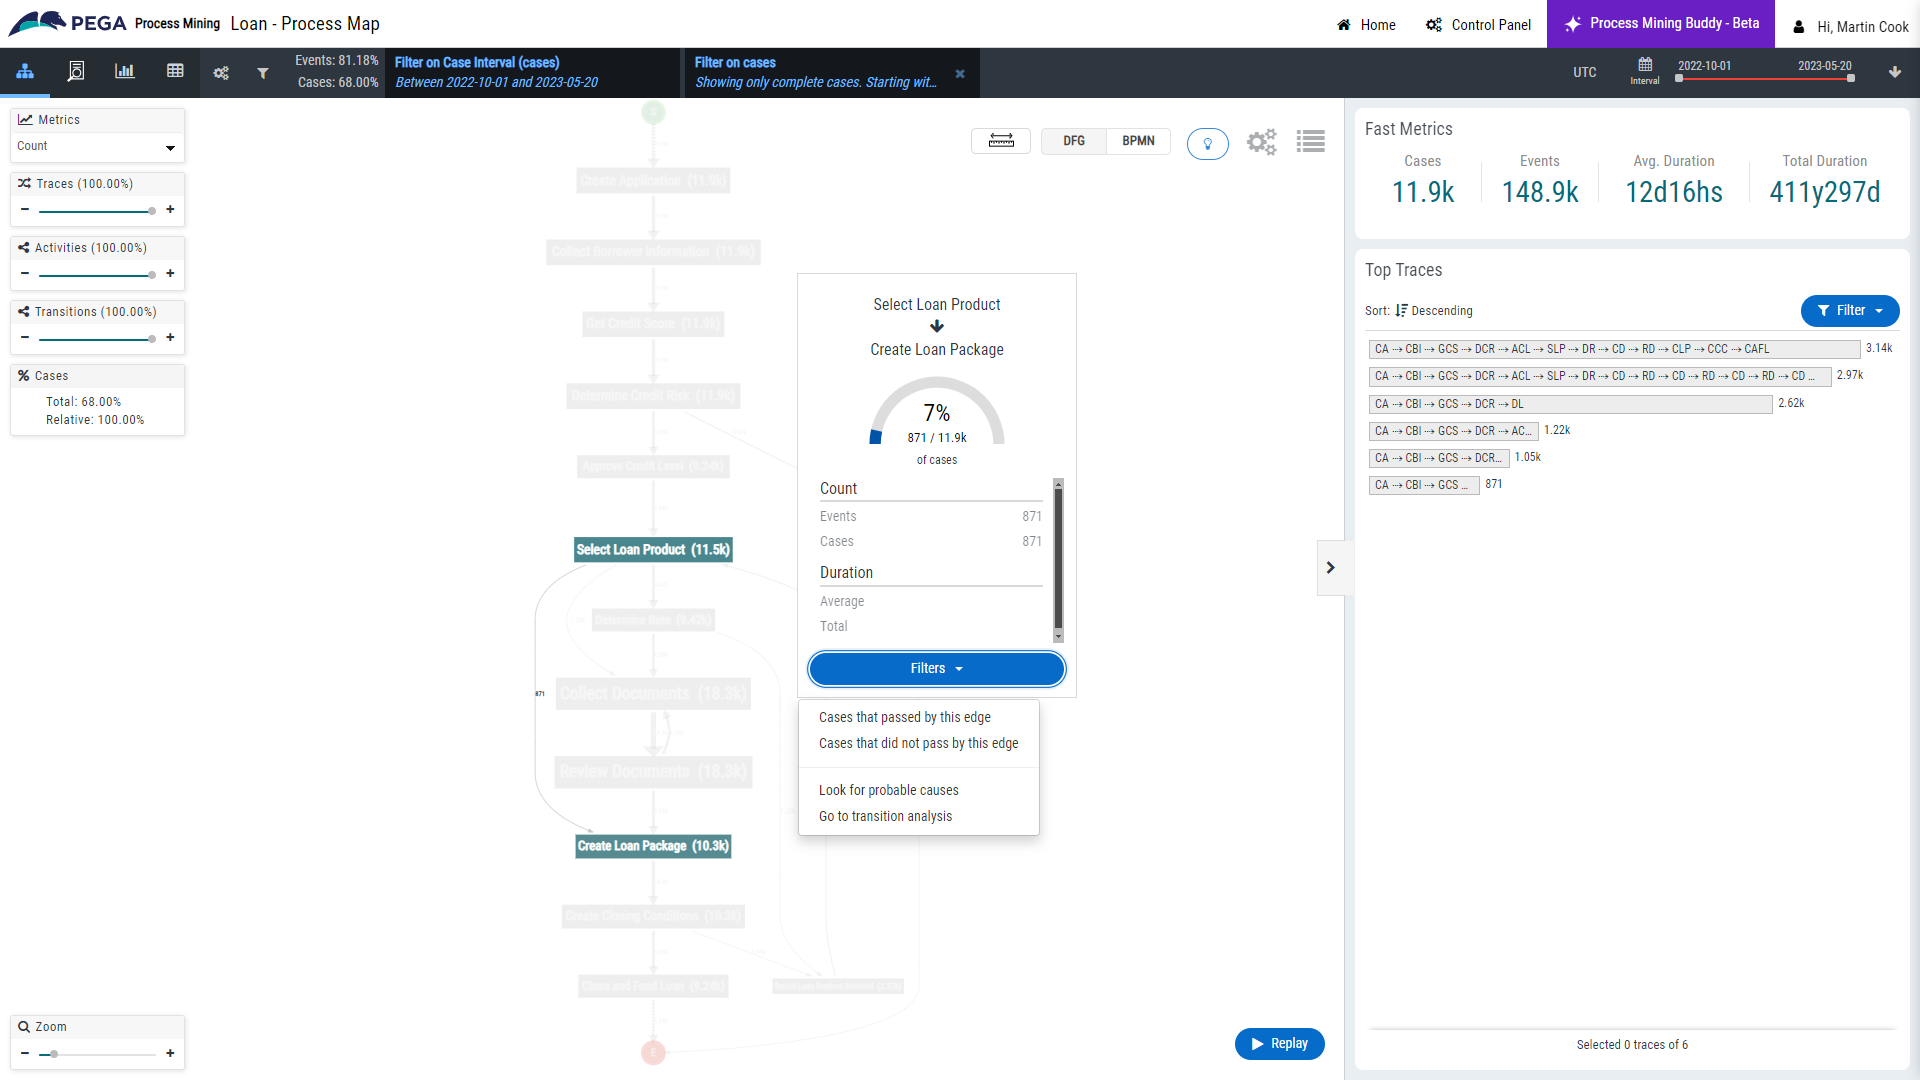
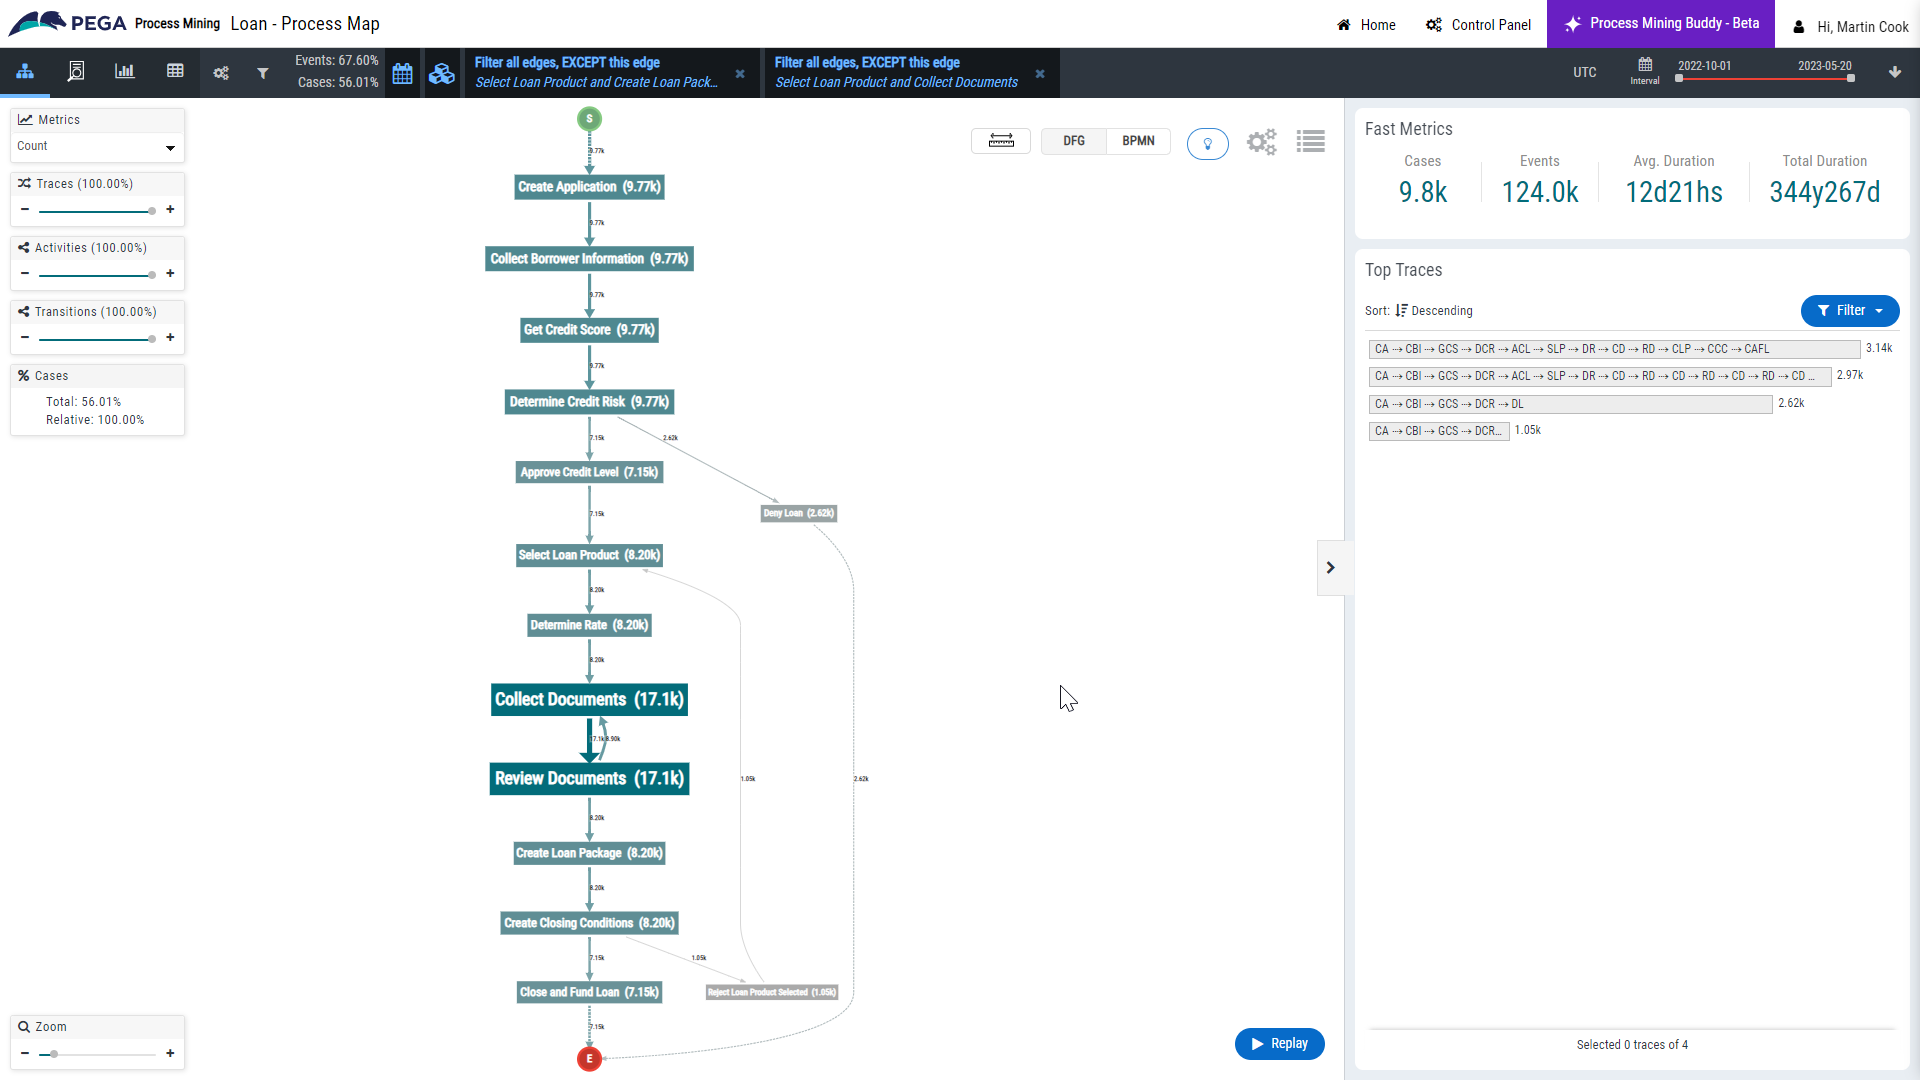
When I create my Blueprint, I do not want any cases to skip the Determine rate or Document collection steps, so I filter those steps out by left-clicking the edge (the line connecting two activities), selecting Filters, then Cases that did not pass by this edge (you may have more or fewer edges/traces that you do not want to be reflected in your Blueprint, so may have to do more or less filtering):
Now I have a Process that I would be happy to recreate in Pega GenAI Blueprint:
Exporting the BPMN file
To view this as a BPMN map – all we need to do is click BPMN in the upper-right corner of the Process map:
We can see that the BPMN map reflects all the activities and rework loops we expect.
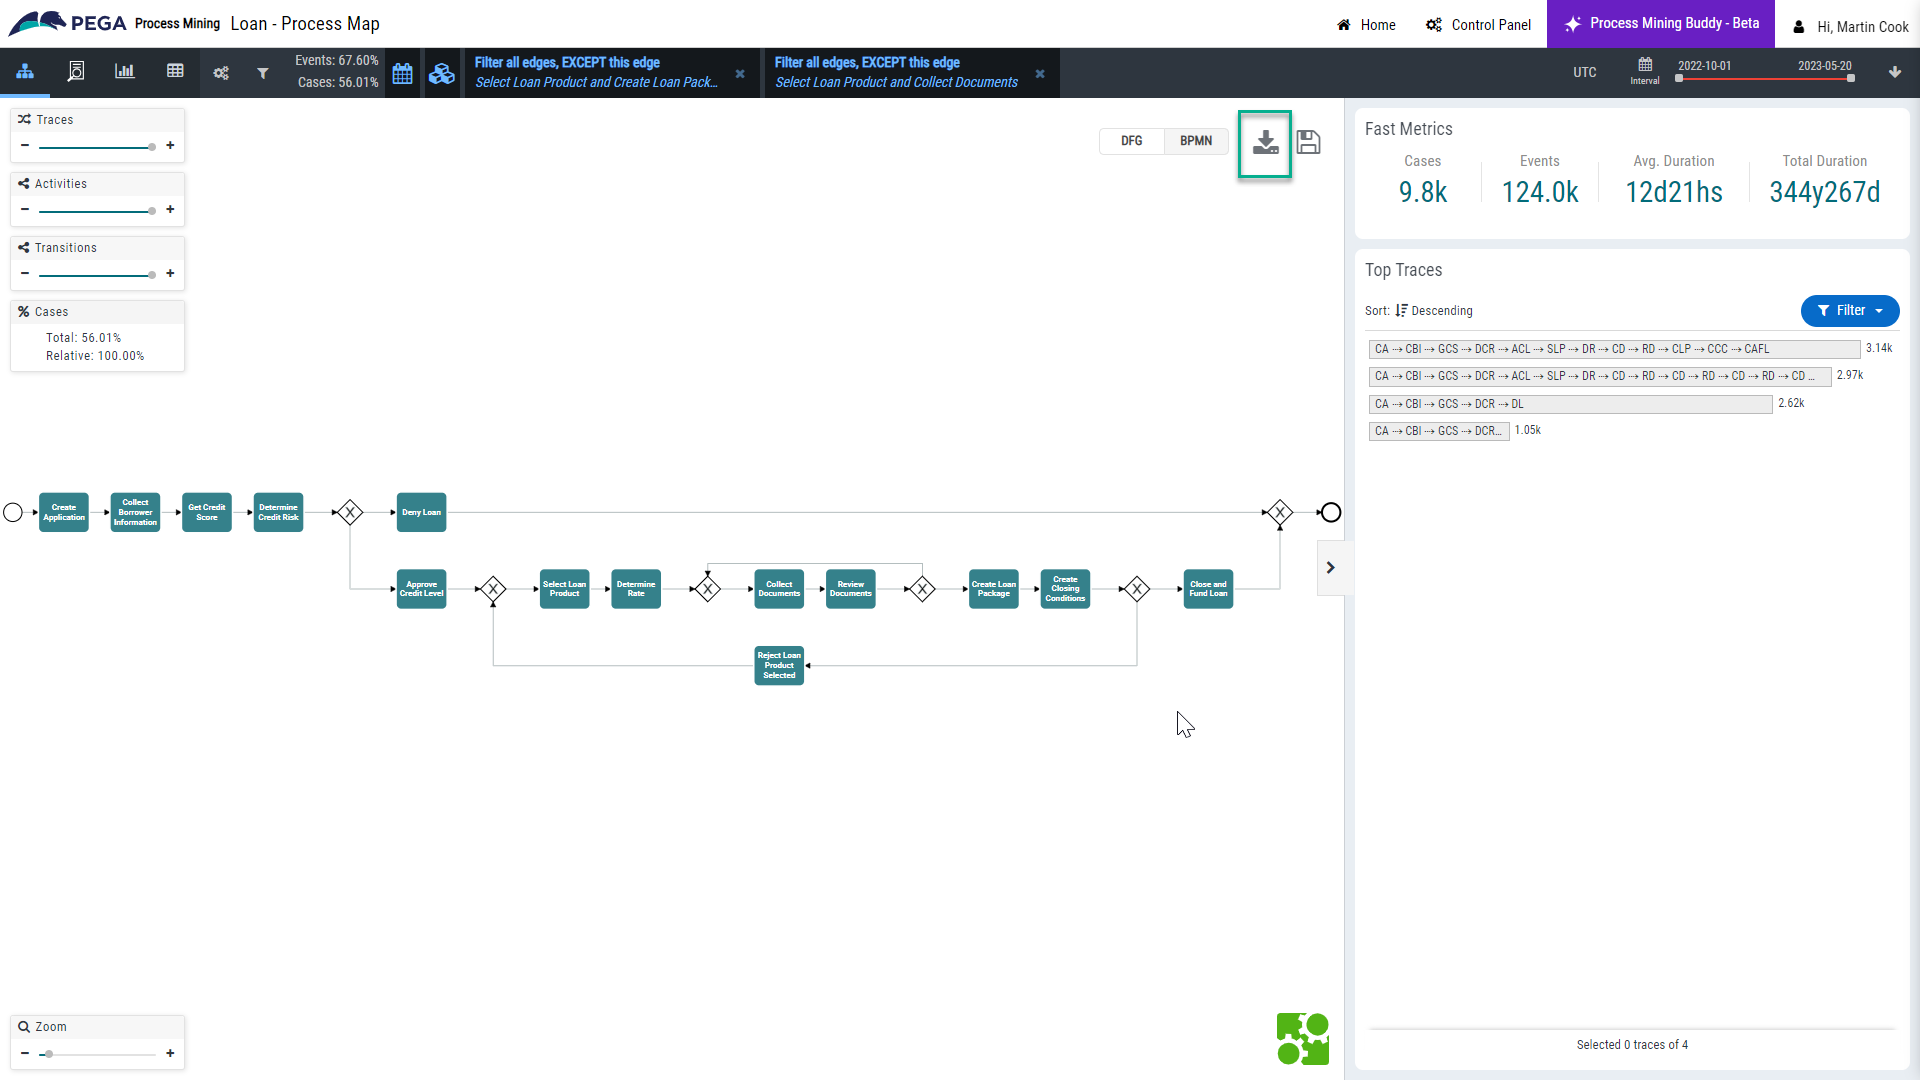
Now we just need to download it by clicking the Download icon next to the BPMN button:

Now we’re ready to start building a Blueprint!
Creating a Blueprint
In your web browser, go to www.pega.com/blueprint, log in with your Pega Community ID, and click the yellow Build a Blueprint button. Your Blueprint dashboard will then open:
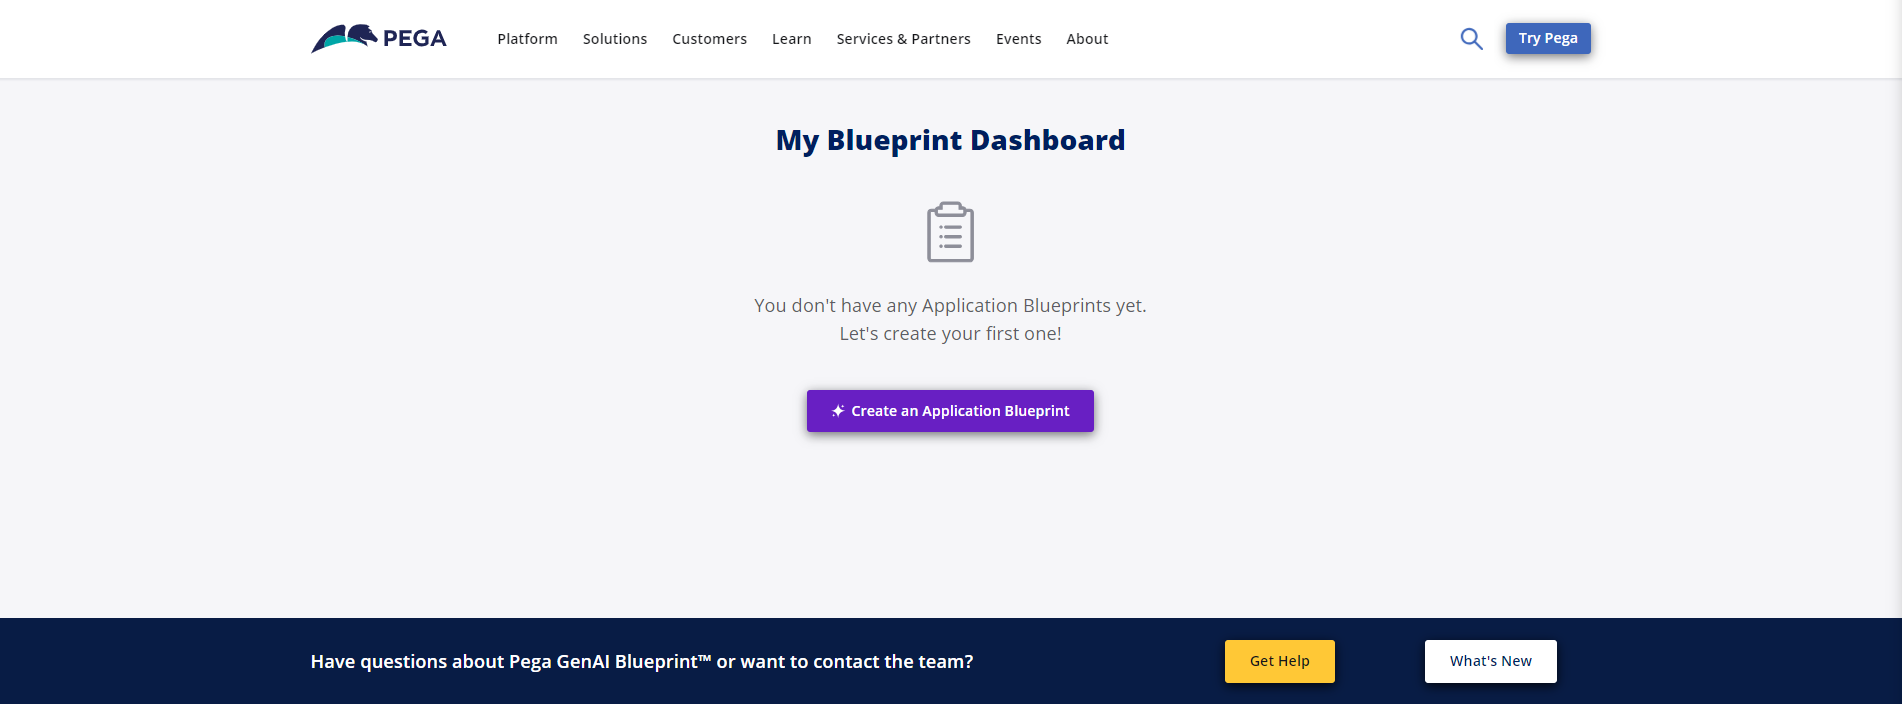
Click Create an Application Blueprint, and read and accept the terms and conditions.
Select the appropriate industry, sub-industry, and department or function for your needs:
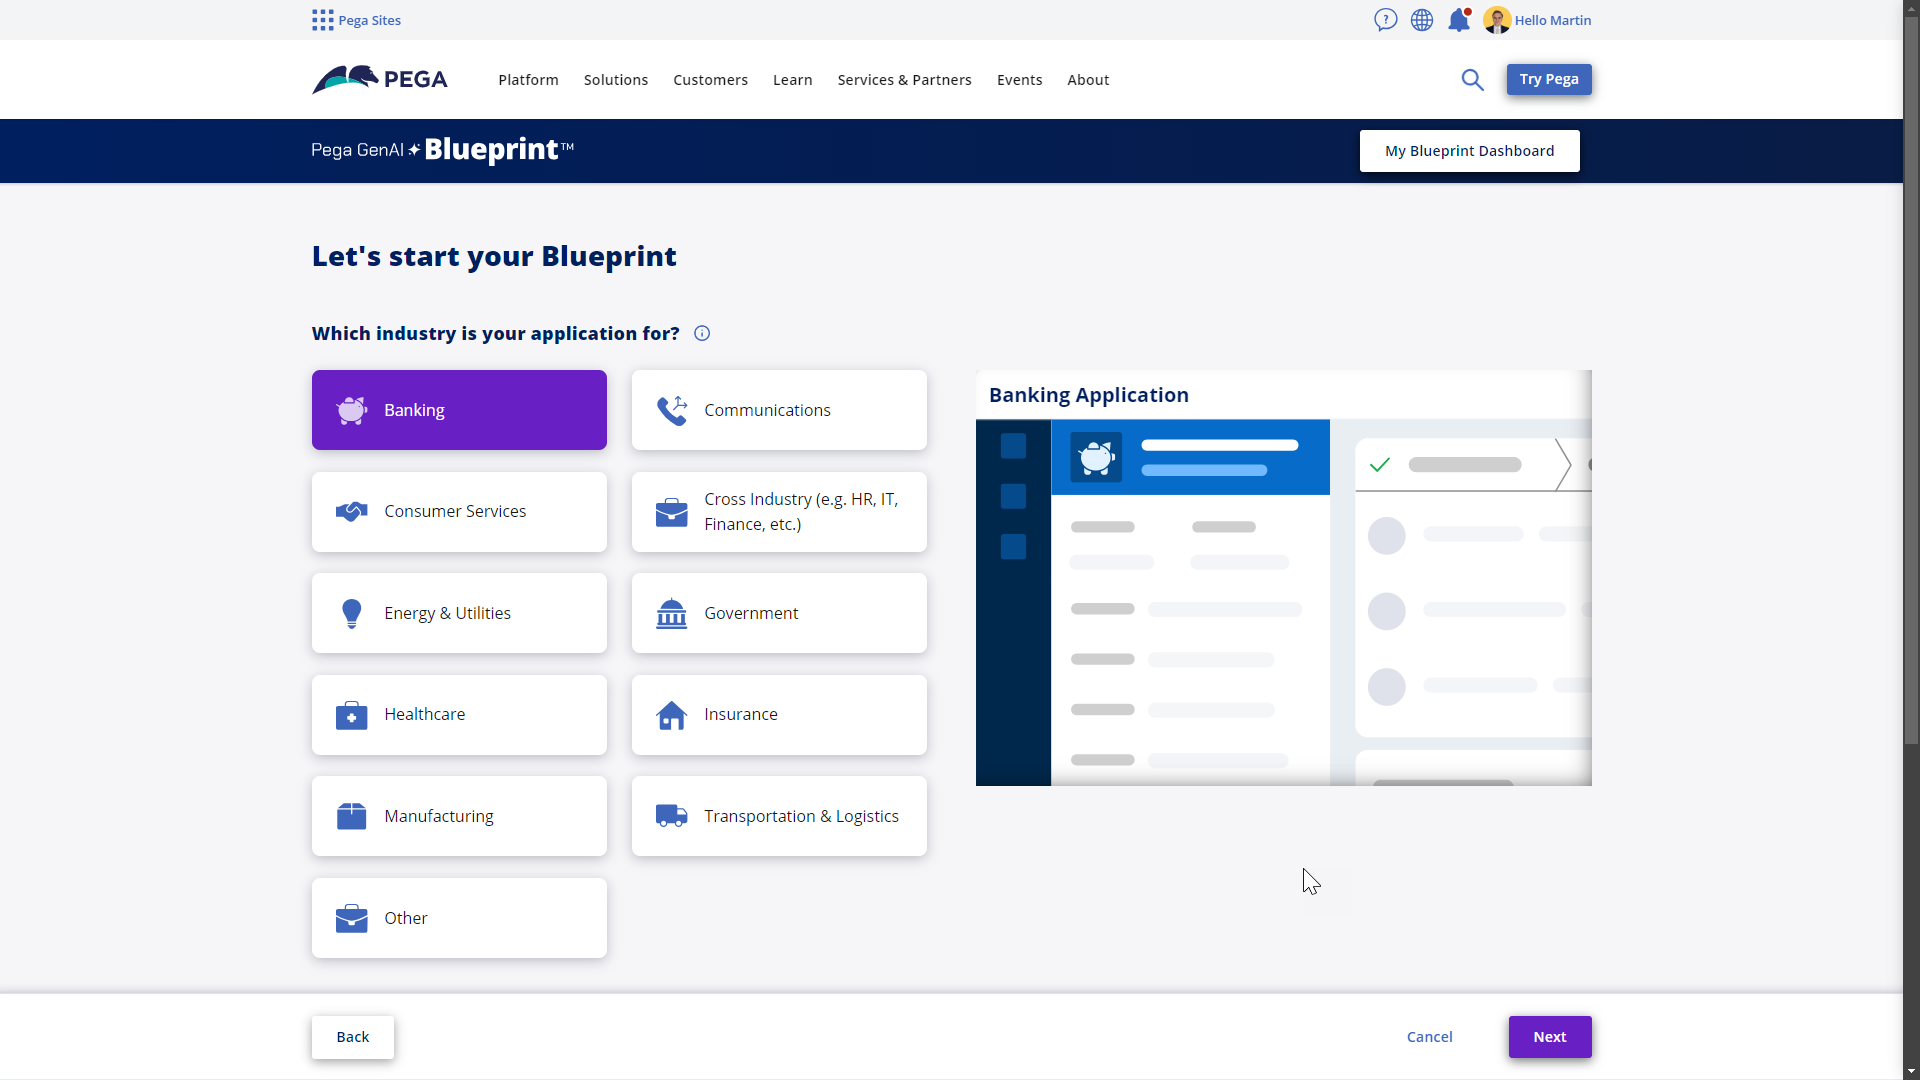
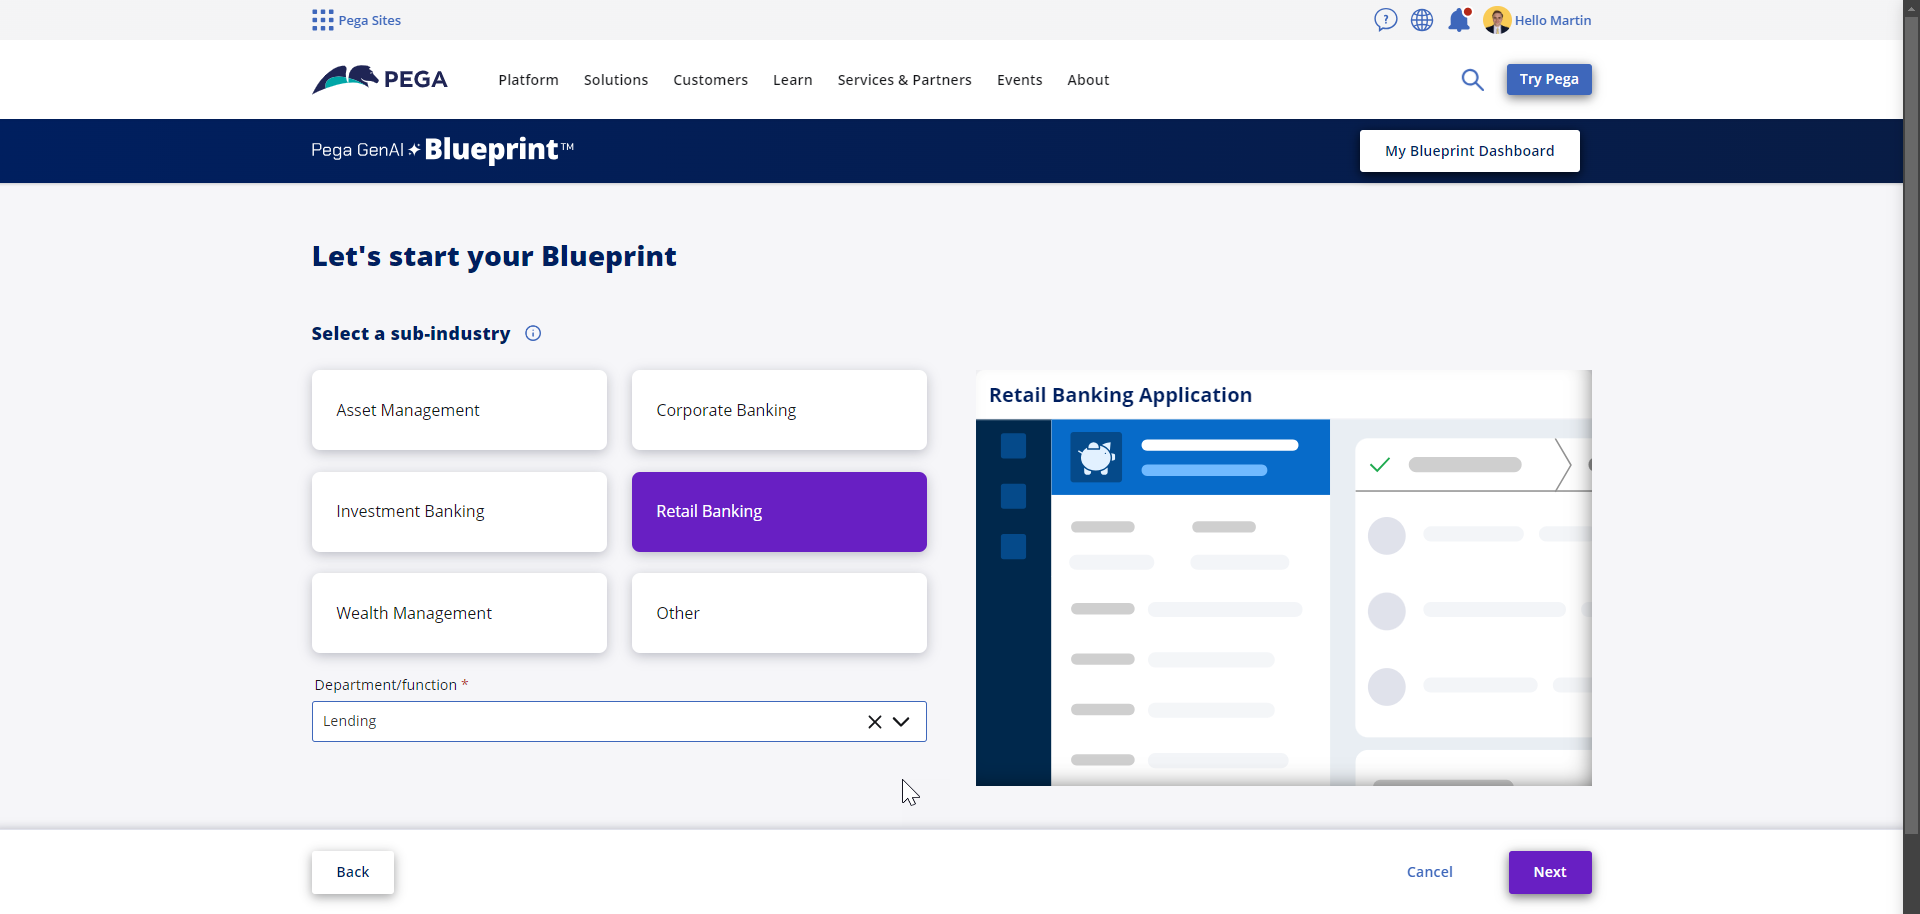
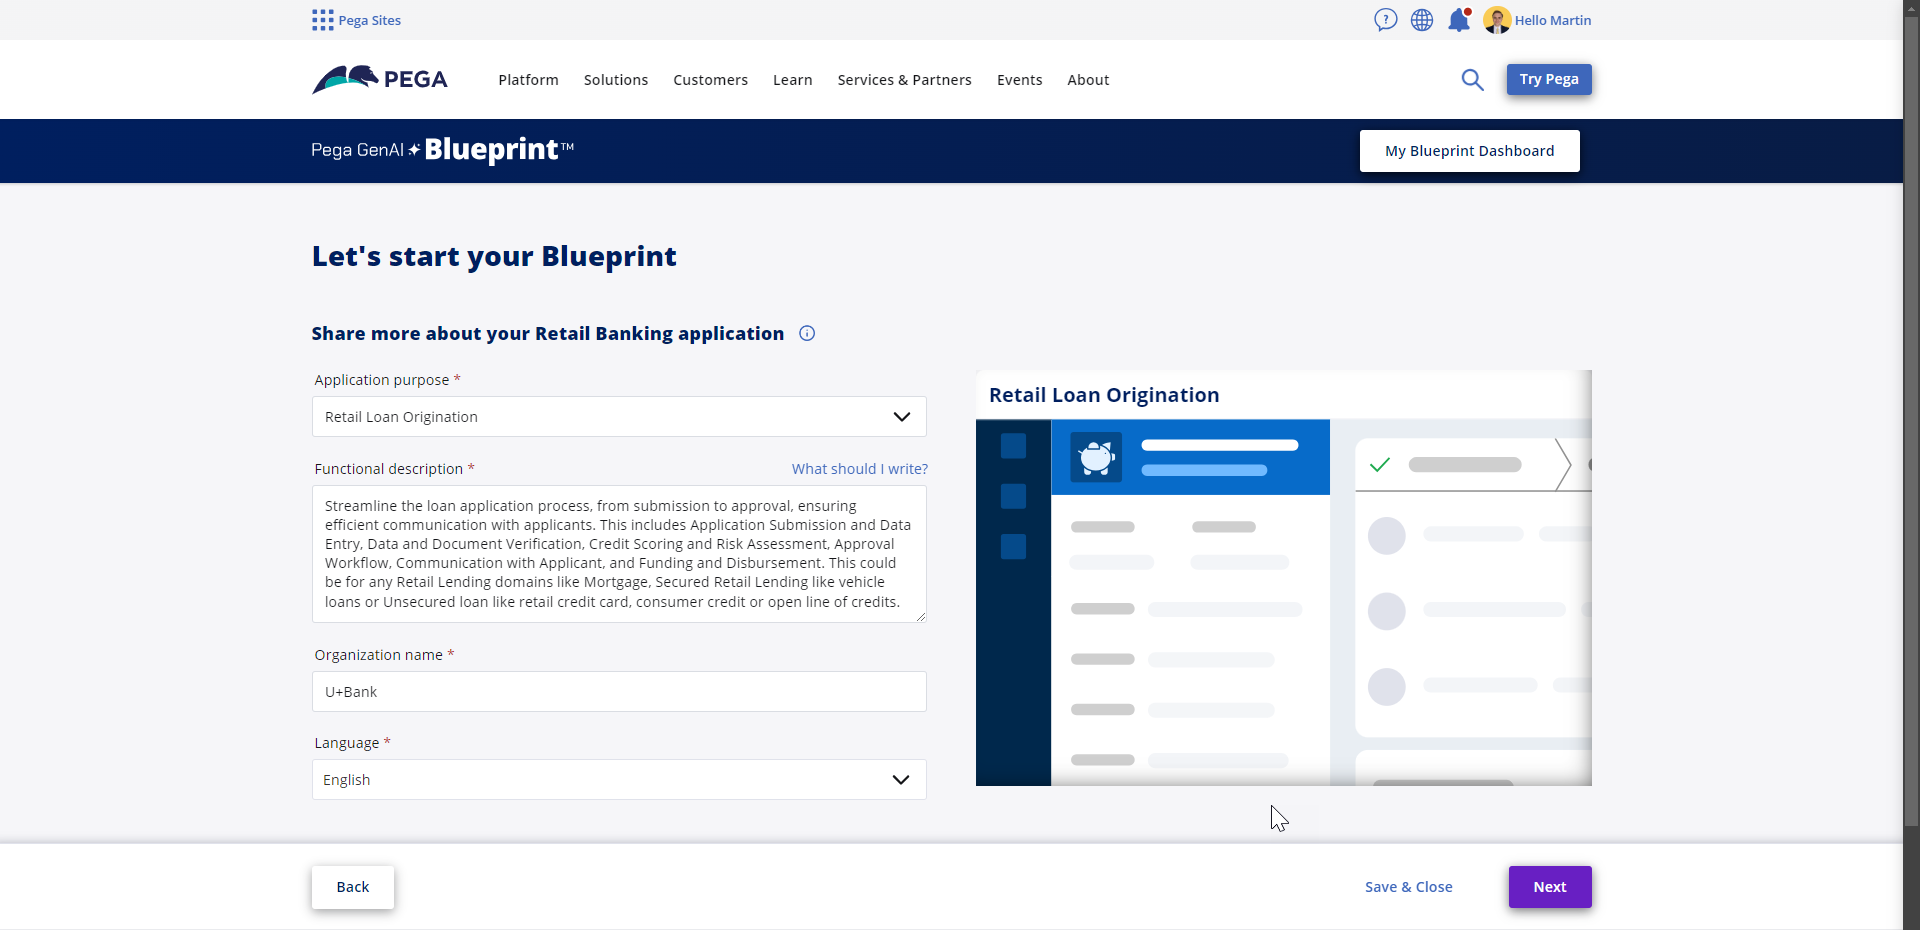
On the next screen, choose or write a short description of your application’s purpose. If you choose one from the list, the Functional description field will be automatically populated for you. You can leave the text as it is, or edit it further. Add your organization’s name, and the language you want to use for the application.
Pega GenAI Blueprint will automatically create some example Case Types for you based on your selections, but you can also create new ones by clicking Add a Case Type.
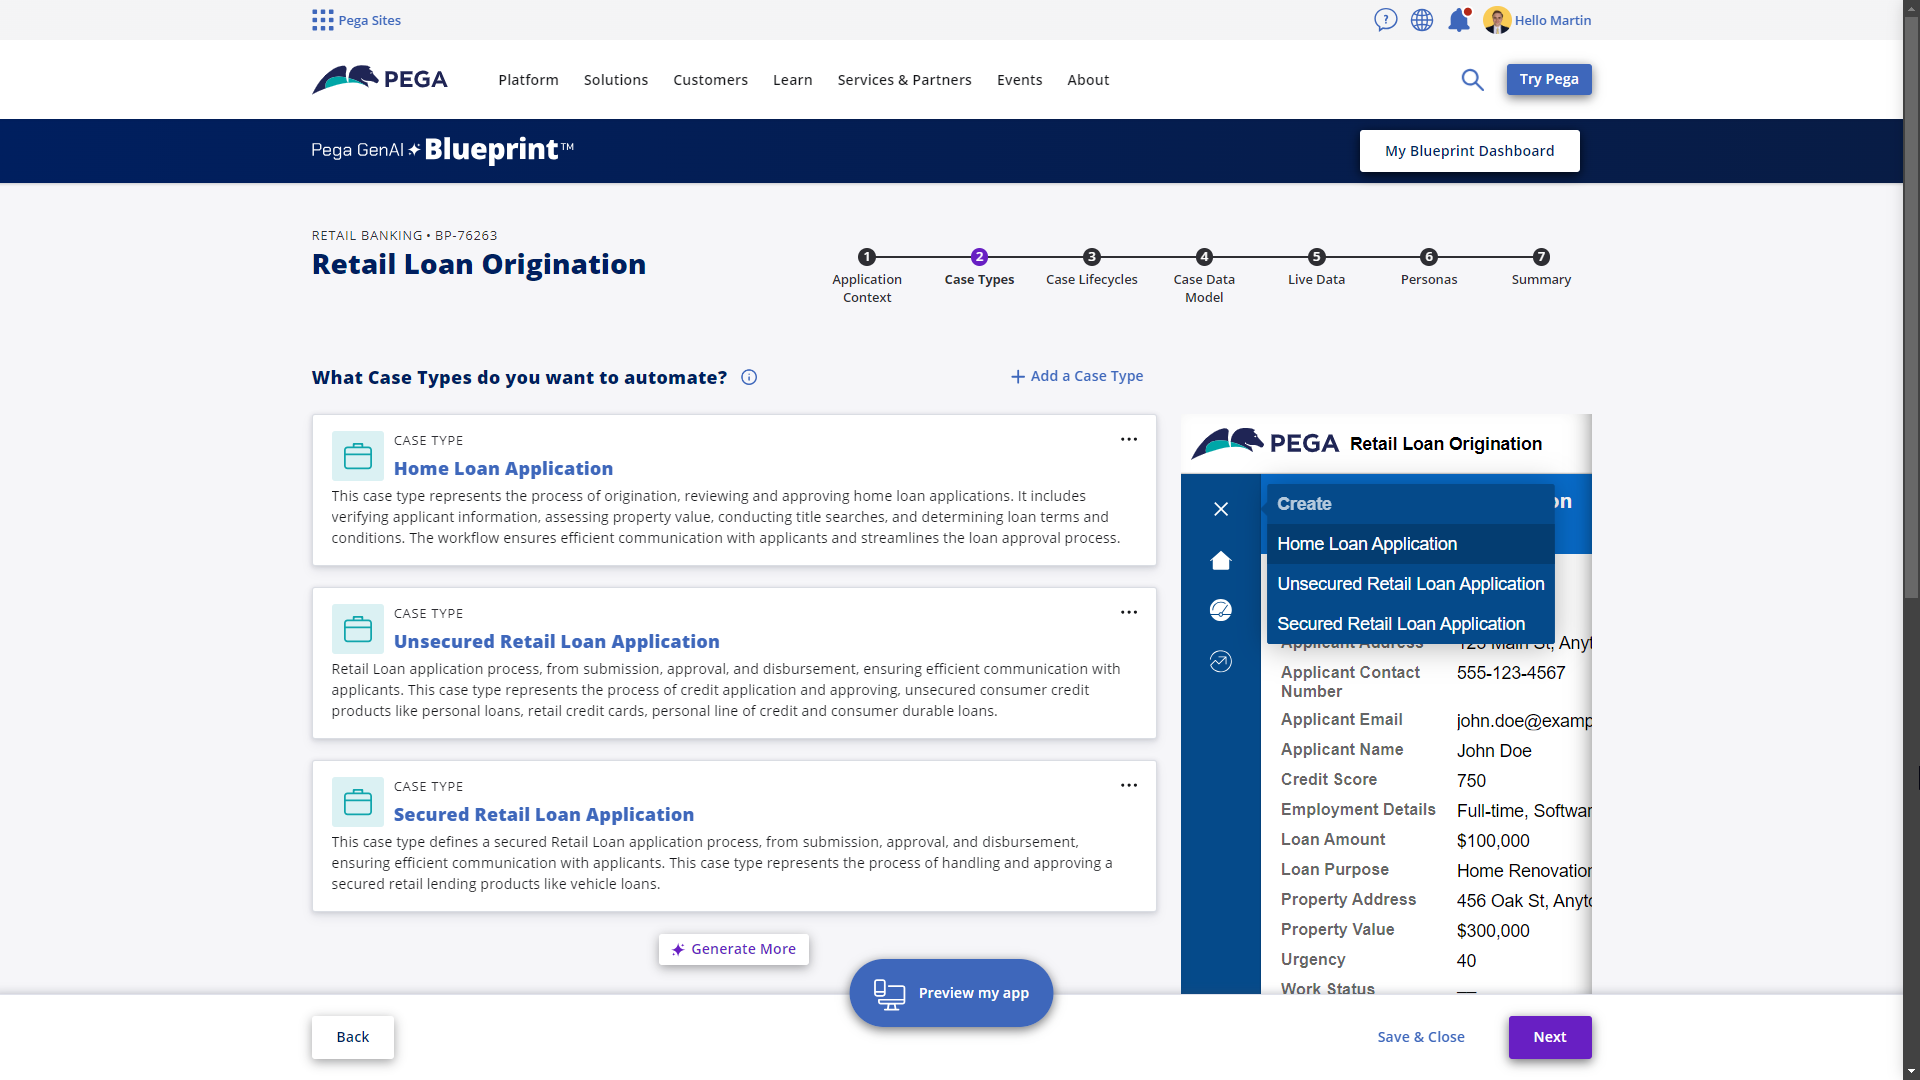
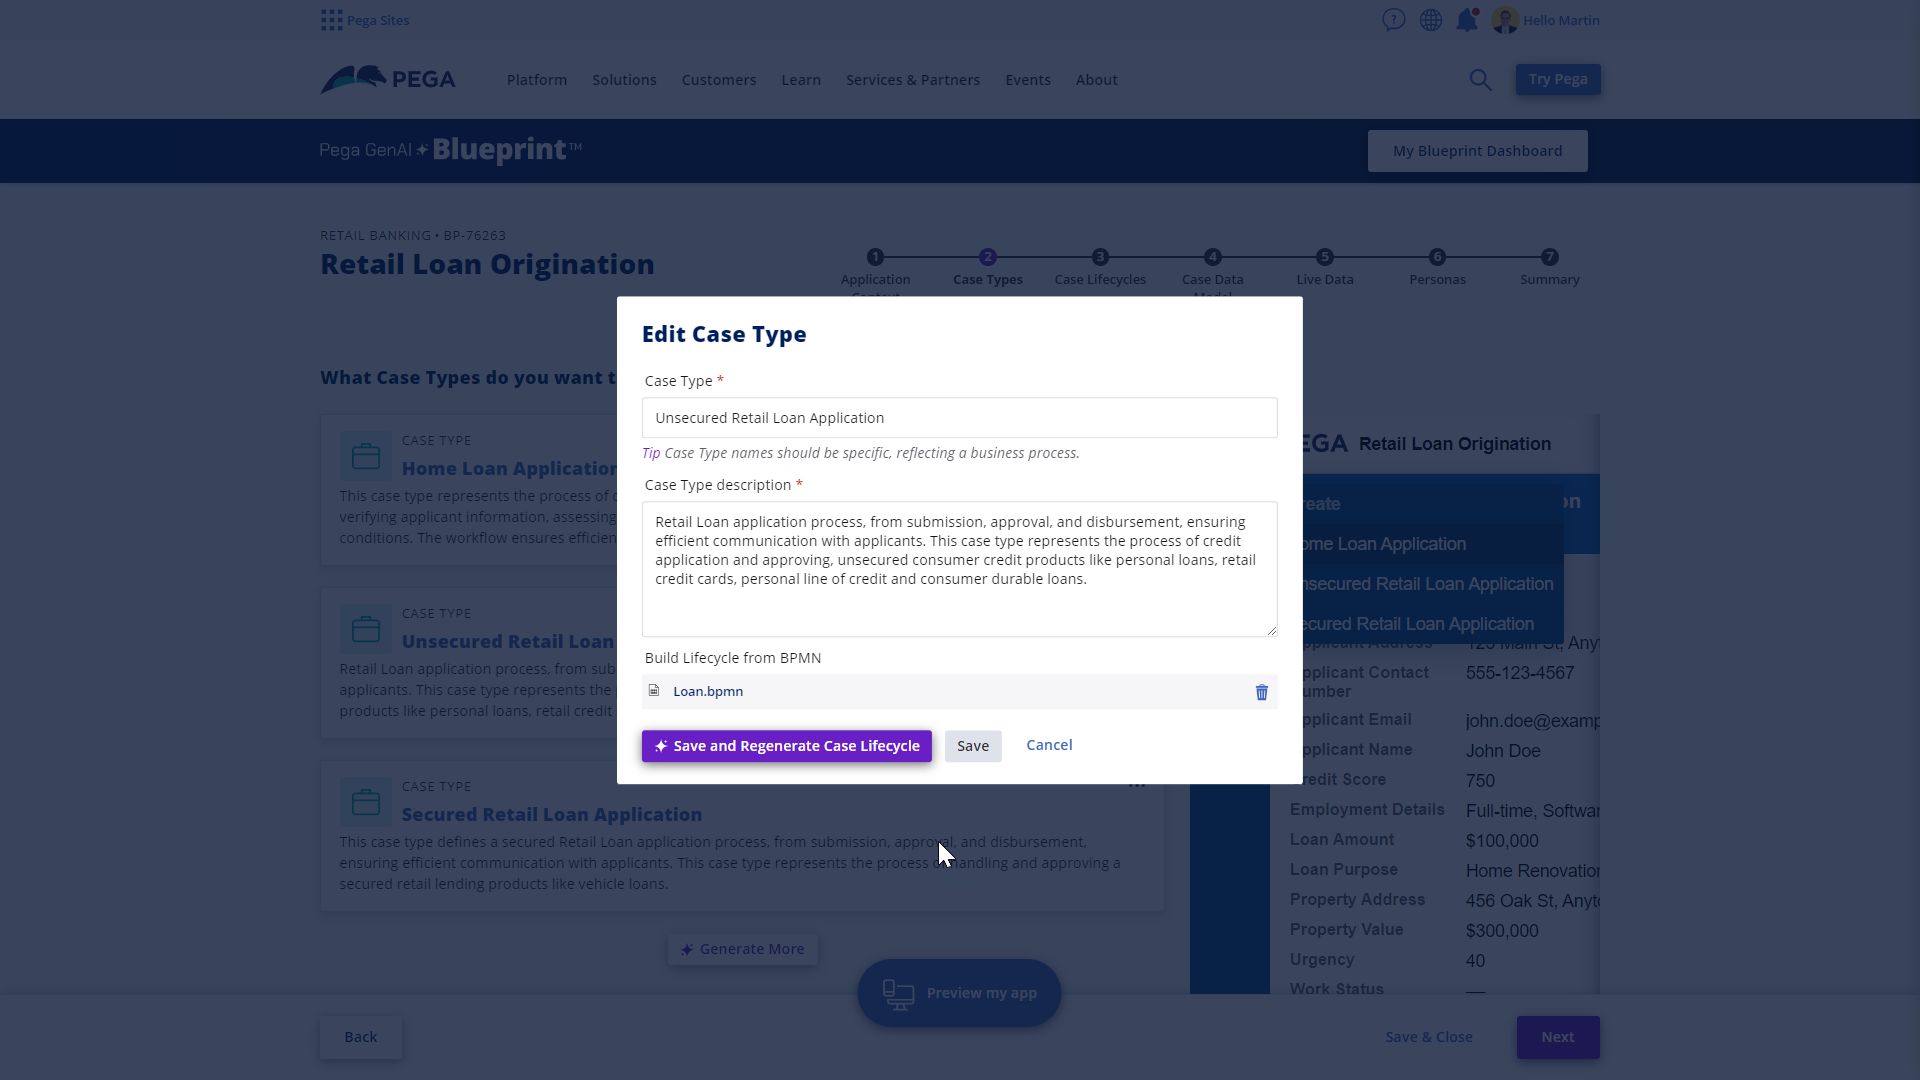
If you see a Case Type in the list that matches your needs, click it to open up the Edit pane. Here, you can add your downloaded BPMN file from Process mining to the Build Lifecycle from BPMN section. You can also edit the description and case type name if needed. Finally, click Save and Regenerate Case Lifecycle, and when that is done, click Next.
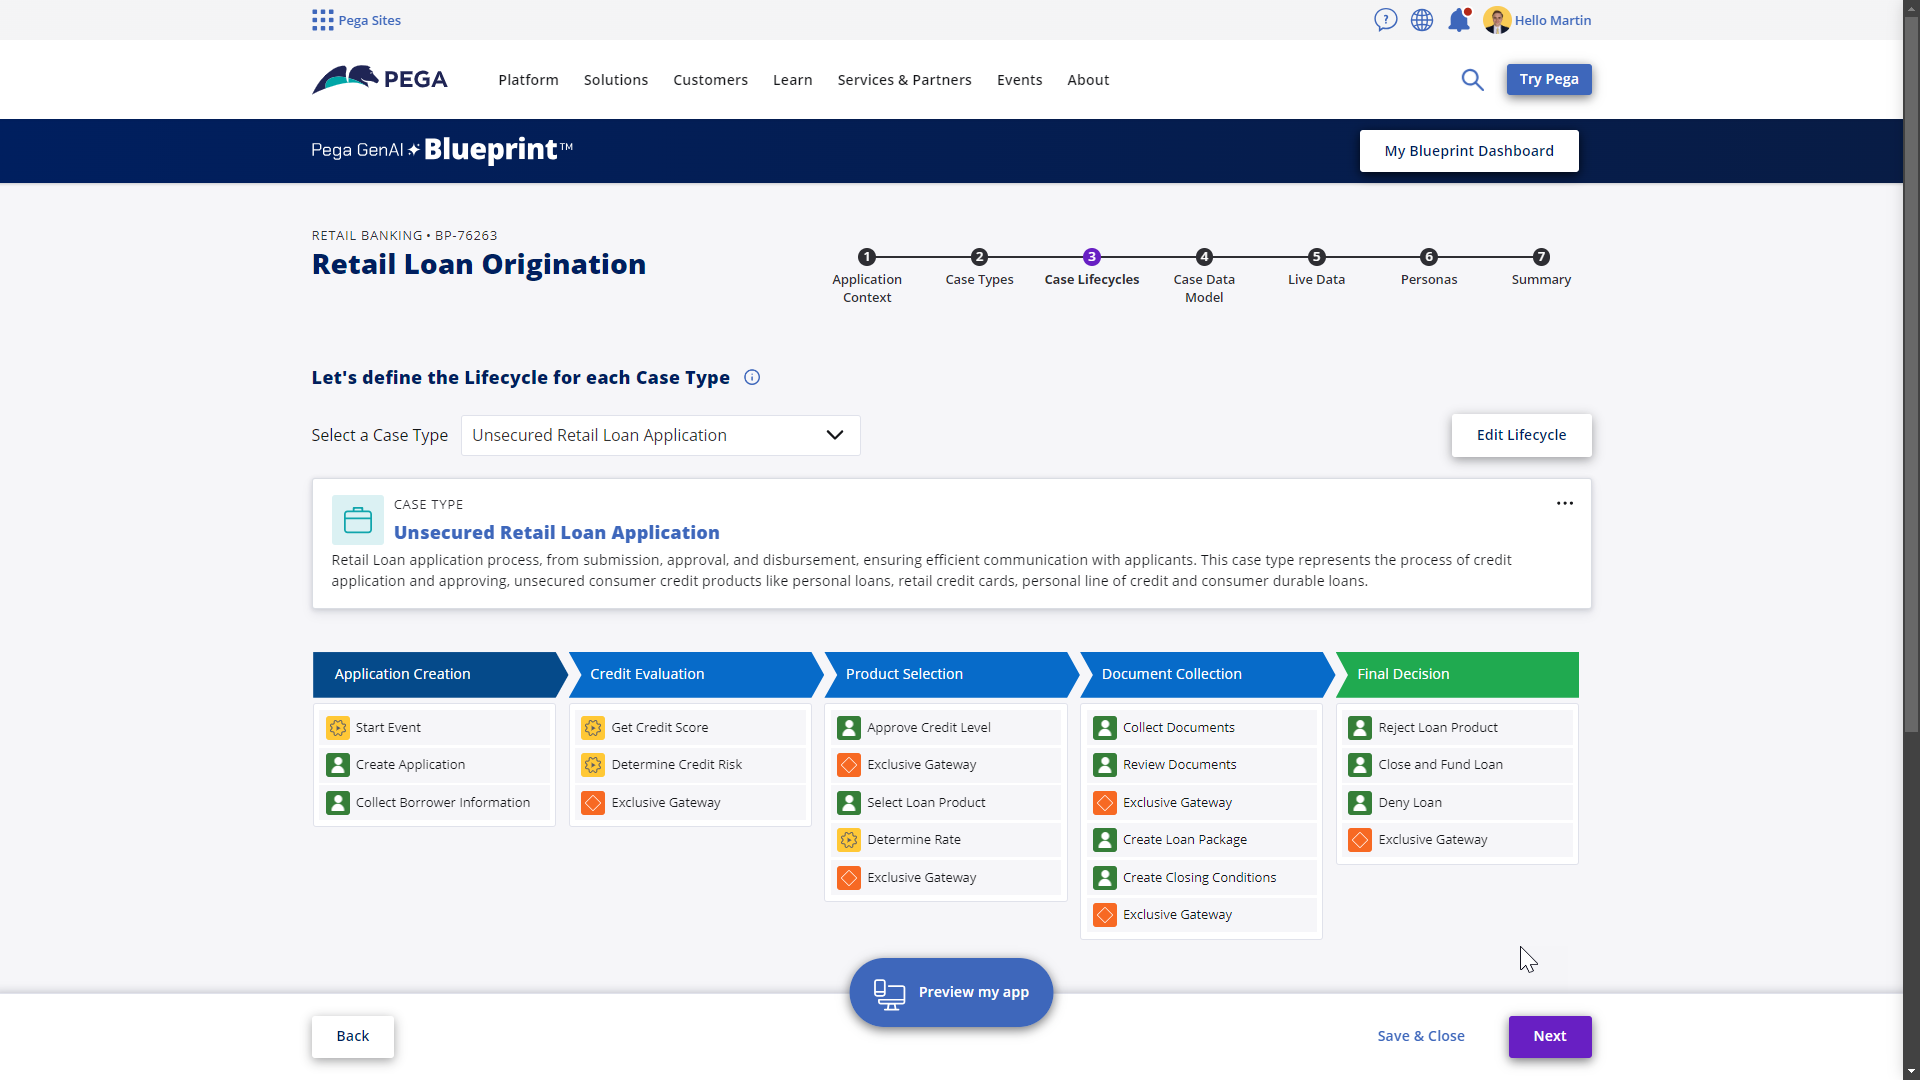
In the Select a Case Type drop-down list, select the case type to which you added your BPMN file and you will see that Blueprint has used the activities from your process to create the stages and steps for your Case Type Lifecycle!
From here you can continue through the Blueprint process to customize the Data Model, determine what Live Data is used, and the Personas involved, to make it truly reflect your planned Pega application.
Once you are finished you can download your Blueprint as a PDF or a Blueprint file that can be imported into Pega Platform™ to generate an application based on your design in seconds!
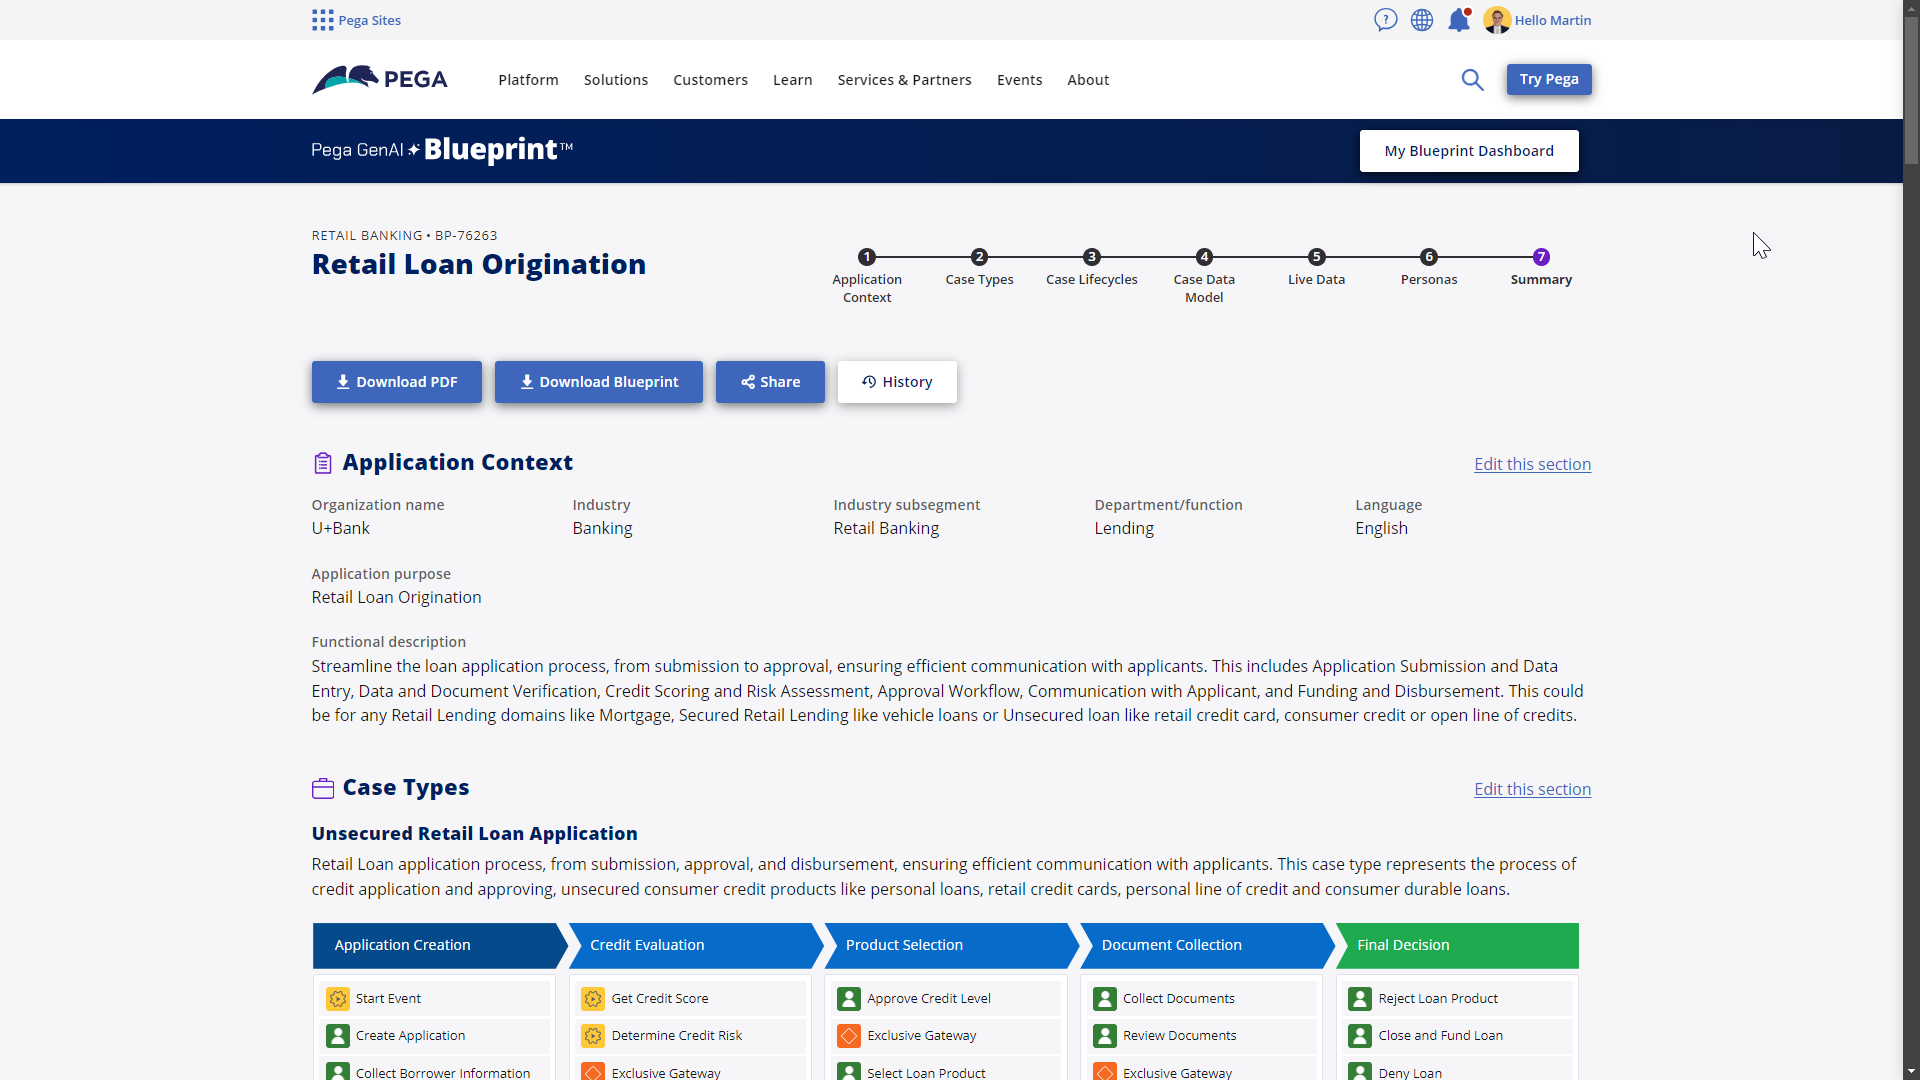
Congratulations, you’ve created a Pega GenAI Blueprint using your real process data, mined with Pega Process Mining! For more guidance on how to get the most out of Pega Process Mining and become the ultimate process miner, see our other “How do I...?” blogs here.
Related Resources
Don't Forget
- JOIN THE CONVERSATION on Support Center
- FOLLOW @PegaDeveloper on Twitter

